How to grout tiles
'/%3E%3C/svg%3E)
Guide written on 6 February 2024 by:
Tess, painting & decorating consultant, Brighton
Important features
- Preparing your tools and grout
- Grouting your tiles
- Cleaning up and removing grout film
Best sellers in this category
Grouting tiles: how to achieve a good finish
Grouting is the last stage in tiling a floor or wall. It goes without saying that the edges of your tiles should not touch. Even if you go for thinner grout lines, is absolutely essential to leave uniform gaps between your tiles where the grout will be applied. For traditional, non-rectified tiles, the grout line should measure 4 to 5 mm; for rectified tiles, it should measure around 2 mm. Grouting should be done at least 24 hours after you have installed your tiles after the glue has cured.
Steps
Preparing your tools and grout
Grouting your tiles
Cleaning up and removing grout film
Grout
1. Preparing your tools and grout
Preparing the grout
Just like tile adhesive, grout consists of a mixture of powder and water. Pour the required quantity of powder into a mixing tray followed by water. Be sure to follow the ratio provided by the manufacturer.
Ideally, you should use a mixing paddle or a drill equipped with a mixing attachment to mix. This will help you to achieve an even, lump-free mixture. That said, you can also mix the grout by hand. If you are mixing by hand, be sure to add the water gradually.
Measure out the right quantity of water in advance. Make sure your grout is the right consistency: it should be neither too thick nor too thin.
Calculating how much grout you need
The amount of grout you need will depend on the size of the tiles as well as the thickness and width of the grout line you're after.
You can find calculators online designed to measure out exactly how much grout you'll need. It's a good idea to use these calculators as they'll help you to avoid wasting material and making mistakes.
Tile adhesive
Best sellers in this category
2. Grouting your tiles
You can now proceed to grouting.
Start at the end of the room and work towards the door so you don't find yourself stuck inside the room.
Work in small areas of around 5 m² and make your way across the surface gradually.
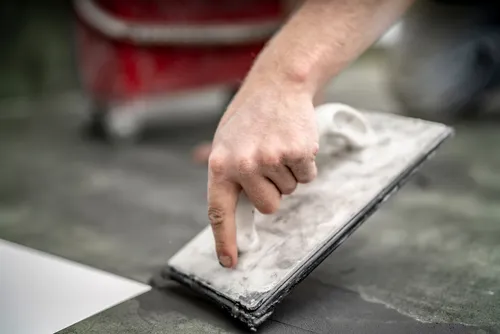
Apply the grout directly to the tiles using a grout float.
Use the grout float to press the grout into the spaces between the tiles. You should apply the grout in diagonal strokes.
Watch some videos in advance to get a good idea of how to hold the grout float; never attempt to use the full surface of the float.
Continue the process until you have filled in all the spaces, as well as any holes. Use the technique described above to avoid any air bubbles.
3. Cleaning up and removing grout film
As you might already know, grouting is a messy process, especially if you are working with thick tiles. The tiles will end up completely covered in grout so you will have to clean them off.
You must start cleaning immediately; do not wait until the grout starts to dry! It's important to start cleaning within a few minutes of applying the grout. For the best results, cut ridges in your sponge with a blade knife so it picks up and absorbs as much grout as possible.
A grouting kit will be a big help in cleaning off the grout. The rollers provided allow you to wring out and clean off a sponge float.
Dip the sponge float in water and wring it out using the rollers.
Wipe your surface using the sponge float, applying pressure to just one side in order to remove the excess grout.
Work slowly in order to remove as much material as possible in one motion. You will have to clean and wring excess water from the sponge regularly. If you work too quickly, you might end up spreading the grout rather than removing it.
After cleaning off your surface with clean water, apply a grout film remover to remove the grout haze. The grout haze refers to the white film left on your tiles by the cement in the grout. This haze won't show up when your tiles are dry.
Please note: as you clean, you might find that pinholes start to appear. Use your finger to fill these holes in with grout as you work.
How to grout tiles
Required skills
Grouting isn't a very tricky job, but you do need to some preparation work and be able to use tiling tools. Your job will be easier if you manage to master a few techniques. Just about any good DIYer will be able to grout tiles.
Time and number of people required
2 hours for 12 m²
1 person
Tools and equipment
Bucket, grout float and sponge float or a grouting kit
Grout powder in your desired colour
Mixing paddle or a mixing attachment to connect to a sander
Grout film remover
Personal protective equipment (PPE)
Knee pads
Please note: this is a non-exhaustive list; be sure to match your personal protective equipment to the job at hand.
Tiling tools
Guide written by:
Tess, painting & decorating consultant, Brighton
'/%3E%3C/svg%3E)