How to make a terrarium
'/%3E%3C/svg%3E)
Guide written on 6 February 2024 by:
ManoMano
Materials
Glass container
Activated charcoal
Potting soil
Pebbles or gravel
Terrarium plants
Moss (sheet, sphagnum, or pincushion)
Equipment
Trowel
Gloves
Watering can
Step 1. Find Your Terrarium Container
Before starting to find a container, decide whether you want to make a closed or open terrarium. Once you have decided, finding an appropriate container for your terrarium can be as simple as raiding your glass recycling for a large jar. But if you are looking for a larger container, kitchen storage containers are a good solution. Alternative spending some time in second hand and vintage shops can produce unusual glass containers of all shapes and sizes. Glass coffee pots can make attractive terrariums and removing the handle is as simple as unscrewing the screws. Make sure that you use a glass container as plastic can become cloudy over time and leach toxins into the soil of your terrarium. Once you've got your container, or containers, give it a thorough clean to avoid anything contaminating the environment inside.
Step 2. Add Drainage Layers
For the first layer in your container add a layer of your pebbles or gravel. Depending on the size of your container this layer should be around 1/2 inch to 2 inches deep. It's important to include this layer to prevent water flooding your plants when it settles in the bottom.
Step 3. Add Charcoal And Soil
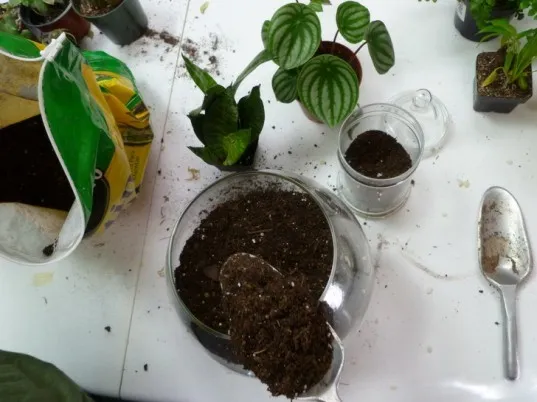
Next up, add a layer of activated charcoal. This layer doesn't need to be very deep, just enough to cover your initial rock layer. It's important to include the activated charcoal as it help to reduce bacteria, fungi and odours inside your terrarium. If you have any charcoal leftover you can mix that into the soil before you add it, but this step is not entirely necessary. Now add your soil layer, this layer will be the deepest to allow your plants' roots to grow. This layer will probably take up approximately 1/3 to 1/4 of your container. Don't forget, if your planting succulents and cacti you will require specialised soil.
Step 4. Arrange Your Plants
Now your ready to arrange the plants in your terrarium! Take your plants out of their containers and brush off the loose soil from their roots. At this point, take a moment to consider how you want to arrange your plants, before you dig them in. It is also advisable to leave some space between your plants, both aesthetically and to allow them room to grow. When you're happy with your display, dig each plant a little well into the soil and place them into it. Add more soil around the base of your plants and compact it down, making sure that the roots are fully covered. Once your plants are safely installed, arrange your moss on top of the soil around your plants. Finally, give your terrarium a generous drink of water.
Step 5. Decorate!
If you are keeping your terrarium simple, you can skip this step. If not, this is the moment to add whatever creative flourishes you can imagine! Anything from geodes to plastic cake toppers can give your terrarium that special touch. Once you are finished, place your terrarium in a well-lit area away from direct sunlight. Because of the glass walls, placing it in direct sunlight could scorch the leaves.
Depending on what type of terrarium you have made, it will require more or less frequent watering. Closed terrariums almost never need additional water, while open terrariums need watering 1-2 times a week.
You may be also interested in these guides
Guide written by:
ManoMano
ManoMano is the largest marketplace for products and services in the DIY, gardening and home improvement sector in Europe. Together, we are free to invent a sustainable future and committed to build it today. We are hands-on to improve our homes for tomorrow. Bold, from idea to action. Ingenious always & together. Responsible for people & our planet.
'/%3E%3C/svg%3E)