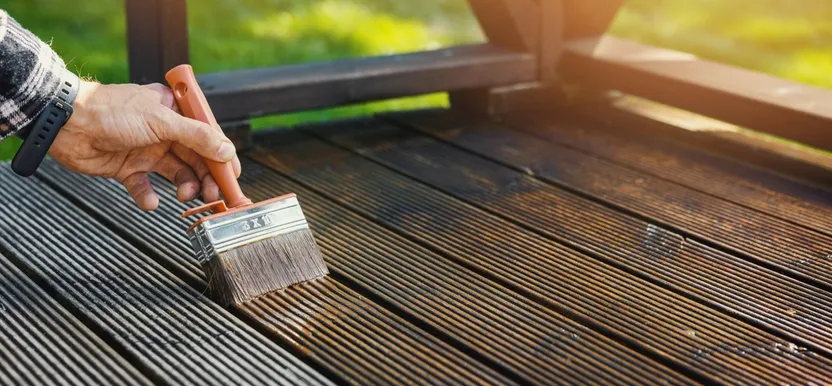
How to paint, stain or oil decking
'/%3E%3C/svg%3E)
Guide written on 6 February 2024 by:
Ela, Copywriter
Important features
- Assessing the damage
- Prepping the area
- Choosing the finish
Check the forecast
It’s a good idea to check the weather forecast before you start planning your project. Look for a dry spell lasting a few days to give your decking time to dry fully before it rains again. You also want to make sure the weather isn’t too hot, as this could cause your chosen product to dry too quickly, making it harder to work with and possibly drying out before it’s had time to soak into the wood.
1. Assess the damage
Before you begin, check the current condition of your decking. If your decking is brand new, we recommend waiting at least six months before adding any stain or oil. This ensures that any existing coating has worn away and allows the new treatment to soak in properly. Otherwise, the decking may be untreated or have been previously coated with another product, in which case you are ready to begin.
2. Prep the area
Next, you’ll need to clean your decking thoroughly. You can purchase decking cleaner which is specifically designed to remove any mould, moss or algae.
Clear the decks before sweeping your boards with a broom.
Check for any loose boards or screws that need tightening with a screwdriver.
Subsequently, you have two options:
Sanding
Use a sander to remove any existing layers of paint. This will only work on smooth decking boards. Always try to sand in the direction of the grain.
Decking cleaner/stripper
Apply deck cleaner to your decking. Scrub thoroughly and rinse well with a garden hose or pressure washer on the lowest setting, before leaving to dry overnight.
If traces of existing paint or stain are still visible, you might want to apply decking stripper to your boards. Rinse well and leave to dry overnight.
Now you’re ready to add your chosen treatment.
Shop our sanders
3. Choose the finish
Decking protector
If you’re happy with your decking’s current appearance and just want to add a protective coating, you might want to try using a decking protector. Decking protector protects your decking boards from the elements and foot traffic without changing the appearance of the wood.
Decking oil
Decking oil soaks into the wood, replacing natural oils and resins that fade over time. This process helps protect the wood from rain, damp and moisture whilst enhancing and conserving its natural beauty.
Decking paint
Decking paints are available in a huge range of colours. Many decking paints offer specialist protection for the wood, filling in cracks and smoothing over splinters.
Decking stain
Decking stains are generally more opaque than paints, adding a deeper, more intense layer of colour. Most deck stains also have waterproofing and protecting properties, giving you an all-in-one treatment option.
Shop our wood oil
4. Apply the finish
There are a number of different tools you can use for applying your decking treatment:
Paint brush
Paint brushes are great for areas that are small or hard-to-reach, but is probably the most time consuming method for treating your decking.
Stir the product well for an even application;
Start in the furthest corner and work your way back towards your exit point;
Coat the boards generously, painting lengthways;
Paint a few boards at a time, working from one end to the other;
If using a stain, don’t apply more than the wood can absorb;
You can go back and add extra product to any areas that need filling in later;
Allow to dry and recoat as required.
Roller
A paint roller will allow you to get the job done quickly. Consider using an extension pole for ease of use.
Stir well, before pouring the product into a tray or bucket;
Start in the furthest corner and work your way back towards your exit point;
Rollers can be messier than using a paint brush, so use dust sheets to protect any exposed surfaces or furnishings from drips;
Be careful not to overload the paint roller;
Rotate the roller as you apply;
Paint a few boards at a time, working from one end to the other;
Allow to dry and recoat as required.
Paint pad
Like a roller, products can also be applied using an extension pole and is suitable for both grooved and smooth decking boards.
Start in the furthest corner and work your way back towards your exit point;
Work in long strokes along the deck boards;
Be careful not to overfill the paint pad;
Paint a few boards at a time, working from one end to the other;
Quickly smooth over any areas where paint is pooling in puddles;
Allow to dry and recoat as required.
Paint sprayer
The most convenient choice, offering fast application and using the least amount of product.
Stir well for an even finish;
Start in the furthest corner and work your way back towards your exit point;
Paint sprayers can cause drips and spray, so use dust sheets to protect any exposed surfaces or furnishings;
Minimise refills by making sure the inner tube is inserted right down into the container;
Maintain a distance of 20-25cm when spraying for a consistent finish;
Allow to dry and recoat as required.
Paint sprayers
How to paint, stain or oil decking
Required skills
Applying paint, stain or oil to your decking doesn't require any specific DIY knowledge. You will just need to know how to use a sander, organise the area and apply the product.
Time required
Up to one day, depending on the size of the area
Number of people required
1 person
Tools and equipment
Decking cleaner and/or stripper
Broom and/or scrubbing brush
Pressure washer or garden hose and any attachments
Personal protective equipment (PPE)
Knee pads
Dust mask
Please note: this is a non-exhaustive list; Be sure to match your personal protective equipment to the job at hand.
Brooms
You may be also interested in these guides
Guide written by:
Ela, Copywriter
Passionate about renovation and all things retro.
'/%3E%3C/svg%3E)