How to prevent and fix paint drips
'/%3E%3C/svg%3E)
Guide written on 6 February 2024 by:
Anne, Painter, Cambridge
Important features
- Why paint drips
- Preventing paint drips
- How to fix paint drips
Why paint drips and how to avoid it
Paint can drip during application for one or several of the following reasons:
You have used a poor quality paint.
You haven't used the right types of tools for the paint.
The surface is not compatible with the paint.
Too much paint has been applied in one spot and the excess is dripping.
The paint is too watery
Paint that is simply too watery in texture will be very difficult to apply as it tends to slide over the surface and will have trouble clinging to the roller or paint brush. This is often the case with cheaper acrylic paints or paint that has been sitting around for too long.
How to thicken paint
It is possible to thicken white paint by adding calcium carbonate powder. However, this only works with white paint as it will act as a pigment with other colours. Alternatively, marble dust can be added as a neutral thickener to coloured paints.
Do not mix powders directly in the paint pot in order to prevent lumps. Instead, remove a bit of paint from the container, mix and add it back to the rest of the paint. Please note that if your paint is simply too old, it's best to get rid of it all together!
Choosing the right tools for the paint
The more of a liquid consistency the paint has, the more your choice of tools matters. If you attempt to use a roller with a long nap to apply this type of paint, you are sure to run into problems. The paint will get loaded on to the roller and will run off the roller faster than you can apply it to the wall which will lead to unsightly paint dripping.
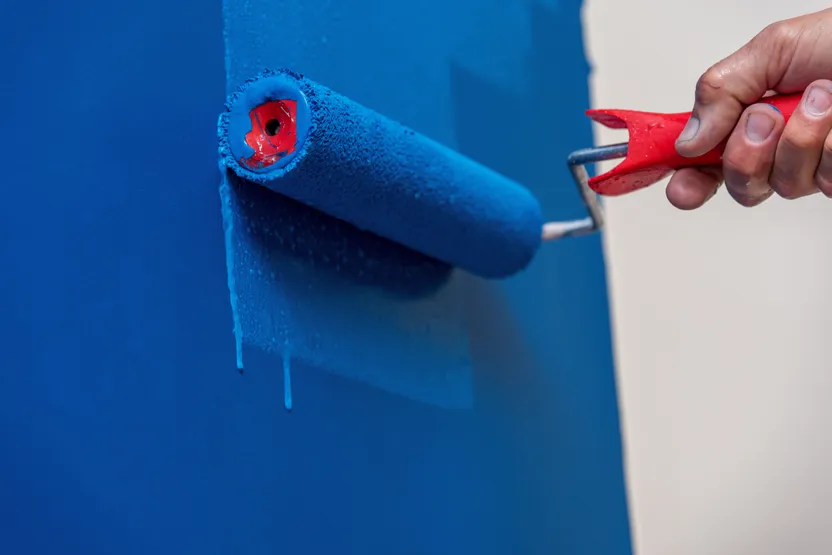
Similarly, if you use the right type of roller but you dip it right into the paint, the paint will enter the holes in each end of the roller and will cause the paint to drip on each side. What's more, you'll probably end up with a healthy splattering of paint on you too!
How to prevent paint from dripping
Use the right tools
For paints with very watery consistencies, use a roller with a short nap. Do not dip the roller entirely in the paint pot and take care to get paint only on the outer part of the roller and not in the plastic centre.
Don't use incompatible paints
The most common issue results from painting over a surface covered with an oil based paint – with a glossy finish – with an acrylic paint which is water-based. These paints are not compatible with each other. Water and oil simply don't mix – the two liquids will instantly separate on the wall, the paint will slide and drip. Worse still, the paint may adhere partially and then flake off later on.
How to fix paint drips
If you are lucky enough to notice the damage in time, you should wipe off the excess wet paint as quickly as possible. Prepare your surface properly and thicken the paint if necessary. If the paint drips have dried, you'll have to put in a bit more work.
You will have to remove the paint using either a paint stripper or by sanding the surface using a sanding block or a sander. You should then move on to preparing the surface by cleaning and degreasing, then applying a suitable undercoat. Choose a less runny paint or thicken it if necessary.
You may be also interested in these guides
Guide written by:
Anne, Painter, Cambridge
After 8 years of trade, I turned professional: I trained myself to be a painter and carpet fitter, either on my own or with 16 year old comrades. 9 months later, following vocational training, I created my company. I’m a self-taught DIYer and decoration enthusiast, I love to find and restore furniture and to create unique decoration pieces. I completed the renovation of my sister’s house with my niece: electrics, tiling, plasterboard...we did it all. And today, if I can share my experience I'm happy to do it. Good Luck.