How to restore old tile grout
'/%3E%3C/svg%3E)
Guide written on 6 February 2024 by:
Kate, Flooring Expert, Swansea
Important features
- Clean and remove grout
- Grout your tiles
- Clean up your workspace
Best sellers in this category
Restoring tile grout: a cost-effective solution
Tile grout can crack, become pitted or get mouldy as time goes on. On the other hand, tiles will barely show any signs of age even after years of use. Luckily, there's no need to change your whole wall or floor covering to sort out the issue. Simply restoring the grout should help to improve the look of your tiles and make them watertight again.
There are several ways to go about this but the process isn't all that different from grouting in the first place. And once you're done, your room will look brand new again! Grout can be restored between both floor tiles and wall tiles. That said, wall tiles will generally see more grout damage than floor tiles.
Steps
Clean and remove grout
Grout your tiles
Clean up your workspace
Dusters, microfibre dusters and wipes
1. Clean and remove grout
Cleaning the grout
Start by cleaning the old grout and getting rid of as much mould as possible.
Use a cloth soaked in diluted bleach to clean the grout and remove any traces of mould.
Wait until the grout has dried completely before you start restoring it.
Removing the old grout
Old grout doesn't just get dirty. It can also become brittle and start to feature holes or crevices. In this case, it's best to renew it completely.
To do so, proceed as follows:
Remove the grout to reveal the gaps that were originally between the tiles when you first laid them.
Use a manual grout rake or an electric grout remover tool to remove as much of the old grout as possible.
Clean out the gaps between the tiles, vacuum any dust and clean everything with bleach. Allow the surface to dry completely before you set about applying more grout.
It's worth noting that an electric grout remover is a great investment if you have a large surface to cover. Alternatively, you can use a circular saw provided that you can control it properly or else you risk damaging your tiles.
Cleaners
Best sellers in this category
2. Grouting your tiles
Repairing grout with a pre-mixed product
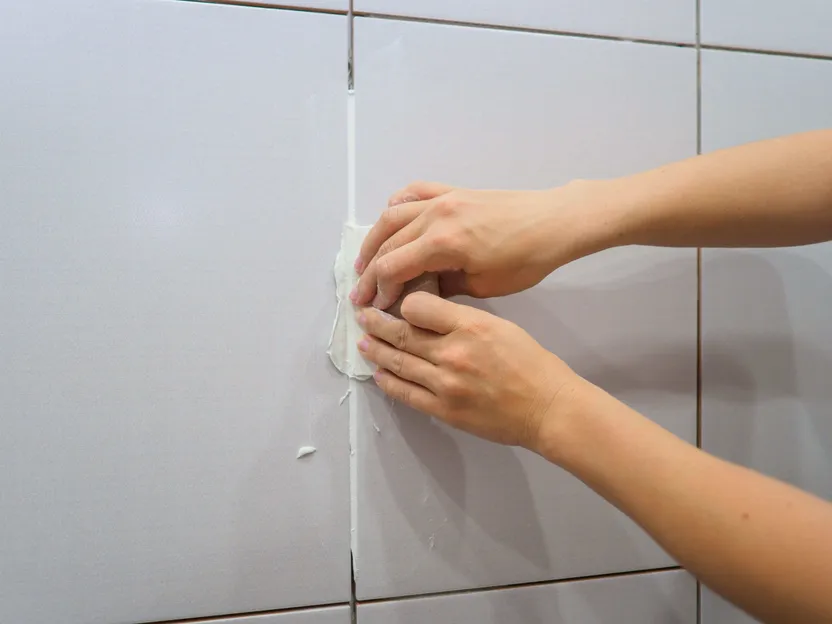
It is possible to repair your grout using a pre-mixed product. This type of grout repair product usually comes in tubes. In this case, you simply have to:
Position the tube wherever you need to repair the grout.
Apply the grout as a uniform bead by applying even pressure to the tube.
Remove any excess grout using a grout float or squeegee.
Clean the area thoroughly with a sponge.
Replacing old grout
If you have removed all your old grout, you'll need to regrout the entire surface just like you would if you were laying new tiles. You can either use a pre-mixed product or you can mix your own grout from powder in the colour of your choice. If mixing your own grout, simply combine the powder with water in a container designed for this purpose and be sure to respect the ratios provided by the manufacturer. You can then move on to applying the grout.
Use a trowel or spatula to apply the grout directly to the tiles.
Use a grout float to spread the grout in diagonal motions until the gaps between the tiles are filled.
A few minutes after applying the grout, go over the area very slowly with a clean float to remove excess grout.
Clean off any remaining grout using a sponge. The sponge should be dipped in water and wrung out thoroughly. It is recommended to use a grouting kit for this step. These kits are really handy and designed specially for this purpose.
Be careful – you must never leave grout to dry on the tiles as it will be impossible to remove later on.
3. Clean up your workspace
Just like any other job, cleaning up is a step you cannot skip.
Clean the grout from your tiles carefully using a special grout cleaner. This will prevent grout haze which will leave a white film over your tiles and render all your efforts pointless!
Pass a dry microfibre cloth over the tiles to check for any remaining grout. If necessary, go back in with the damp sponge. To finish off, rinse your tiling tools with water and leave them to dry before storing.
Tile cleaners
How to restore grout
Required skills
You don't need any particular skills to revive old grout. That said, restoring grout is a delicate process that does require a certain degree of precision.
Time required
Approx. half a day to restore a wall measuring 10 m², plus 24 hours for curing.
Number of people required
1 person
Tools and equipment
Manual or electric grout rake or paint scraper
Grouting kit (bucket, grout float)
Grout powder in the colour of your choice or a pre-mixed grout
Mixing bucket
Cloth and sponge
Groat float
Bleach
Safety and workwear
Please note: this is a non-exhaustive list; Be sure to match your personal protective equipment to the job at hand.
Dusters, microfibre dusters and wipes
Guide written by:
Kate, Flooring Expert, Swansea
Flooring is my life. I love what I do, and I've been doing it for as long as I can remember. So, I'm not bragging when I tell you I know all there is to know about every flooring product. From laminate, parquet and linoleum to PVC, carpeting and tiling, my workdays are spent learning about manufacturing processes, composition, performance, laying techniques and maintenance methods. I've certainly seen my share of mistakes made on construction sites because of what was essentially a lack of information or understanding of the product. Flooring elements are constantly evolving and being improved upon - even us pros can find it hard to keep up! Some of us in the industry use language that is overly technical or loaded with jargon you'd have to be an expert to understand. What's more, flooring salespeople are often so focused on closing the sale that they don't take the time to explain the products in any detail. That's why I want to pass on my knowledge in a way that's clear and accessible, and maybe a bit fun too. Because flooring shouldn't be a chore!
'/%3E%3C/svg%3E)