DIY pegboard
'/%3E%3C/svg%3E)
Guide written on 18 September 2026 by:
Mariluz, Blog writer for Bricoydeco
What you'll need
To do this DIY project you will need the following tools:
Mitre box and saw
Drill
Drill bit
Multi function Tool
Sander
Screwdriver
Brush
Clamps
In addition, these materials will be needed :
Wood panel 1900x600x18 mm
Wood panel and slats of 69x900x18 mm and 27x27x1200 mm, respectively
Wooden dowel 19 mm in diameter and 2m long
Varnish
Screws
The measurements will depend on the size you want your pegboard to be, so they can be changed depending on taste.
Cost, time and difficulty
The approximate cost of the materials is approx £60.
This project is quite simple, and therefore ideal for beginners. Depending on the size of your pegboard, it shouldn't take much more than a day. This will change depending on how you decide to finish your wood. We painted on a varnish, and the time for drying and applying a second layer is very short (between 30/60 minutes). Another type of finish may, however, require more time and extend your project a little.
Step 1: Measure and mark holes
First, you must measure and mark the holes you are going to make on the wooden board. To do this, it's best to use a guide so that each hole is the same distance apart. A ruler or wooden board would work as a guide.
The distance between the holes will depend on the size of the board and the diameter of the hole. In this case, the holes have 19 mm diameter and the board 60 cm wide, so a point has been marked every 8.5 cm. We recommend the minimum distance between each hole is 3 times the size of the hole . For example:
Hole diameter = 2 mm
Distance between holes = 6 mm
Distance between points = 6 mm + 2 mm = 8 mm
Step 2: Drill your board
The next step is to drill the pegboard . To do this, use a drill bit for wood. Bare in mind that you usually lose material when drilling, so always choose a drill bit slightly smaller than your dowel. In this case the bit is 18 mm and the rod is 19 mm in diameter.
If you are able to fix the board with clamps, we recommend you do so. This will control some of the vibration from the drill and make the hole neater.
Step 3: Sand the board
Once the entire board has been drilled, the front and back should be sanded with the sander. It is likely that the board has been chipped a little on the back, so it is necessary to smooth it, even if it is not visible.
You can use a multi functional tool to completely smooth the internal part of the holes.
Step 4: Protect the wood
Next, paint on a varnish to protect the wood. This is a nice aesthetic touch, and it willl also provide the pegboard with protection.
Step 5: Cut the rod and slats
While the varnish dries, take advantage of sawing and cutting the rods and slats that will make shelves. The rods should be long enough to support your accessories once inserted into the hole. In this case, the rod has been cut to 8 cm long.
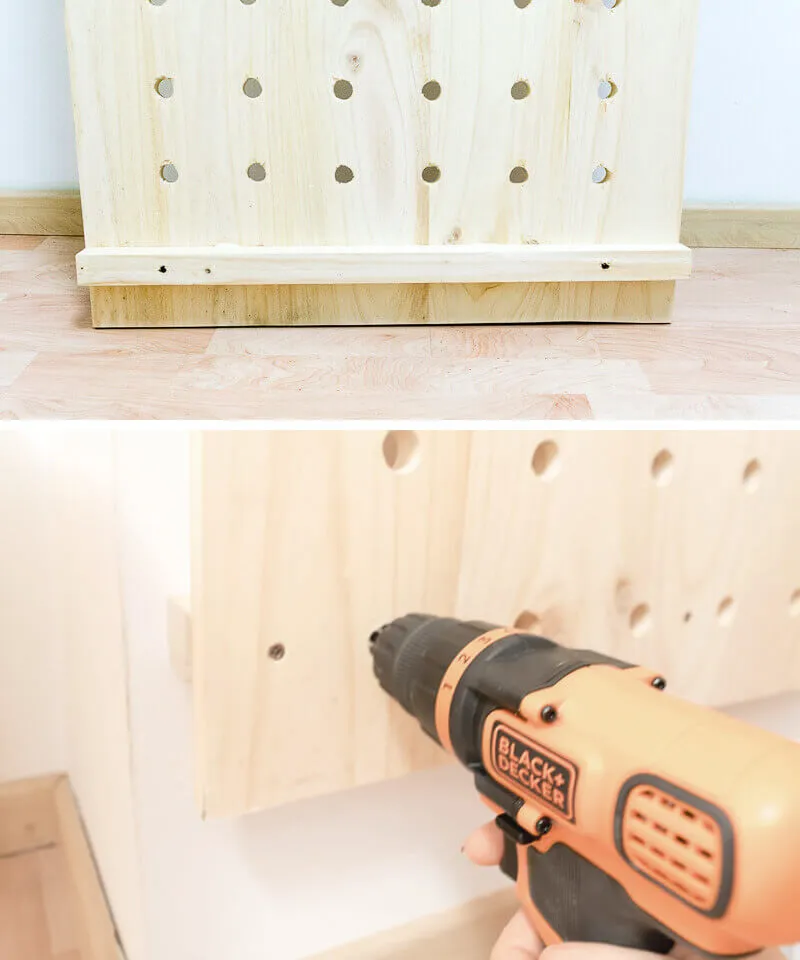
Step 6: Fix the board to the wall
Finally fix your pegboard to the wall . To do this, a slat will be screwed to the top of the board and another to the bottom. They will then be bolted to the wall.
Alternatively, screw the panel directly to the wall or hang it. If you choose to do this, remember to take into account that large wooden boards may have curves, and therefore may not sit flush to the wall.
Now just slide in your rods wherever you choose, and customise your board!
No excuse now for a disorganised place with your completed DIY pegboard!
You may be also interested in these guides
Guide written by:
Mariluz, Blog writer for Bricoydeco
This article was written by: Bricoydeco and translated. Mari Luz authors the blog ‘Bricoydeco’, she is a DIY fanatic, lover of recycling and customising furniture. Her passion is giving a second chance to turn once forgotten things into unique pieces!
'/%3E%3C/svg%3E)