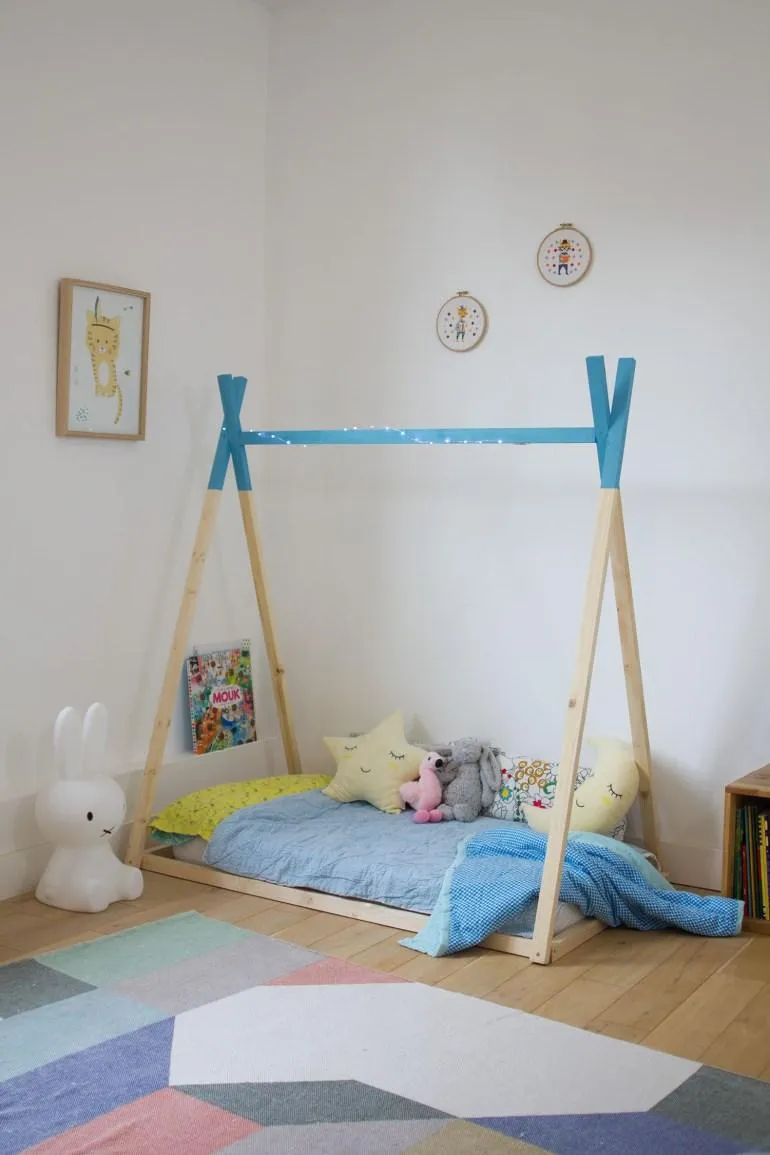
DIY tipi tent bed frame
'/%3E%3C/svg%3E)
Guide written on 6 February 2024 by:
ManoMano Team,
To make your tipi tent bed frame, you'll need:
wooden strips (pine) (here, we've used 6 strips measuring 28 x 40 x 240 cm, which can be adapted to your child's mattress)
10 wood screws: 8 x 50 mm screws and 2 x 100 mm screws
paint in the favourite colour of your budding adventurer
drill driver and wood drill bits
jigsaw
sandpaper
Please note: our frame is for a mattress measuring 60 x 120 cm, but it can easily be adapted to fit any child-sized mattress, such as 70 x 140 or 90 x 190. You can even build it on top of an existing bed frame for a tent bed with a bed base.
Choosing the right paint for a child's bedroom
When it comes to painting children's rooms or furniture, it’s important to read the ingredients carefully to avoid chemicals that could be dangerous to children.
Ban the use of oil-based paints: they contain too many VOCs (volatile organic compounds) and formaldehyde, substances that are very harmful to human health and the environment.
Water-based acrylic paints are less dangerous, but may also contain some harmful substances. Check the ingredients and avoid paints containing glycol ethers.
Whenever possible, opt for paint that is specifically made for children's rooms or environmentally-friendly or natural paints.
No matter what paint you choose, make sure to air out the room for several hours after application.
How to make a tipi tent bed frame for your children
Step 1: take the correct measurements
Lay a wooden strip next to the mattress lengthwise and use a pencil to mark off the length you need for the frame (here it's 120 cm). Next, measure the width you'll need making sure to factor in the width of the strips (here it's 60 cm + 2 x 2.8 cm = 65.6 cm).
Step 2: cut the wood and build the base frame
Cut the wood strips with a jigsaw and then lightly sand the ends (you may also want to sand the edges if you're using unfinished wood).
Put the strips together to form a rectangle.
One each side, pre-drill holes in the strips using one of the shorter wood drill bits. Then screw the 50 mm screws into the four corners.
Tip: For a professional look, use a countersink to form a small cavity in the wood before screwing. That will stop the head of your screw from sticking out.
Step 3: make the ends of the tipi tent
Put two wooden strips together to form a triangle, where the base is the head and foot of your frame, and check to see which height that would be best for your child's bed. On one strip, use a pencil to mark the top of the tent frame and the point where the two strips will intersect. Use the same dimension to mark the other three strips with your pencil.
Cut the strips with a jigsaw and drill them at the point where they intersect. Use a bit that's wider than your screws, as the latter will need to move around in the holes you've made. Sand everything until it's smooth and splinter-free.
Screw the top ends together and attach the strips to the frame at the bottom after pre-drilling (it's normal if they aren't perfectly symmetrical).This step is easier with the help of another person.
Step 4: attach the tent frame crossbar
Once the sides are attached to the frame, measure the length you need for the central bar, which will reinforce your frame. To do this, place the uncut strip at the top of the ends (as seen here) and mark the inside of the strip with the pencil.
Pre-drill the end of the crossbar in the middle, taking care not to split the wood, and attach the crossbar with the larger screw, drilling it into the end braces beforehand (as seen here).
Step 5: paint your tipi tent bed frame
For the finishing touch, we decided to paint only the top of the frame. If you want the same effect, protect the strips with some masking tape at the desired height and then paint the top of the ends and the crossbar.
You may be also interested in these guides
Guide written by:
ManoMano Team,
ManoMano is the largest marketplace for products and services in the DIY, gardening and home improvement sector in Europe. Together, we are free to invent a sustainable future and committed to build it today. We are hands-on to improve our homes for tomorrow. Bold, from idea to action. Ingenious always & together. Responsible for people & our planet.
'/%3E%3C/svg%3E)