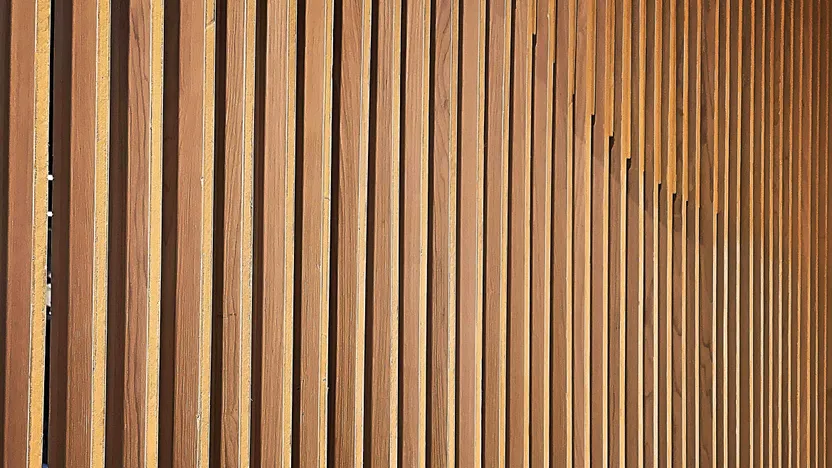
How to build a wood slat room divider
'/%3E%3C/svg%3E)
Guide written on 6 February 2024 by:
Sebastian, self-taught DIY-er, Exeter
Best sellers in this category
Building a wood slat room divider with a built-in storage chest in 15 steps
This wood slat room divider will measure 2 metres in length and 2.5 metres in height. The separate storage bench will measure 2 metres in length, 40 cm in depth and 45 cm in height. The plywood sheet dimensions and number of battens required have been worked out in line with these dimensions.
Pick a location for your wood slat wall and work out dimensions
Select plywood sheets and calculate dimensions
Choose battens for your storage chest
Draw up a plan for the plywood chest
Assemble the inner base structure and fit the base
Fit battens to the side panels
Fit the side panels to the base panel
Fit the front and back panels
Fit the piano hinge to the plywood seat
Fit screw covers and sand the storage chest
Choose and calculate your timber battens
Cut and assemble the battens to make the wood slat room divider
Fix your slatted room divider to the floor and ceiling
Fit the storage bench to the wood slat room divider
Finish and customise your wood slat room divider
At the end of this guide, you'll find details of all the tools and equipment you'll need to make your own wood slat room divider and storage chest.
1. Pick a location for your wood slat wall and work out the dimensions
Positioning your wood slat room divider
Of course each room divider will differ in length and height to match the room in which it will be installed. To work out the dimensions of your room divider, start by deciding where it will go in the room. You can then calculate:
the length of the room divider: if you need to add in a door, you'll need to leave about 762 mm for a standard interior doorway in England or Wales (or 726 mm in Scotland).
the height of the room divider: take measurements at each end of your chosen position in case there is a difference in ceiling height from one end to the other (around 2.5 metres is common).
The dimensions of the storage chest are similar to the height and depth of a standard chair (H. 45 cm x D. 40 cm).
Measuring up for materials
Once you've worked out the length and height of the room divider, you can then calculate:
the number of slats you need to build the room divider;
the size of the plywood sheet you need to build the storage chest and the number of battens you need for the inner structure.
To make things simpler, the instructions set out below apply to a room divider with the following dimensions:
length = 2 metres;
height = 2.5 metres.
The outer dimensions of the storage chest are as follows:
length = 2 metres;
height = 45 cm;
depth = 40 cm.
The length of the storage chest is more or less the same as the wood slat divider.
Best sellers in this category
2. Select plywood sheets and calculate dimensions
Plywood quality
If you are installing your partition in a dry room, go for basic plywood. If you are building your partition in a room with moisture (such as a bathroom or kitchen), go for MR grade plywood. Next, you'll have to think of the finish you want for your plywood:
If you plan to leave the wood slat wall bare or coat the plywood with a product that will let the features of the wood show through (such as a stain or clear varnish), go for birch plywood. Sturdy and strong, this material offers an attractive finish.
If you plan to paint the slat wall, go for Okoume plywood. While durable and strong, this material is cheaper and provides an even surface that is easy to paint. The paint will cover up the material so there's no need to look for a high-quality surface.
There are four main grades of plywood from 'A' for the highest quality to 'D' for the material with the most flaws. The plywood we use here is 15mm thick.
Calculating how much plywood you need
Depending on where you buy your materials, it may be possible to have your plywood cut to size which will be particularly useful if you aren't sure about your sawing skills. It'll also save you time and prevent you wasting too much material bearing in mind the most common plywood sheet dimensions are 1220 x 2440 mm.
To build a storage chest measuring L. 200 x H. 45 x D. 40 cm, you will need:
1 front panel and 1 back panel L. 200 x H. 45 cm (A1 + A2)
2 side panels H. 45 x D 37 cm (B1 + B2); 3 cm less to account for the thickness of the front panel
1 base: L. 197 x D. 37 cm (base)
1 seat: L. 200 x D. 40 cm (seat)
This adds up to a total of 3.62 m²
Calculation breakdown: [2 x (45 x 200)] + [2 x (37 x 45)] + [1 x (37 x 197) + [1 x (40 x 200)] = 36,619 cm² = 3.62 m² meaning you'll need a 4 m² plywood sheet
Work out how much plywood you'll need based on the size of the pieces you are going to cut, bearing in mind there will be offcuts. You can use pine instead of plywood but beware that this material may warp over time as the temperature of your home fluctuates.
3. Choose battens for your storage chest
The plywood panels will be held together inside the chest by 30 x 30mm Douglas fir timbers.
To calculate the total length of battens required, add up the following:
4 battens for the corners 4 x 40.5 cm (4.5 cm less to account for crosspieces and thickness of plywood base)
2 battens for the crosspieces 2 x 197 cm (3 cm less to account for plywood panel thickness)
2 battens for the base 2 x 31 cm (9 cm less to account for thickness of crosspieces and plywood)
That adds up to a total of 5.37 linear metres
Calculation breakdown: [(4 x 40.5) + (2 x 197) + (2 x 31)] = 537 cm
Be careful – just like with the plywood sheets, you need to account for offcuts to ensure you buy enough material.
4. Draw up a plan for the plywood chest
Plywood panels to cut:
40 x 200 cm: seat (D)
45 x 200 cm: front panel (A1)
45 x 200 cm: back panel (A2)
37 x 197 cm: base (C)
37 x 45 cm: left side (B1)
37 x 45 cm : right side (B2)
Close-up of plywood chest structure
If you are cutting the plywood into panels yourself, use a circular saw fitted with a guide rail. Always cut on the same side of the line to ensure you don't accidentally cut a few millimetres short or you will end up with corners that aren't absolutely square and sides that aren't plumb.
Battens to cut:
4 x 40.5 cm (corner battens)
2 x 197 cm (crosspieces)
2 x 31 cm (base)
Close-up of batten assembly
If you are cutting the battens yourself, use a handsaw and measuring square or a circular saw to guarantee perfectly square corners and straight cuts. Always cut on the same side of the line to ensure you don't accidentally cut a few millimetres short or you will end up with corners that aren't absolutely square and sides that aren't plumb.
5. Assemble the inner base structure and fit the base
Pre-drill the crosspieces (C) 15 mm from the edge using a 3mm wood drill bit.
Use a countersink bit to widen the hole so the screw heads fit snugly inside the material without having to apply too much force to the drill.
Line the crosspieces (B) up with the side pieces (A) and screw them together using 4.5 x 60mm nails
Put the the base panel (C) in place and check the base is lined up and square.
Fit the base panel to the base structure using 4.5 x 35mm screws. Insert the screws but don't apply too much force as you reach the end of the countersink.
It's important not to apply too much force when screwing and not to go too deep as this may cause the wood to split and/or the screw tip to protrude from the material.
Screws
6. Fit battens to the side panels
Position your battens (B) on the side panels (B1 + B2) ensuring they are flush with the edges but leave 45 mm at one end.
Pre-drill holes 70 mm from the edge of the side panels using a 3mm wood drill bit.
Use a countersink bit to widen the hole so the screw heads fit snugly inside without having to apply too much force to the drill. Your screw heads should sit flush in the material.
Insert the 4.5 x 35mm screws, check that the batten and panel are lined up and tighten screws making sure not to overtighten.
Once again, be careful not to over- or under-tighten your screws. It's a good idea to adjust the torque of your drill.
Screws
7. Fit the side panels to the base panel
Pre-drill holes in your side panels 30 mm from the bottom edge and 100 mm from the side edge (B1 + B2).
Use a countersink bit to widen the hole so the screw heads fit snugly inside without having to apply too much force to the drill. Your screw heads should sit flush in the material.
Set the side panels (B1 + B2) in position.
Insert the 4.5 x 35mm screws and tighten taking care not to over-tighten.
Screws
8. Fit the front and back panels
Pre-drill holes horizontally around 30 mm from the bottom and 60 mm from the side panels (A1 + A2), then drill every 200 mm or so. Pre-drill holes around 15 mm from the vertical edge then about 60 mm from the bottom and top, with one hole in the middle.
Use a countersink bit to widen the hole so the screw heads fit snugly inside without having to apply too much force to the drill. Your screw heads should sit flush in the material.
Set your front and back panels (A1 + A2) in position.
Insert the 4.5 x 35mm screws and tighten taking care not to over-tighten.
Screws
9. Fit the piano hinge to the plywood seat
Identify the knuckle on the piano hinge where you need to make your cut, bearing in mind that the hinge should be slightly shorter than the length of the chest.
Cut the piano hinge using a metal-cutting saw. If you have a vice, cover it with a cloth and use it to hold the hinge while you make your cut.
File down the rough edges to get rid of any burrs.
Position the piano hinge along the edge of the chest seat (D) making sure to leave an equal amount of space at each end.
Use one 2.5 x 10mm brass screw at each end of the hinge to fix it in place ensuring that the edge of the hinge doesn't go over the edge of the plywood.
Screw the piano hinge all along the length of the seat (D).
Position the seat on the chest with the piano hinge open.
Use one 2.5 x 10mm brass screw at each end of the hinge to fix it in place before screwing along the length of the back panel.
Ideally, you should use a brass piano hinge with brass slotted countersunk screws.
Screws
10. Fit screw covers and sand the storage chest
Apply a drop of glue onto each screw cover then place the caps over the screw heads. Wipe off any excess glue.
Sand down the cut edges of the chest using 180-grit sandpaper for a smooth finish.
In our assembly, we have used plastic light brown screw covers which are fitted once the screw is in place. Other types of screw covers (for example brass, stainless steel or plastic caps) are designed to be clipped into place. This provides a better finish and you won't have to use glue.
Sandpaper
11. Choose and calculate your timber battens
Picking the timbers for your wood slat divider
Look for rectangular battens measuring around 27 x 70 mm depending on what your supplier has available. It's best to use softwoods like Douglas fir or maritime pine.
When it comes to choosing the battens that will make up the slatted structure, you should:
check that the battens are absolutely square – the wood must not be warped and needs to be as straight as possible;
get rid of any battens with any highly visible knots;
choose dry timber with no splits or marks.
Calculating slat spacing and quantity
We've chosen to use 27 x 70mm battens with a space of 9 cm from the centre point of one batten to the centre point of the next (or 6.3 cm from edge to edge since 9 mm - 2.7 mm = 6.3).
To calculate the number of battens required:
Subtract the thickness of the batten from the total length of the divider (200 - 2.7) which gives us 197.3 cm.
Divide that length by the space between each centre point (197.3 / 9) which gives us 21.92.
Round the result up and that makes 22 battens.
The space between the centre point of each slat is 9 cm meaning you'll need 22 slats in total. As the calculations don't add up to an even number (21.92), the second to last slat will be 7 mm off as 22 x 9 = 198 and out total length is 197.3 cm.
12. Cut and assemble the battens to make the wood slat room divider
The wood slat room divider is made up of:
2 cross pieces measuring 2 metres in length
23 battens measuring for a total of 244.6 cm [250 - (2 x 2.7)]
Your slatted structure should be constructed on the floor which can be covered by cardboard or a tarp if need be. Any cuts should be made at a comfortable working height using a mitre saw or circular saw, if possible, or a hand saw if not.
Proceed as follows:
Mark out your measurements on the crosspieces (B) and slats (A), and use a measuring square to mark your cuts on both sides.
Cut the two crosspieces (B) and 23 slats (A).
Sand down your cuts.
Position the first slat (A) at the end of one of your crosspieces (B) making sure they sit flush with each other. Screw them together using two 4.5 x 60mm screws. Repeat the process with the second crosspiece and then fix the last slat to the other side of the crosspieces.
Use an offcut to make two spacers measuring 6.3 cm – these pieces will serve as a template to space out your slats (A).
Place your spacers in position before sliding in your second slat (A) and fixing it in place.
Repeat this process with all other slats (A) until you reach the last one.
It isn't necessary to pre-drill holes in your crosspieces or slats but you should make sure to drill the slats 20 mm from the edge.
Screws
13. Fix your slatted room divider to the floor and ceiling
The way in which you install your room divider depends on the type of surfaces you have. In the example set out here, we are installing over a tiled-over concrete floor and a suspended plasterboard ceiling.
Use a drill equipped with a 6mm wood drill bit to drill holes between the second and third slat, and the sixth and seventh slat, on both sides. You should end up with four holes on each crosspiece.
Use a countersink bit to widen the eight holes so the screw heads fit snugly inside the material without having to apply too much force to the drill. Your screw heads should sit flush in the material.
Set the wood slat room divider in position, check it is plumb using a spirit level then start drilling through your holes just enough to leave a mark on the floor and ceiling using a masonry drill bit.
Remove the slatted wall.
Drill into the floor in hammer mode using a 7mm drill bit and use an 11mm drill bit to drill a hole in the ceiling in normal drill mode.
Insert a 7mm expansion plug in to the floor and an M6 x 50 hollow wall anchor (8S type) into the ceiling before expanding using a setting tool.
Position the slat wall and fix it in place by inserting screws into your fixings. Check it is plumb.
Mark out your other holes using the drill.
Remove the slatted wall.
Drill into the floor in hammer mode using a 7mm drill bit and use an 11mm drill bit to drill a hole in the ceiling in normal drill mode.
Insert your expansion plugs into the floor and hollow wall anchors into the ceiling and expand using a setting tool.
Put the wood slat room divider back in place and fix it in its final position by inserting screws into the plugs, starting at the ends of the crosspieces.
Apply a drop of glue to each screw head and apply screw covers. Wipe off any excess glue.
Screws
14. Fit the storage bench to the wood slat room divider
Position the storage bench in front of the room divider.
Attach it to the room divider using 4.5 x 35mm screws inserted into the back of the chest and along several slats (it is recommended to use around six fixing points).
Screws
15. Finish and customise your wood slat room divider
You may want to leave the room divider and chest as they are, or you may wish to apply a coat of varnish, wood stain or paint. When it comes to application, you can either leave the room divider where it is or remove it. However, it's a good idea to coat the assembly before you fix it in place permanently and to paint outdoors to prevent releasing too many VOCs into the home.
The lid of the chest can be fitted with a handle or lock depending on your needs and preferences.
How to build a wood slat room divider
Required skills
In order to build a wood slat room divider and storage chest, you'll have to be able to:
use a drill and pick the right drill bits;
use a circular and/or jigsaw;
take accurate measurements;
use a spirit level;
pick the right fixings for your surface;
assemble parts following instructions.
Time required
8 hours (excluding drying time if you apply a top coat)
Number of people required
1 person
Tools and equipment
Piano hinge
2.5 x 10mm brass countersunk slotted screws
4.5 x 35mm chipboard screws (approx. 50); 4.5 x 60mm (approx. 100)
M6 x 50 (8S type) hollow wall anchors
Screw covers (approx. 160)
Glue
25 Douglas fir slats (27 x 70 mm)
200 x 250cm plywood sheet (15mm thick + grade A)
If you are a beginner DIYer and you're not sure you can cut your plywood panels straight, we advise you to pass on the dimensions provided to your wood supplier who will be able to make accurate cuts. The screw dimensions are provided for guidance purposes only.
Safety and workwear
Mask
Protective clothing
Please note: this is a non-exhaustive list; be sure to match your personal protective equipment to the job at hand.
Sheet materials
You may be also interested in these guides
Guide written by:
Sebastian, self-taught DIY-er, Exeter
Redo a roof with wooden beams? Check. Advise everybody in the DIY shop? Check. Redo bathroom plumbing? Check. If it doesn't work, try again! I'll do my best to advise you in your projects.
'/%3E%3C/svg%3E)