How to install a drip irrigation system
'/%3E%3C/svg%3E)
Guide written on 6 February 2024 by:
Jeremy, Construction site supervisor, Cardiff
Drip irrigation: an efficient and economical system
Drip irrigation is the most effective way to ensure your plants are getting the perfect level of hydration delivered right to the soil. The amount of water provided can be controlled which means you'll never accidentally overwater or waste water. This type of watering system is also really versatile. It works just as well for potted plants and raised beds as it does for flowerbeds, borders and vegetable gardens. Fairly quick to set up, these systems can even be set to work automatically. Suffice it to say that the daily grind of watering will soon be history with a drip irrigation system!
Steps
1. Plan your drip irrigation network
2. Connect your drip irrigation to your water supply
3. Assemble your drip lines
4. Install your drip emitters and/or micro sprinklers
Micro sprinklers
1. Plan your drip irrigation network
To work out exactly what equipment you need to build your system, you need to start by planning your watering network. Your system will start with the water supply and end with the last plant, flowerbed or corner of the vegetable patch you need to water.
Draw up the route you want to set up with all the different water points, turns and anywhere you want to set up a drip emitter or micro sprinkler. Roughly measure out the length of each section to estimate how many metres of tubing you'll need.
In terms of drip lines, bear the following guidelines in mind:
system > 15 m = use 13 mm (or ½'' ) drip lines;
system < 15 m = use 4.6 mm (or 3/16'') drip lines;
Make a rough count of how many drip emitters, micro sprinklers and goof plugs or end caps you think you'll need.
2. Connect your drip irrigation to your water supply
Drip irrigation systems work best at a water pressure of approximately 1.5 bar. Depending on the pressure of your water supply, you may have to fit a pressure regulator. In terms of flow, it all depends on the number of drip emitters/micro sprinklers you want to install. Most pressure regulators also provide a maximum operating pressure. This will usually be around 500 to 2000 litres per hour (l/h).
Drip emitters are sensitive to impurities and will eventually get clogged up if they aren't protected. It's therefore essential to install a filter at the start of the system (before the pressure regulator). To go one step further, you can also automate your system using an irrigation controller. Installed at the start of the system, a controller is used to program watering frequency and duration. It can even be connected to a moisture sensor or rain gauge to cut down on water consumption and improve the overall system performance.
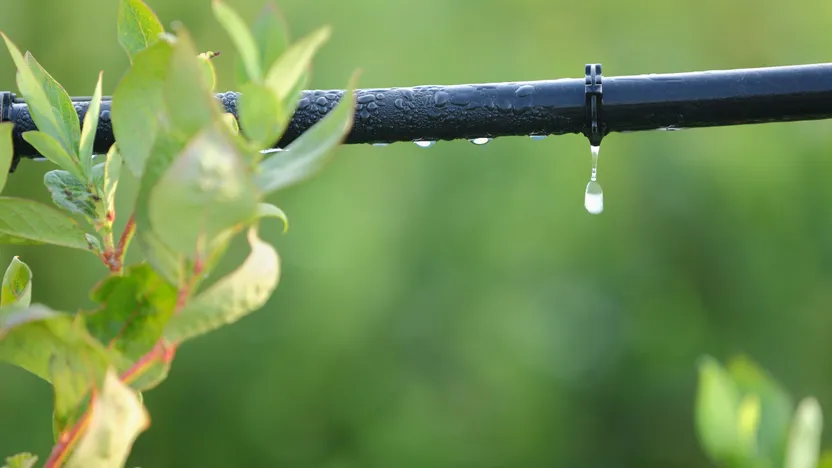
Drip irrigation systems
3. Assemble your drip lines
As mentioned above, you can choose between a couple of different drip line diameters (typically 1/2" and 3/16") depending on the length of your system. Simply unroll your poly tubes and place your drip lines on the ground according to your plan. Use stakes to keep them in place.
At this point, you should have all the different fittings you need for assembly including:
connectors to link two supply lines of the same diameter;
elbows to change the direction of the lines;
reducing to connect two lines with different diameters;
goof plugs to block the end of the line;
valves to open and close lines.
Generally speaking, these fittings should all be quick connect and won't require the use of tools. You should simply have to slot the different components together.
4. Install your drip emitters and/or micro sprinklers
Drip emitters
Designed to water just one plant, drip emitters can be adjusted to provide just the right amount of water. Each drip emitter has a different capacity – this can vary from 2 to 20 l/h. It's also possible to find more advanced drip emitters (adjustable or self-cleaning models, for example). Drip emitters are screwed directly into the drip lines which will usually need to be cut using a special tool called a tube punch. The emitters must be placed as close as possible to the base of your plants.
Micro sprinklers
Micro sprinklers are designed to tackle larger surfaces meaning they can water a group of plants at once. They can be used to complement your drip irrigation system. Micro sprinklers can rotate 90°, 180° or 360°. Most are adjustable and can cover up to 3 metres. Comparatively, an oscillation sprinkler can cover surfaces of up to 50 m². The width and length of the water jet can be adjusted. A micro sprinkler can be set up directly on the soil or elevated on a base to hit all the plants it needs to reach.
Drip irrigation system
5. Program your watering system
Once you have set up your system, all that remains to be done is to program your watering sequences according to the needs of your plants and the weather conditions.
How to install a drip irrigation system
Required skills
Most drip irrigation systems don't require any particular skills to set up. The water supply lines are usually made of polyethylene and can be cut using a pair of scissors or a utility knife. The connectors are usually fitted with barbed or screw joints so are really easy to slot together. Once you've mapped out the system, you just need to slot all the components together and open your valves!
Time required
Approx. 2 hours for a system measuring 10 to 15 metres in length.
Number of people required
1 person
Tools and equipment
Scissors or utility knife
One or several pressure regulator(s)
One or several filters
Polyethylene tubing (diameter of which can vary)
Connectors (size of which can vary)
Drip emitters, micro sprinklers (if required), goof plugs
Stakes to keep tubing and/or connectors in place
A hammer drill and plugs and screws (if securing components to hard surfaces)
An irrigation controller (optional)
Safety and workwear
Please note: this is a non-exhaustive list; be sure to match your personal protective equipment to the job at hand.
You may be also interested in these guides
Guide written by:
Jeremy, Construction site supervisor, Cardiff
Electrician by trade, I first worked in industrial estates where I installed, wired and fixed a large number of electrical installations. After this, I managed a team of electricians for this type of work. 10 years or so ago, I turned to building and construction. From the modest family home, to gyms and theatres, I have been able to coordinate, audit and organise all sorts of construction sites. For 4 years now, I am restoring and building an extension to a bungalow in the heart of the Welsh countryside. My experience in manual work and my knowledge means I am proud to be of service. Terraces, interior design, roofing, plumbing, electrics, anything goes! My wife, daughter and I, built almost everything we have from scratch! So to answer all of your questions and advise you on choosing your tools? Easy!