1/5
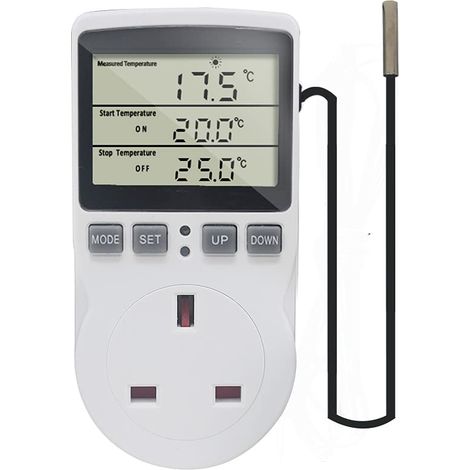
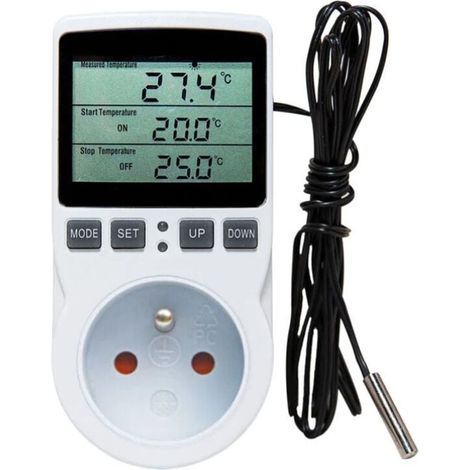
W3230 AC 110V-220V 20A Digital Temperature Controller, Digital Display Thermostat Control Switch with 10K NTC Sensors Probe(-50℃ 120℃)
Of which environmental contribution £0.10 including VAT.
Buying for your business?
Negotiated prices excl. VAT up to -20%
Sold by YUSONG-UK
You may also like









Compare with similar items
Product information
Description
Reference: HHH Error reason: Temperature exceeds alarm temperature Solution: Alarm temperature drops below alarm temperature and returns to normal Reference: LLL Error reason: No temperature sensor detected Solution: Replacement reconnect temperature sensor PO cooling and heating mode: Long press SET for 5 seconds to display P0. Press SET once to set the working mode. Press +- to change [H is heating mode] [C is cooling mode]. Press SET once to return. Long press SET or there is no button action for 10 seconds. The controller automatically confirms completion.In cooling mode: when the temperature measurement value ≥ temperature set point, the cooling relay closes and the refrigerator starts; When the temperature measurement value ≤ temperature set point - hysteresis, the cooling relay disconnects and the refrigerator turns off. In heating mode: when the temperature measurement value ≤ temperature set point, the heating relay closes and heating starts; When the temperature measurement value ≥ temperature set point + hysteresis, the heating relay disconnects and the heating turns off.P1 hysteresis setup: Long press SET for 5 seconds to display P0, press +- to switch to P1, press SET once to set the hysteresis value, press +1 to set the hysteresis to 0.1-15, press SET once to return after completion, press SET or there is no key action for 10 seconds. The controller automatically confirms completion. In cooling mode: when the temperature measurement value ≥ the set value, the relay closes and the refrigerator starts; When the temperature measurement value ≤ the set value - feedback difference value, the relay disconnects and the refrigerator turns off. For example, if the environment is 86.0°F, the setting value is 77.0°F and the hysteresis is set to 35.6°F. After switching on, the relay closes and the refrigerator starts.When the cooling reaches 73.4°F, the relay opens and the refrigerator closes. At this point the refrigerator was unplugged. The opening temperature begins to increase. When it reaches the set value of 77.0°F, the relay closes and the refrigerator starts again. Move, repeat this cycle to verify that the temperature does not exceed 77.0°F. In heating mode: when the temperature measurement value ≤ set value, the relay closes and heating starts; when the temperature measurement value ≥ set value + hysteresis value, the relay is turned off and the heater turns off. For example, the environment is 50°F and the setting value is 77.0°F, and the hysteresis is set to 35.6°F. After ignition, the relay closes and the heating starts. When heated to 80.6°F, the relay disconnects and the heater turns off.At this point, the heater has After disconnection, the temperature begins to drop. When it drops to the set value of 77.0°F, the relay closes and heating begins again. Move, repeat this cycle to control temperature not lower than 77.0°F. Maximum temperature setting upper limit P2: In order to avoid the danger of excessively high setting temperature caused by the malfunction of others, this thermostat has a maximum setting upper limit function, which limits the setting range of the maximum temperature set point controlled by the thermostat. Long press SET for 5 seconds to display P0, press +- to switch to P2, press SET once to set the maximum limit, press +1 to set the highest configurable temperature, the maximum value is 110, press SET once to return after finishing, press and hold SET or 10 seconds.The controller automatically confirms completion without pressing a button. For example: If the temperature set point is set to 60, it can only be set to a maximum of 140°F. If you want the temperature set point to be higher and the temperature range to be widened, you need to adjust the upper limit setting value first. P3 lower temperature setting lower limit To avoid malfunctions from others that cause ice blockage due to low temperature, this thermostat has a minimum setting upper and lower limit function, which limits the setting range of the minimum temperature set point controlled by the thermostat.Long press SET for 5 seconds to display P0, press +- to switch to P3, press SET once to set the minimum lower limit, press +1 to set the lowest configurable temperature, the lowest value is -50, press SET once to return after finishing, press and hold SET or 10. The controller automatically confirms the end of the action without pressing a button for a few seconds. For example: If the temperature set point is set to 2, it can only be set to a minimum of 35.6°F. If you want the temperature set point to be lower, To extend the temperature range, you must first adjust the lower limit setting. P4 temperature correction When the measured temperature deviates from the standard temperature or the user's equipment has special needs, you can use this function to correct.The corrected temperature = the temperature before correction + the corrected value. The valid range is -7.0 ~ 7.0. Long press SET for 5 seconds to display P0, press +- to switch to P4, press SET once to correct, press +- to set the correction value, press SET once to return after finished, press SET or without button action for 10 seconds, the controller will automatically confirm completion. For example, normal display is 25 degrees; when the temperature correction is 0, it displays 25 degrees; when the temperature correction is 1.5, it displays 26.5 degrees, when the temperature is corrected to -1.5, it displays 23.5. P4 temperature correction When the measured temperature deviates from the standard temperature or the user's equipment has special needs, you can use this function to correct.The corrected temperature = the temperature before correction + the corrected value. The valid range is -7.0 ~ 7.0. Long press SET for 5 seconds to display P0, press +- to switch to P4, press SET once to correct, press +- to set the correction value, press SET once to return after finished, press SET or without button action for 10 seconds, the controller will automatically confirm completion. For example, normal display is 25 degrees; when the temperature correction is 0, it displays 25 degrees; when the temperature correction is 1.5, it displays 26.5 degrees, when the temperature is corrected to -1.5, it displays 23.5. Delayed start time P5 (unit: minutes) When it is necessary to delay the operation of the refrigerator or heater, the delay function can be activated to protect the life of the equipment.Long press SET for 5 seconds to display PO, press +- to switch to P5, press SET once to set the delay start time unit in minutes, press +- to set 0-10 minutes, press SET once to return after finishing, press and hold SET or 10 seconds without the key action controller automatically confirms completion In cooling mode: When the power is turned on for the first time, if the current temperature ≥ the set value, the refrigerator will not start cooling immediately and must operate for the set delay time. In heating mode: When the power is turned on for the first time, if the current temperature ≤ the set value, the heater will not start heating immediately and must work for the set delay time before starting.When the stopping time between two consecutive starts of the refrigerator or heater is greater than the delay start time setting value, the refrigerator starts immediately. When the shutdown interval between two consecutive starts of the refrigerator or heater is less than the delay start time setting value, the appliance can only start after the set delay start time of the refrigerator has been completed. The delay time is calculated from the moment of shutdown. For example, in the cooling state, set the delay time to 5 minutes. After turning on the power, the refrigerator will start with a delay. After 5 minutes, the refrigerator turns on. When the required temperature is reached, the refrigerator stops. At this time, the timer starts. When the next time the refrigerator start time is over, it will start immediately.Work, if the time is not over, it will not work until the time is over. The LED indicator flashes during the delay. When the delay start is set to 0, it is equivalent to disabling the delay function. P6 restore factory settings Due to some human reasons, the internal configuration of the thermostat is confused, and it takes a long time to configure them one by one. In this case, you can use this function to restore factory settings. The specific method is: In the off state, hold down the + and - buttons at the same time, then turn on the phone. All settings above will be restored to factory settings.
Features
- BrandOTHERS
- SmartYes
- ColourWhite
- MaterialPlaster
- Pcs per pack1
- ManoMano ReferenceME242990631
- MMID371215802405
- Product codeYS-UK26Z61429
- EAN4011487913291
You are here:
'/%3E%3C/svg%3E)