How to install ventilation and fans
'/%3E%3C/svg%3E)
Guide written on 6 February 2024 by:
Rob, Copywriter and Digital Content Creator. Towcester
Important features
- Ventilation in the loft
- Airbricks
- Trickle vents
- In-glass air vents
- Extractor fans
- Axial extractor fans
The benefits of good ventilation
Reduce or eliminate condensation
Improve indoor air quality
Reduce the risk of long-term structural damage to your building
There are several ways you can improve your ventilation and indoor air quality.
Steps
Additional ventilation in your loft space
Airbricks
Fitting a trickle vent
Fitting an in-glass air vent
Installing an extractor fan
Where to fit an extractor fan
How to fit an axial extractor fan
1. Additional ventilation in your loft space
If you have a standard pitched roof, then check the soffit boards and make sure any roof insulation isn’t blocking the air vents. Simply pulling back the insulation so it no longer blocks the vents will improve air flow.
You can also install tile vents to replace a few roof tiles. This work should be done by a professional roofer.
If you have a flat roof, you can install air vents over the eaves, where the roof meets the external wall.
2. Airbricks
The external walls of your house contain airbricks which ventilate the space below suspended timber floors. For cavity walls, a sleeve connects the airbrick to a ventilation grid on an internal wall. Airbricks should never be blocked – check them regularly for debris. Any broken airbricks should be replaced immediately.
3. Fitting a trickle vent
Fitting a trickle vent reduces condensation and improves ventilation rate. A trickle vent is a grille on the window frame that can be opened or closed to allow or prevent air flow. Most modern UPVC windows have trickle vents, but they can be retrofitted to older windows. Consult a professional glazier if you need to retrofit trickle vents.
4. Fitting an in-glass air vent
In-glass rotary ventilators are simple to fit to both single and double-glazing, and quickly improve ventilation rate and reduce moisture. They operate without the need for batteries or an electrical connection.
Ask a glazier to cut the appropriately sized hole in your window.
Fit the air vent. To improve performance and durability, apply a little silicone glazing sealant to the external retaining ring. If your window doesn’t open, you will need a second person on the other side to help you fit the vent.
5. Installing an extractor fan
An extractor fan is very effective at removing moisture and condensation, so it’s perfect for your bathroom or kitchen. Installing a bathroom extractor fan or kitchen extractor fan prevents mould and mildew forming on the walls.
There are two types of extractor fan:
Axial fans: wall-mounted and connect directly through to an external air vent.
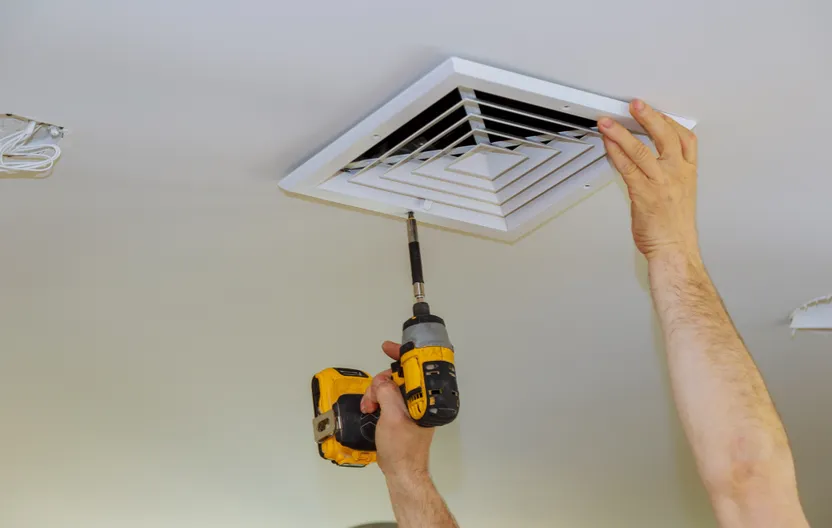
Centrifugal and Inline fans: usually fitted in the ceiling and designed for bathrooms that aren’t close to an external wall or need extra-long air ducts.
Extractor fans are operated by a pull-cord or switch in a separate location. The size of extractor fan you need depends on the size of your room.
To calculate the extraction rate for your bathroom:
measure the height, width, and length of the room in metres
multiply the three figures together to get the size in cubic metres (m3)
divide this figure by 3.6 to get your required extraction rate in litres per second (l/s)
Building regulations state the following minimum extraction rates for an extractor fan:
bathroom is 15 l/s
kitchen 30 l/s adjacent to hob; 60 l/s elsewhere
Extractor fans
6. Where to fit an extractor fan
It’s important to remember that any modifications to electrical circuits must comply with the latest IET Wiring Regulations. It’s essential that a qualified electrician makes the necessary wiring.
Mount your extractor fan as high up on the wall as possible. To maximise ventilation rate, place it opposite a door so fresh air easily replaces the extracted air when the fan is running. In a kitchen, fit the extraction fan as close to the cooker as possible, so that steam isn’t drawn across the room.
7. How to fit an axial extractor fan
When you have decided where to put the extractor fan, use a pipe and cable detector to check for hidden pipes and cables. Make sure that no pipes on the external wall will block the fan, and make sure the outlet isn’t directly beneath a window.
Hold the fan in place and use a pencil to trace around its circular edge. Use a power hole saw to drill the marked hole. The hole should go all the way through the outside wall.
Cut the supplied ducting to the required length with a fine-toothed saw, then screw the ducting onto the fan itself.
Push the fan and ducting into the hole to check that it fits correctly. If necessary, repair or tidy up any plasterwork on the wall where you have drilled.
Adjust the fan into its final position, then mark the fixing holes. Remove the fan and drill the holes.
Screw the fan into place. Make sure the electrical cable is properly positioned so it’s accessible. Carefully follow the manufacturer’s instructions for this step.
A qualified electrician must now finish the wiring.
After an electrician has completed the wiring, secure the grille cover onto the fan. If the cover has slats, make sure they’re positioned horizontally.
Fit the external grille cover onto the outside wall, using a masonry drill bit to drill the holes.
Hole saws
How to install ventilation and fans
Required skills
Fitting an extractor fan requires an intermediate level of DIY knowledge. Remember, only a qualified electrician can hook the fan up to the mains and please consult your local authority to see if you need any planning permission.
Planning and visualising your project effectively
Measuring accurately
Experience with power tools, especially masonry drilling
Basic knowledge of plastering
Time required
6-8 hours
Number of people required
1-2 people
Tools and equipment
Extractor fan and flexible duct pipe
Pipe and cable connector
Heavy duty drill
Power hole saw and masonry drill bits
Pencil
Safety and workwear
Please note: this is a non-exhaustive list; be sure to match your personal protective equipment to the job at hand.
Masonry drill bits
You may be also interested in these guides
Guide written by:
Rob, Copywriter and Digital Content Creator. Towcester