How to repair a cracked sink
'/%3E%3C/svg%3E)
Guide written on 6 February 2024 by:
Jeremy, Construction site supervisor, Cardiff
Important features
- Preparing the sink for repairs
- Sanding the sink and preparing the resin mix
- Applying the epoxy resin and sanding
- Applying an epoxy paint
How to repair a cracked sink with minimal fuss
There are two situations in which you might find yourself having to repair a cracked sink:
Firstly, you might have dropped a heavy object in the sink. A bottle of perfume can easily slip out your hands and crack a wash basin and dropping a stock pot will certainly leave its mark on your kitchen sink!
Alternatively, you might just want to freshen up an old porcelain enamel sink; perhaps you've managed to nab a bargain sink from a second-hand shop but need to repair a crack before you install it.
Either way, we'll talk you through the process of using a 2-part epoxy resin to repair a crack or chip in a porcelain enamel sink. These kits are made up of two pastes or gels (depending on the product) that are designed to be mixed together then applied onto the surface that needs repaired.
In order to hide the repair job (as your resin patch will be visible) you'll need to finish by repainting the whole wash basin or sink using a special type of paint.
Steps
Preparing the sink for repairs
Sanding the sink and preparing the resin mix
Applying the epoxy resin and sanding
Applying an epoxy paint
Required skills
Repairing a crack in a sink is a fairly straightforward task. However, you will need to read all instructions carefully and pay attention to the mixing ratios. You will also have to dismantle the sink, sand and paint.
Time required
2 to 4 hours
Number of people required
1 person
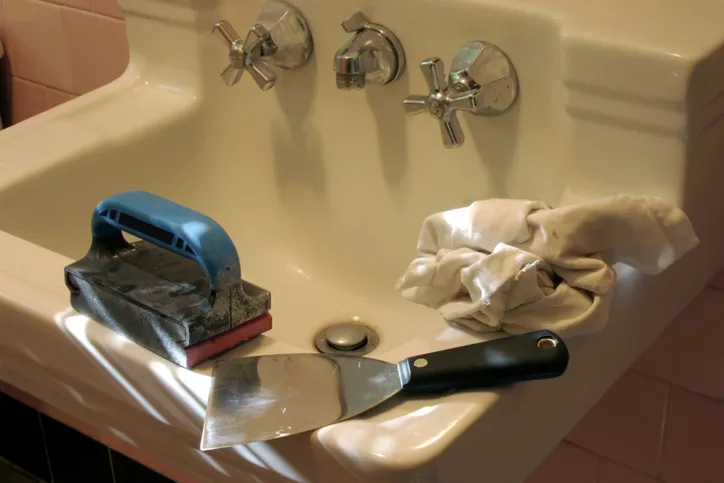
Tools and equipment
A plumber's tool kit
Adjustable spanner
A grease-cutting cleaner
Sponges
Water pump pliers
A set of screwdrivers
A set of spreading tools
Fine-grit sandpaper
An epoxy filler designed for porcelain sinks or baths
Cloths
An electronic scale
Tape and protective tarp
Epoxy paint kit for porcelain sinks or baths
Foam paint roller
Personal protective equipment (PPE)
Overalls
Gloves (suitable for handling epoxy)
Respiratory protection
Safety goggles
Please note: this is a non-exhaustive list. Be sure to match your personal protective equipment to the job at hand.
Resin
1. Preparing the sink for repairs
Please note that if your sink is not yet installed, your task will be easier.
Dismantling the sink
Remove the sink from its position.
If your sink is attached to parts such as a plug, waste, overflow grid or tap fittings, you will have to remove these too.
Using an adjustable spanner, screwdriver set and/or a pair of water pump pliers, carefully remove all sink components.
Cleaning the sink
The porcelain should be cleaned before any product is applied.
Wearing PPE, use suitable cleaning products and sponges to clean and degrease the sink. Once you've finished, clean everything again! Remember: this isn't your usual cleaning routine and is an important step in the repairs process. You will therefore have to apply a bit more elbow grease.
2. Sanding the sink and preparing the epoxy mix
Sanding the sink
Sand the entire surface of the sink lightly using sandpaper.
Be sure to pay special attention to the area that requires repairs.
Finish by cleaning again to remove all dust from the surface of the sink.
Preparing the epoxy resin mix
Using an electronic scale, a resin repairs kit and a spatula, mix product A with product B according to the ratio set out in the manufacturer's instructions.
Leave the product to rest for the specified time and prepare for application.
3. Applying the epoxy resin and sanding
Applying the resin
Using a spreader tool, apply the mix to the crack you want to repair as well as any other affected areas.
Leave the product to dry for the time set out in the instructions.
Sanding the resin
Once the resin is dry, put your PPE back on. It is essential to wear a respiratory mask as fine epoxy dust particles are very toxic. Next, sand down the hardened epoxy resin until you end up with a smooth surface.
4. Applying an epoxy paint
The epoxy won't be exactly the same colour as the sink enamel.
Using a foam paint roller, apply a special epoxy paint kit (designed for the material) to the entire surface of the sink according to the kit instructions.
Wait for the paint to dry.
Once the sink is repaired and looking new, all that's left to do is install it!
You may be also interested in these guides
Guide written by:
Jeremy, Construction site supervisor, Cardiff
Electrician by trade, I first worked in industrial estates where I installed, wired and fixed a large number of electrical installations. After this, I managed a team of electricians for this type of work. 10 years or so ago, I turned to building and construction. From the modest family home, to gyms and theatres, I have been able to coordinate, audit and organise all sorts of construction sites. For 4 years now, I am restoring and building an extension to a bungalow in the heart of the Welsh countryside. My experience in manual work and my knowledge means I am proud to be of service. Terraces, interior design, roofing, plumbing, electrics, anything goes! My wife, daughter and I, built almost everything we have from scratch! So to answer all of your questions and advise you on choosing your tools? Easy!