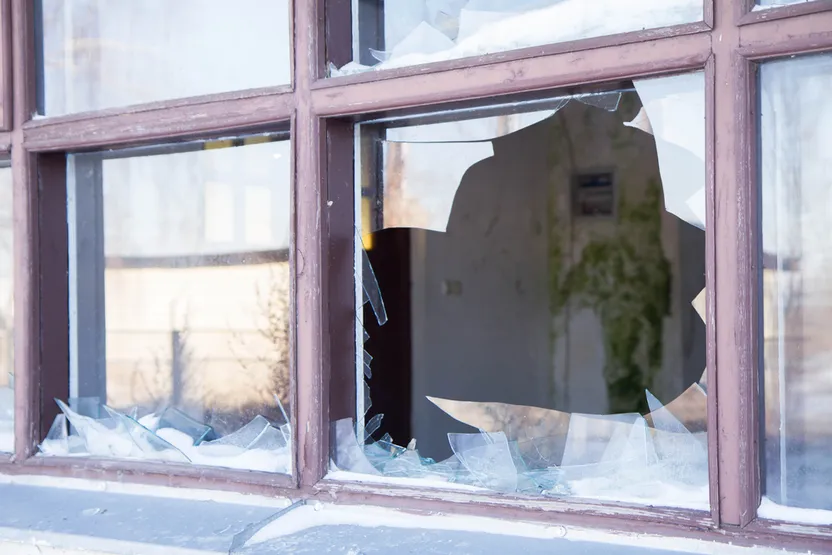
How to repair a window
'/%3E%3C/svg%3E)
Guide written on 25 September 2026 by:
Rob, Copywriter and Digital Content Creator. Towcester
Important features
- Temporary repairs to window panes
- Replacement glass
- Broken window panes
- Installing replacement windows
Repairing a window
Depending on the extent of the damage you may be able to make some temporary repairs, especially if the damage is minor. This guide concentrates on repairing or replacing broken windows and window frames. It’s very important to consult a qualified glazier if you’re unsure about completing any of the steps detailed in this guide.
Steps
Making temporary repairs to window panes
Buying replacement glass
Removing a broken pane
Installing a replacement window
1. Making temporary repairs to window panes
There are a few simple quick fixes for a broken glass window, making it safe and buying you time to assess the situation more thoroughly, before deciding what longer term repairs are needed.
The simplest fix is using polythene sheeting. Wearing heavy duty gloves, carefully remove any broken glass. Spread the polythene across the pane and secure it with thin wooden battens nailed to the frame.
If the glass is cracked rather than broken, seal it with waterproof glazing tape.
Alternatively, you can use silicone sealant to make your repair more weatherproof.
Carefully remove any broken glass.
Run some silicone sealant around the edge of the window frame.
Cut a piece of plywood board to fit the frame, and press this into the silicone.
Secure the board to the frame with panel pins.
Heavy duty gloves
2. Buying replacement glass
A professional glazier will advise you on the type of glass you need, and they will cut and fit your new window. If you can, take a shard of the old glass so the glazier knows exactly what to recommend.
It’s very important to dispose of broken glass properly. Take care that it’s wrapped and bagged up and labelled “Danger – broken glass”.
To work out how much replacement glass you need, measure the thickness of the window pane to the nearest millimetre. The following thicknesses are for general guidance:
3mm glass for very small panes
4mm glass for windows up to 1m2
6mm glass for larger panes
Measure the height and width of the frame, right into the corners. Check that the window is square by measuring the diagonals, which should match exactly. If your pane isn’t square, make a cardboard template of the pane and take that to the glazier.
3. Removing a broken window pane
Larger windows, or windows on the first floor, will require access via a ladder or scaffolding, plus another person to help you. It’s very important to consult a professional glazier in these instances.
Smaller windows on the ground floor can be replaced more easily. Make sure you wear safety goggles and gloves for this stage, as well as sturdy boots. Spread some newspaper on the floor underneath the window.
Cover any cracks with duct tape, then tap each piece of glass free with a hammer.
Working from the top down, remove any remaining glass by hand, making sure there are no bits left stuck in the putty.
Use a chisel and hammer to take off the old putty, then remove any old glazier’s points or panel pins. If the putty is very hard you may need to soften it first with a heat gun.
Brush away any dust and debris, then clean and sand the frame. Seal the wood with primer paint.
Ladders
4. Installing replacement windows
Always wear protective gloves for this stage, especially when carrying glass. Ask someone else to help you carry any larger panes.
Work from the outside of the window, and make sure your new pane is rested flat on the ground, preferably on newspaper or a cotton dust sheet. Never rest a glass pane directly on concrete.
Knead the putty until it is soft, then work it into the frame, using your thumb to press it in place. When you’ve covered the whole frame, use a putty knife to smooth it out a little.
The glass should rest on a layer of putty about 2mm thick.
Gently push the new pane into place, working from the bottom of the frame. Press around the edges of the glass, never in the middle.
Hold the glass in place with glazier’s points, which are pushed into the window frame.
Apply a second layer of putty on the outside of the glass, using your thumb and a putty knife as before. Make sure the putty covers the glazier’s points.
Make sure the layers on either side of the glass line up with each other and remove any excess putty.
The putty needs about two weeks to harden fully. Then you can paint the wood. When painting the wood, overlap paint from the putty onto the glass by 2-3mm to reinforce a waterproof seal.
Putty knives
How to repair a window
Required skills
Making temporary repairs to a window only requires very basic DIY knowledge
Removing and replacing smaller windows can take time, but it’s relatively straightforward if you work methodically and carefully
Take care when working with glass and always wear protective equipment
Time required
Minimum 1-2 hours
Number of people required
1-2 people depending on the size and type of window
Tools and equipment
Thin wooden battens
Panel pins
Glazier’s points (small metal clips that push into the frame)
Weatherproof glazing tape
Plywood board
Thin brush
Primer paint
Heat gun
Putty
Personal protective equipment (PPE)
Please note: this is a non-exhaustive list; Be sure to match your personal protective equipment to the job at hand.
Putty knives
You may be also interested in these guides
Guide written by:
Rob, Copywriter and Digital Content Creator. Towcester
'/%3E%3C/svg%3E)