How to tile a wall
'/%3E%3C/svg%3E)
Guide written on 6 February 2024 by:
Tess, painting & decorating consultant, Brighton
Important features
- Preparing to tile a wall
- Laying the wall tiles
- Cutting tiles
- Grouting the tiles
Wall tiles for easy care
Wall tiles come in a wide range of colours, patterns and effects to match any style of décor. Extremely hard-wearing, easy to care for, waterproof and heat-resistant, tiles really have it all!
Different tiling options
Natural stone | Porcelain or ceramic | Faience | Mosaic |
Natural stone tiles are very strong and can be formed from a range of materials including granite, marble and slate. That said, you will have a more limited selection in terms of colours and patterns. | Through-body, unglazed porcelain and ceramic tiles are very hard-wearing but can be tricky to clean. Glazed tiles are easier to maintain and come in a wide variety of colours and textures. | Stylish and available in a range of colours, faience tiles can be fragile. | Made up of pieces of glass, stone and ceramic, mosaics can be used to form original shapes and designs. |
Steps
Preparing to tile a wall
Laying the wall tiles
Cutting tiles
Grouting the tiles
Wall tiles
Preparing to tile a wall
Before you start, make sure that your surface is clean, dry and free of any irregularities that could prevent the adhesive from sticking correctly. Remember to protect your furniture and/or the floor using protective sheets.
Start by measuring the height at which you'd like your tiles to start (or end) and mark this out using a pencil.
You can nail a wooden batten to the wall to serve as a horizontal guide for laying the first row of tiles. If required, you can also fix a vertical guide in the same way.
Using a spirit level, check that the wooden batten is absolutely level; this is important as this line will ensure your tiles are aligned correctly. If you are using a vertical guide, check that your batten is plumb.
Use an electric screwdriver or drill to fix your horizontal batten firmly in place on the wall. Do the same with your vertical batten (if required).
Next, prepare your tile adhesive in a bucket following the manufacturer's instructions and mix thoroughly.
Alternatively, you can use a ready-mixed tile adhesive to save time.
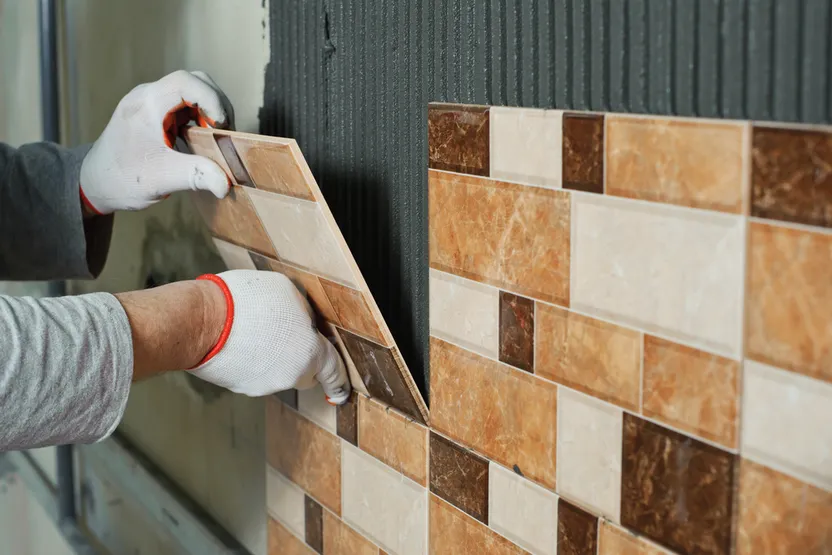
Laying the wall tiles
Using a notched trowel, apply a wide strip of adhesive to the wall.
If you have large tiles, you will have to apply adhesive on the back of the tiles, too: this is called double bonding.
Be sure to check that the adhesive is not spilling over the wooden batten or you will end up with a thick layer of adhesive at the end of your tiles. If this has happened, carefully wipe off any excess using your finger.
Next, install your first tile making sure to check that it lines up perfectly with the batten and push it firmly into place.
Continue to install your tiles one by one by placing spacers between the tiles to ensure they are positioned evenly.
Each time you install a tile, lightly tap over the whole surface using a rubber mallet.
Repeat the process for the next row of tiles and don't forget to install the tile spacers each time. Continue until you reach the last row of tiles.
Once you've installed the last row of tiles, clean off any excess adhesive using a sponge.
Leave the adhesive to dry according to the manufacturer's instructions.
Tiling materials
Cutting the tiles
Mark out your cutting lines directly onto the tiles. Place the tiles on the tile cutter with the line positioned under the blade and cut the tile.
As tile cutters only allow you to cut straight lines, you'll need to use a tile scribe for any curved cuts.
Grouting the tiles
Once the adhesive is completely cured (after about 24 hours), carefully remove the tile spacers using a screwdriver.
Prepare the grout in a bucket by mixing it with water (according to the manufacturer's instructions).
Use a grout float to spread the grout over the entire tiled surface.
Use diagonal strokes and remove excess from the tiles using the spreader tool taking care not to remove any grout from between the tiles.
Once the grout has begun to harden (after around 10 minutes), smooth it down using a damp sponge.
Clean the surface of the tiles using a sponge, rinsing the sponge frequently.
Once the grout has dried, remove any remaining grout from the tiles and polish the surface and edges using a dry cloth.
Unscrew or pry off the wooden battens carefully and there you have it: you've tiled a wall!
Tiling tools
How to tile a wall
Required skills
Taking measurements
Checking lines are level and plumb
Fixing wooden battens
Applying tile adhesive
Installing tile spacers
Laying tiles
Using a tile cutter
Grouting tiles
Smoothing grout
Cleaning tiles
Required time
2 days minimum, including curing time.
Number of people required
1 person.
Tools and equipment
Wooden battens
Cloth
Notched trowel
Tile scribe
Grout spreader
Protective sheets
Personal protective equipment
Protective clothing
Please note: this is a non-exhaustive list; be sure to match your personal protective equipment to the job at hand.
PPE
You may be also interested in these guides
Guide written by:
Tess, painting & decorating consultant, Brighton