How to tile a bathroom wall
'/%3E%3C/svg%3E)
Guide written on 6 February 2024 by:
Kate, Flooring Expert, Swansea
Important features
- Prepare the walls
- Tile the bathroom wall
- Grout the tiles and clean up
Bathroom wall tiles: the advantages
When it comes to flooring, tiles are an ever popular option throughout homes particularly in rooms that have to deal with moisture such as bathrooms and kitchens. This is largely thanks to the technical properties of tiling which makes it the most suitable solution for these situations. Tiles are designed to cope perfectly with water splashing and are really easy to clean.
However, the main advantage of tiling is that it can be used to cover both floors and walls. You can even use the same tiles for your floors and your walls (but bear in mind that porcelain is more hardwearing and a better option for flooring). What's more, the process is pretty much the same whether you are tiling a wall or a floor.
Steps
Prepare the walls
Tile the bathroom wall
Grout the tiles and clean up
1. Prepare the walls
It's important to prep your walls before tiling.
Your surfaces must be flat, cleanly plastered and perfectly even. To start, you'll need to clean your surface well and/or sand it down with some sandpaper. You may even need to replaster the wall first if your surface is very uneven.
It's also a good idea to apply a bonding primer to your surfaces to ensure the tile adhesive can adhere properly.
Mortar
2. Tile your bathroom wall
Once the bonding primer is dry, you can move on to tiling.
Start by working out your starting point. Never start at the top or bottom of a wall.
If required, use a spirit level to fit a batten to the wall to act as a guide to keep your tiles straight.
Prepare your tile adhesive by mixing the powder with water to match the ratios set out by the adhesive manufacturer.
If you don't follow the instructions carefully, the adhesive won't do its job properly, especially if you add too much water. It is not a good idea to try and scrimp on tile adhesive!
Pre-mixed adhesives are available as pastes and work really well for smaller surfaces such as bathrooms.
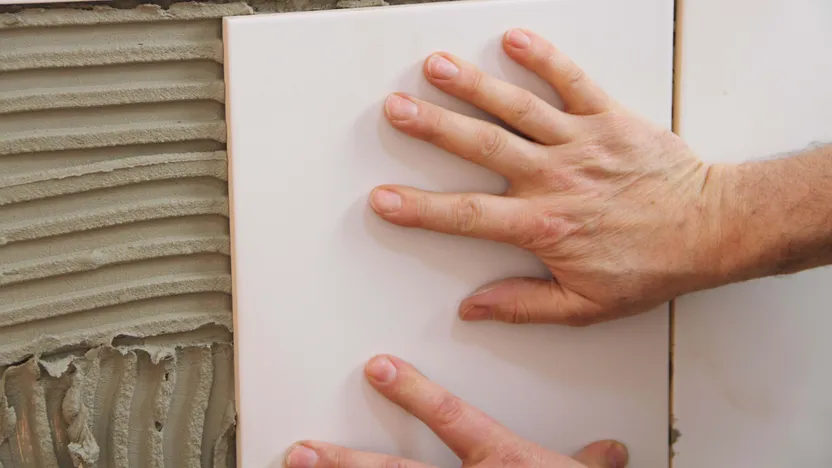
Start applying the tile adhesive above the batten in small sections. Do not attempt to cover the whole wall at once.
Use an adhesive spreader to comb the adhesive. The grooves must be even. If this isn't the case, add more tile adhesive. Depending on the size of your tiles and the type of adhesive you use, you may need to double bond your tiles. If so, apply the same tile adhesive to the backs of your tiles and apply your first tile to the wall.
Tap gently on the tiles with a rubber mallet to make sure they adhere to the surface properly and that they sit level with each other.
Put your second tile in place taking care to use two tile spacers to leave a gap for the grout. The grout line between the tiles must measure at least 2mm.
Repeat the process to tile the rest of your surface placing tile spacers in the corners between each tile. Tiling in this way should mean that all your cut tiles will be placed along the edges of your surfaces on the right and left and top and bottom of the wall. To ensure you make clean cuts, you will need to measure your tiles first and cut them using a manual or electric tile cutter.
Remove the tile spacers when you are finished.
Clean up any excess tile adhesive using a sponge dipped in clean water and leave to dry for 24 hours.
Tile saws and cutters
3. Grout the tiles and clean up
It is essential to grout your tiles – no tiles can be lined up edge to edge. Grouting is essential to give your tiles more stability.
Start by preparing the grout in exactly the same way as you prepared the tile adhesive. Mix the powder with water following the ratios set out by the grout manufacturer.
Apply the mixture using a grout float ensuring that all the gaps are filled. Do not hesitate to use more product than you need before wiping away the excess.
Once all your gaps are filled, go over the entire surface with a damp sponge to remove excess grout from your tiles.
Use a special grout remover to remove any traces of grout haze from the tiles.
This step cannot be skipped under any circumstances! If you fail to clean the tiles properly, the white grout haze will stick to your tiles forever which will not give you a nice finish, especially if you have darker tiles!
Tiling and concrete flooring
How to tile a bathroom wall
Required skills
Tiling a wall isn't a very complicated process and shouldn't pose any great difficulties to DIYers, provided you are able to:
clean a surface properly;
apply a bonding primer and tile adhesive;
put tiles in place;
cut tiles to size using a tile cutter.
Time required
Approx. 4 hours for 10 m² (tiling and grouting) Bear in mind that space is generally limited in the bathroom and you will probably have to cut a lot of tiles.
Number of people required
1 person
Tools and equipment
A straight edge
Battens
Tile cutter
A builder's bucket to prepare the tile adhesive
A mixer to prepare the tile adhesive
An adhesive spreader
A rubber mallet
A spirit level
A sponge
Please note: it is possible to buy tiling kits which can be really handy and stop you forgetting anything!
Safety and workwear
Please note: this is a non-exhaustive list; be sure to match your personal protective equipment to the job at hand.
Sponges
More information
Wall tiles
You may be also interested in these guides
Guide written by:
Kate, Flooring Expert, Swansea
Flooring is my life. I love what I do, and I've been doing it for as long as I can remember. So, I'm not bragging when I tell you I know all there is to know about every flooring product. From laminate, parquet and linoleum to PVC, carpeting and tiling, my workdays are spent learning about manufacturing processes, composition, performance, laying techniques and maintenance methods. I've certainly seen my share of mistakes made on construction sites because of what was essentially a lack of information or understanding of the product. Flooring elements are constantly evolving and being improved upon - even us pros can find it hard to keep up! Some of us in the industry use language that is overly technical or loaded with jargon you'd have to be an expert to understand. What's more, flooring salespeople are often so focused on closing the sale that they don't take the time to explain the products in any detail. That's why I want to pass on my knowledge in a way that's clear and accessible, and maybe a bit fun too. Because flooring shouldn't be a chore!