How to lay outdoor tiles
'/%3E%3C/svg%3E)
Guide written on 6 February 2024 by:
Kate, Flooring Expert, Swansea
Important features
- Preparing concrete to lay outdoor tile
- Laying your exterior tiles
- Grouting your tiles
- Cleaning the grout haze
Laying exterior floor tiles: step by step
This tutorial will show you how to lay tiles over existing concrete. Before you start, ensure that you have chosen a non-slip tile to prevent the tiles from becoming slippery when the patio is wet.
Do not forget to apply a waterproofing membrane to the surface before tiling. Unless your patio is covered, it will be exposed to the elements so be sure to prepare your surface properly. Finally, remember to clean the grout haze from your tiles before the grout is fully cured and check the weather forecast before you get to work!
Steps
Preparing concrete to lay outdoor tile
Laying your exterior tiles
Grouting your tiles
Cleaning the grout haze
1. Preparing concrete to lay outdoor tile
You must allow for a minimum fall of 15 mm per 1.5 metres to prevent water build-up which could cause your tiles to become unstuck. Unless your surface already has the ideal slope, you'll need to screed your surface.
Prepare a timber frame with a fall of 15 mm per 1.5 metres. For this, you'll need timbers, pegs, a hammer and nails, a straight edge, spirit level and tape measure. A timber frame will only be required for levelling out large areas; if you only have a small area to tile, you can try to level out the ground directly using a straight edge and a spirit level.
Place an expansion joint between the timbers and the wall(s).
Prepare the bonding agent by mixing it with the ratio of water as set out by the manufacturer.
At the same time, mix your screed in a cement mixer. The two mixtures must be ready to use at the same time. If you don't have a cement mixer, you can prepare your screed by hand but be prepared for hard work.
Spread your bonding agent evenly over your surface using a paste brush.
Spread a thin layer of screed directly over the bonding agent. The two preparations should mix to ensure a good bond.
You can then lay the rest of your floor screed.
Level the screed as you go using the timbers as your guide (or just your straight edge and spirit level if you haven't set up a screed frame).
Tamp the screed well to finish.
Waterproofing your surface
It is essential to waterproof your new surface using products designed specifically for exterior use. This way, your base will last longer and there will be less risk of your tiles lifting from the surface.
Mix a waterproofing membrane with water according to the product instructions.
Spread a first coat of the membrane using a brush designed for this purpose.
Leave to dry for several hours (according to the manufacturer's instructions) before applying a second coat.
Finally, leave the surface to dry for 24 hours before you lay the tiles.
Don't forget to treat the edge of the screed with the waterproofing membrane.
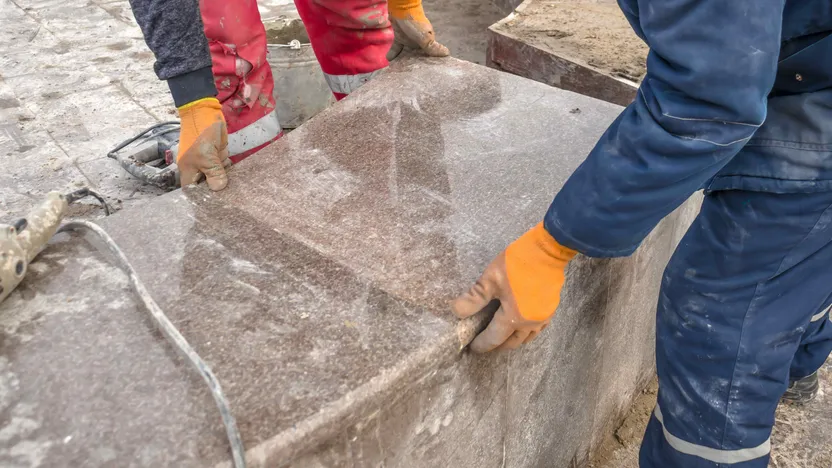
2. Laying your exterior tiles
Once your surface is ready, you can set about laying your tiles using a special tile adhesive. The process is just the same as tiling indoors. However, your tile adhesive must be suitable for outdoor use. Start with a dry run by laying the tiles in place to ensure that your layout is correct and to identify any tiles you need to cut.
Next, prepare the tile adhesive in a bucket by mixing the powder with water to the correct ratio. The tile adhesive must be mixed properly. It is best to use a mixing paddle but you can also mix by hand (using a lot of elbow grease). Alternatively, you can attach a mixing paddle to a drill.
Spread the tile adhesive onto the surface using a notched spreader. These notches are designed to ensure you use the right amount of adhesive.
Paste the back of your first tile. It is important to apply adhesive to both the tile and the surface.
Lay your tiles in your desired pattern making sure to place tile spacers between each tile.
As you work, keep checking to see if your tiles are level.
Use a rubber mallet to fix your tiles in place evenly.
When you're done, remove the tile spacers and clean any adhesive stains using a sponge.
Leave to cure for 24 hours.
Cutting tiles
You won't usually need to cut a lot of tiles when laying exterior tile. However, if you do need to cut some tiles, you can use a manual or powered tile cutter or saw. Outdoor tiles tend to have straight edges making them easy to trim.
If you have to make rounded cuts, you can use:
tile nippers: great for making small or circular cuts.
a circular saw fitted with a tungsten carbide blade: for thin tiles or just a few cuts;
a jigsaw with a special tile-cutting blade: very easy to handle;
an angle grinder with a diamond cutting disc: the fastest option but you will usually have to finish the job with tile nippers, depending on your desired finish.
Please note: any holes made in the middle of tile should be done with a diamond hole saw.
Tiling tools
3. Grouting your tiles
Grouting is an essential step that must be completed about 24 hours after laying your tiles.
A grouting kit provides everything you need to carry out this step.
Prepare the grout by mixing together the correct ratio of grout powder and water to create a uniform paste.
Spread the grout into the spaces between the tiles using a grout float. It's a good idea to go over your work a couple of times to avoid holes.
Work in diagonal motions.
4. Cleaning the grout haze
Cleaning off the grout haze is an essential part of tiling. It must be done just after grouting before the grout has had a chance to dry. Grout haze is easy to clean off when it's wet but will be impossible to remove once cured.
Clean the tiles using a grout sponge. Make sure to wring out the sponge regularly and to clean off all excess grout and haze.
Start by cleaning with water before using a grout haze cleaner to quickly and efficiently remove any remaining residue.
Leave the grout to cure for 24 hours.
How to lay outdoor floor tiles
Required skills
Just about any DIYer should be able to lay tiles. You simply need to know how to screed, use a spirit level, take accurate measurements, follow instructions and cut tiles using a manual or electric tile cutter. You will also have to be able to work on your knees.
Time required
One to several days, depending on the size of the surface you want to tile.
Number of people required
2 people
Tools and equipment
Bucket for mixing grout
Grout powder in your desired colour
Grout haze cleaner
Safety and workwear
Please note: this is a non-exhaustive list; Be sure to match your personal protective equipment to the job at hand.
Safety and workwear
You may be also interested in these guides
Guide written by:
Kate, Flooring Expert, Swansea
Flooring is my life. I love what I do, and I've been doing it for as long as I can remember. So, I'm not bragging when I tell you I know all there is to know about every flooring product. From laminate, parquet and linoleum to PVC, carpeting and tiling, my workdays are spent learning about manufacturing processes, composition, performance, laying techniques and maintenance methods. I've certainly seen my share of mistakes made on construction sites because of what was essentially a lack of information or understanding of the product. Flooring elements are constantly evolving and being improved upon - even us pros can find it hard to keep up! Some of us in the industry use language that is overly technical or loaded with jargon you'd have to be an expert to understand. What's more, flooring salespeople are often so focused on closing the sale that they don't take the time to explain the products in any detail. That's why I want to pass on my knowledge in a way that's clear and accessible, and maybe a bit fun too. Because flooring shouldn't be a chore!