Wall plug buying guide
'/%3E%3C/svg%3E)
Guide written on 6 February 2024 by:
Jeremy, Construction site supervisor, Cardiff
Important features
- Solid materials
- Hollow materials
- Spring toggles
- Chemical fixings
- Diameter
How to choose the right fixings
Wall or ceiling plugs should be selected according to:
the material you are fixing in: whether it is solid (concrete, stone, etc.) or hollow (brick, breeze block, plasterboard, etc.);
size: according to plug type and the weight of load).
Installing a wall plug will almost always require the use of a drill, except when working with plasterboard or in other more specific cases.
Plasterboard fixings
Hollow material fixings
Solid material fixings
Fixings used for hollow materials
What are hollow materials?
Hollow materials are basically any material that is not solid all the way through. The following are examples of hollow materials:
hollow brickwork;
hollow block;
plasterboard / drywall, etc.
Universal wall plugs
Used exclusively for mounting light objects in hollow materials, these plastic wall plugs feature several nylon fins. When screwed into a surface, the fins are contorted before being pressed back against the base material in a tight knot to secure the fixing. These plugs can support weights of 5 to 80 kg. The amount of weight a plug is able to withstand depends on the model, the base material and the number of plugs used. Be sure to check the manufacturer's specifications before purchase.
Self-drilling plugs
Self-drilling plugs are screwed into soft, hollow materials (such as plasterboard) with or without a pilot hole. Also known as self-tapping plugs, these fixings are usually screwed directly into the wall. The fixing is held securely to the base material via the external fixing thread. When the screw is tightened, the outer thread separates slightly from the screw for a more secure hold. The use of self-drilling plugs is generally reserved for lighter loads of 20 kg or less.
Spring toggles
These anchors are mainly used for ceiling installations. Spring toggles consist of a screw and a set of metal wings which are equipped with springs. Once inserted into a hole, the springs work to release the metal wings which then pull flat against the inside face of the surface. The wings then secure the whole fixing as the screw is tightened. The main disadvantage of using spring toggles is that you need to drill a big enough hole for the whole mechanism to pass through the surface material before you can start tightening the screw. These fixings can hold loads of up to 5 kg in plasterboard.
Hollow wall anchors
Well known in the building industry, these fixings are also known as molly plugs. Made from metal, hollow cavity wall anchors feature a screw and a body equipped with contorting fins. The use of a setting tool – also known as a molly setter – is required for these fixings. They can support loads of 20 to 50 kg. Once a hole has been drilled, you just need to insert the whole fixing into the hole (anchor and screw) and crimp the anchor. Crimping causes the wings to spread and pull back against the plasterboard in an umbrella-like shape. Then you simply need to tighten the screw. These fixings are strong and ideal for any fixture mounted on plasterboard.
Self-drilling toggle anchors
These fixings are used exclusively on plasterboard and screw directly into the wall like self-drilling plugs. However, they also feature a toggle that folds back against the wall like a spring toggle. The wing is locked in place when the screw is tightened. These fixings can withstand vertical loads of up to 25 kg and can be installed using just a screwdriver.
Chemical fixings
Chemical fixings involve injecting a resin and hardening agent into a hole to create a highly secure bond. Once the hole has been drilled, the mixture of products is injected into the space using a syringe or an applicator gun. A perforated sleeve is then inserted to encourage the product to spread. This mesh sleeve then fills with product before the stud or bolt is placed inside. The product expands and hardens around the bolt or stud as it cures to create a very strong hold. Chemical fixings are used for heavy loads or installations that may have to deal with some stress.
Chemical fixings
Fixings for solid materials
Solid materials
Solid materials are the same all the way through and do not feature any hollows. Here are a few examples:
concrete;
solid brick;
solid concrete blocks;
stone.
Expansion plugs
Made up of several nylon strips, expansion plugs are designed to be inserted into pre-drilled holes. The strips spread apart as the screw is tightened before coming to lie flat against the contours of the hole to secure the fixing. Expansion plugs can support somewhat heavy loads depending on their size.
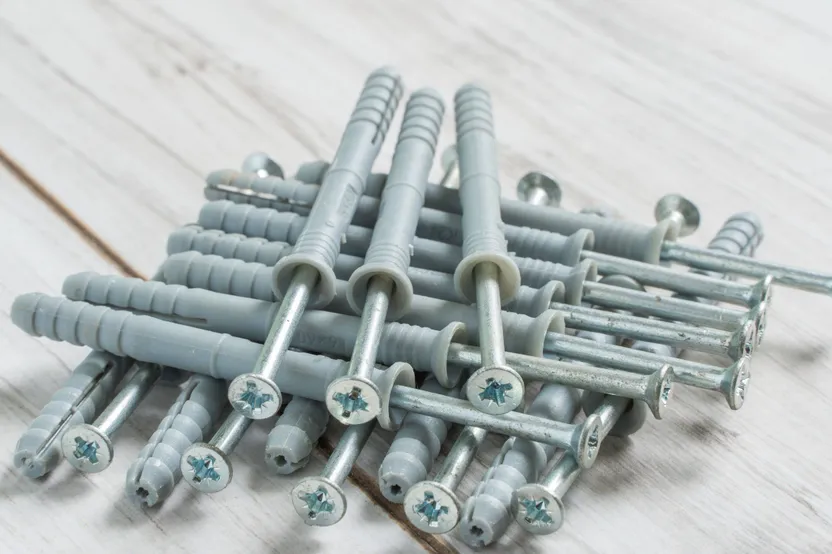
Hammer-in plugs
Comprising a plug and screw in one, hammer-in fixings are simple and fast fixings ideal for tasks like installing skirting boards or various uprights and rails. Once a pilot hole has been drilled, the plug is inserted. A hammer is then used to strike the screw head and secure the fixing to the base material.
Steel bolt anchors
Steel bolt anchors work in the same way as expansion plugs. Used for heavy loads in concrete, these anchors feature a bolt and a nut. Once placed in the hole, the nut is tightened to allow the plug to expand within a pre-drilled hole and create a firm hold inside the material. These fixings are also known as anchor bolts or concrete wedge anchors.
Anchor bolts
Specialist and multipurpose fixings
Lightweight multipurpose plugs
Made of nylon, these wall plugs are suitable for small lightweight fixtures and can be used with most materials. However, they do not have great pull-out resistance and can only withstand very light loads.
Insulation fixings
These fixings are designed for installing insulation and are usually found outdoors. They work just like hammer-in plugs but are mainly used for insulation boards after they have been glued down. They form a bond with the board on one side using a large washer which holds them tightly to the surface on the other side. These plugs are available in various lengths to match the thickness of different insulation panels.
Insulation plugs
Choosing the correct plug size
Depending on the task at hand, there are two main plug characteristics to be considered: diameter and length. These features will help to ensure an effective fastening.
Plug diameter
The diameter of a fixing is directly linked to its mechanical strength once in place. This should therefore be a key consideration when making your choice. Variations in diameter may be grouped into three categories depending on the weight they will have to support:
loads of less than 20 kg: diameter ranges from 3 to 5.5 mm;
loads of 20 kg - 50 kg: diameter of 6 to 8 mm;
loads of >50 kg: diameter of 10 mm+.
Plug length
The length of a wall or ceiling plug will depend on the thickness of the surface you're working with. Pick the longest fixing the diameter will allow. Remember: the longer the fixing, the more secure the fixing.
Fixings and plugs
7 tips for choosing and installing your wall plugs
You may have to use a hammer drill to secure fixings in solid materials. Remember to choose the correct drill bit and to select the right drilling mode according to the material (i.e. normal or hammer mode).
Do not under-calculate length or diameter. Depending on what you plan on installing, poorly fitted fixings can prove dangerous. Using the appropriate plug length and diameter will ensure a durable fitting.
For very heavy fixtures, opt for a chemical fixing. These fixings may be more expensive but the results will be better – and safer!
When working with solid materials, use anchor bolts for the best results.
Do not buy cheap setting tools unless you are dealing with small molly plugs. Otherwise, you are sure to run into problems when crimping.
Always check the maximum weight the plug can withstand before purchase and use multiple anchoring points in hollow materials.
Finally, protect your eyes with goggles and equip yourself with a mask and hearing protection where necessary.
Safety helmets and ear defenders
You may be also interested in these guides
Guide written by:
Jeremy, Construction site supervisor, Cardiff
Electrician by trade, I first worked in industrial estates where I installed, wired and fixed a large number of electrical installations. After this, I managed a team of electricians for this type of work. 10 years or so ago, I turned to building and construction. From the modest family home, to gyms and theatres, I have been able to coordinate, audit and organise all sorts of construction sites. For 4 years now, I am restoring and building an extension to a bungalow in the heart of the Welsh countryside. My experience in manual work and my knowledge means I am proud to be of service. Terraces, interior design, roofing, plumbing, electrics, anything goes! My wife, daughter and I, built almost everything we have from scratch! So to answer all of your questions and advise you on choosing your tools? Easy!