Ceiling paint buying guide
'/%3E%3C/svg%3E)
Guide written on 25 September 2026 by:
Anne, Painter
Important features
- Surface condition
- Finish
- Acrylic or oil-based paint
Best sellers in this category
Assessing the condition of your ceiling
Before launching head-first into the 'painting or repainting your ceiling' project, it's important to properly assess the condition of the surface in order to ensure that it's properly prepared for the application of paint.
New ceiling (plasterboard): all you need is a suitable undercoat (one coat) then a ceiling paint.
Cracked ceiling: fill in the cracks with a powdered or ready-mixed multi-purpose filler then apply a suitable undercoat before finishing with a ceiling paint.
Damaged ceiling: if the paint is flaking, just sand it down, wash it then apply a suitable undercoat before applying your specialist ceiling paint.
Pre-painted ceiling: if it's acrylic paint that's in good condition, a good scrub before applying your paint will suffice. Conversely, if it has already been painted with an oil-based paint and you now want to apply a water-based paint, you will have to either sand and wash the surface then apply a suitable undercoat, or wash and apply a specialist oil-based undercoat.
Proper preparation of the surface guarantees optimal results. Painting over flaking paint, painting on an unsanded or greasy ceiling, painting on a damp ceiling or over crumbly plaster - there's just no point. Rule No. 1, we cannot repeat often enough, is to properly prepare the surface.
Shop our wall and ceiling paint
Acrylic or oil-based paint for ceilings
Oil-based paint
Oil-based paints are more hard-wearing and offer better coverage than acrylic paints. However, they are more harmful to health because they let off more toxic elements (VOCs) and smell more.
Acrylic paint
On the other hand, acrylic paint, known as aqueous paint and also water-based paint, smells very little if at all. It dries much faster and all you need is water to clean your painting equipment, making things much simpler and more environmentally friendly than using white spirits. Acrylics are basically much better for you and the environment.
Best sellers in this category
Ceiling paint finishes - what's best?
The most popular finish for ceilings is still a matt finish. Unlike satin-finish or gloss, matt finishes mask defects and roller marks.
Gloss or satin-finish paints are more washable than matt paints but will highlight any imperfections on your ceiling.
However, you might want to apply a satin-finish to a wood-panelled ceiling because this will bring out the charm of the wood.
Choosing the best colour for a ceiling
The default colour for ceilings is still white, although you can of course apply whichever colour you like!
Be aware that darker shades will make your room darker and give the impression that the room is more cramped and the ceiling is lower than it really is. White is the brightest shade and makes a room seem bigger.
Equipment needed for painting a ceiling
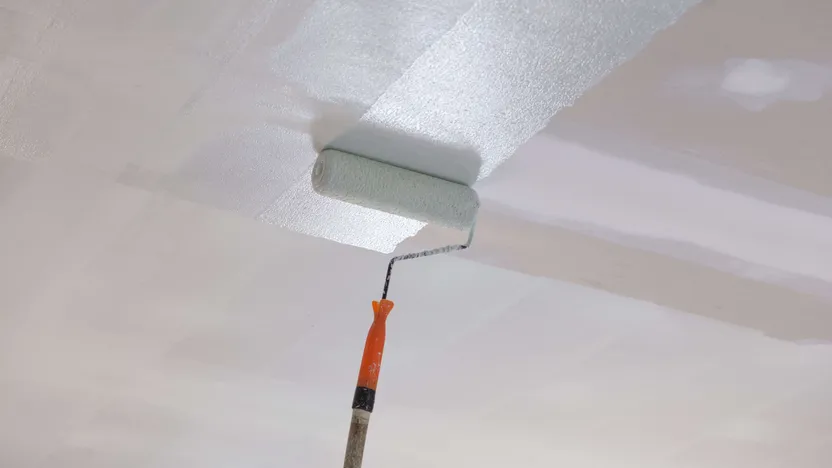
To avoid tiring your arms, you will need to get yourself a telescopic pole! Next up, a good paint roller that's suitable for your ceiling type. You will also need a round brush known as an edging brush to cut in all the corners.
Also arm yourself with good quality masking tape to prevent smudges, protective tarpaulins to protect the floor and furniture in your room, a paint tray to pour your paint into, and a paint grid to squeeze out the roller and to avoid getting drips of paint everywhere. It will also come in handy to have a mixer (manual or one that attaches to a drill) to properly mix your paint.
Additionally, painting overalls, protective goggles and gloves won't go amiss - you never know when there might be small splashes or a little accident.
Buying a good quality paint that offers enhanced coverage is recommended so that you won't need to apply two coats.
6 tips before painting a ceiling
To prevent shedding, try rubbing your roller with sticky tape. This will catch any extra fluff that might shed on the first use, leaving big blobs on your lovely ceiling!
Between coats, store your roller in a plastic bag or cling film so you don't have to wash and dry it before the next coat.
You can use what's known as an 'S-hook' to hang your paint tray on your step-ladder if you aren't using a telescopic pole.
Don't spread the paint too much otherwise it will lose its coverage and you'll have to go over each area several times. Likewise, don't press down hard on the roller - you might cover more but you'll also leave more marks.
Paint at a temperature of between 15 - 25°, otherwise the paint will dry too quickly.
Start at the edges with your round sash brush and work towards the room's light, as this will allow you to see what you've already covered with your paint roller and ensure you don't miss any spots.
Shop our paint rollers
You may be also interested in these guides
Guide written by:
Anne, Painter
After 8 years of trade, I turned professional: I trained myself to be a painter and carpet fitter, either on my own or with 16 year old comrades. 9 months later, following vocational training, I created my company. I’m a self-taught DIYer and decoration enthusiast, I love to find and restore furniture and to create unique decoration pieces. I completed the renovation of my sister’s house with my niece: electrics, tiling, plasterboard...we did it all. And today, if I can share my experience I'm happy to do it. Good Luck.
'/%3E%3C/svg%3E)