Create a life-size wooden dollhouse
'/%3E%3C/svg%3E)
Guide written on 6 February 2024 by:
ManoMano Team,
Materials to make your life size dollhouse
a bookcase with cubes: ideally upcycle it or choose the size that suits your project and your home (here we've chosen a model with 6 cubes for a dollhouse that measures around 1.5 metres, ideal for children aged 5 to 8)
two plywood sheets about 1 cm thick, the same width as your bookcase (the length may vary depending on your bookcase; for a unit with 6 cubes, we've used 600 mm boards)
two angled brackets
a square wood strip measuring around 40 mm long
large rigid cardboard and/or 3 mm MDF board for the back of the dollhouse (factor in both the back of the unit and height of roof you want to add)
a pack of 25 mm screws
two small nuts and 10 mm bolts (the diameter must fit your angled brackets)
wide flat-headed nails
balsa wood boards and rolls of adhesive vinyl (which will serve as floors)
patterned sheets of paper or wallpaper samples (to cover the walls)
white glue and wood glue
drill driver
2 or 3 mm wood drill bit
What material can I use to make miniature furniture for my dollhouse?
Balsa wood! This material is made from the wood of the tree of the same name. Extremely lightweight, it's often used for making models. By choosing a rather thin model (here we used 3 mm-thick balsa boards for furniture), you can cut it with a box cutter.
How to make your DIY dollhouse
Step 1: make the dollhouse roof
Cut a piece of your wood strip the width of the roof and attach the two plywood sheets at right angles to the strip. Add two screws on each side to keep the sheets on the strip.
Step 2: attach the roof to the bookcase
Place the roof on the bookcase, make sure it's centred and use the angled brackets to secure it to the sides of the case on the back of the dollhouse. If the boards you're using for the roof are especially thin, we suggest pre-drilling them using a wood drill bit with a small diameter (2/3 mm).
Locate the bracket holes on the roof and drill a hole using a bit that's wide enough to fit your bolt through. Put the bolt through the wood and bracket and then tighten the nut.
Step 3: add a back to the bookcase
For the back, use MDF, grey cardboard or any other hard cardboard. Just nail it directly onto the wood.
Tip: If you want white walls in the dollhouse, it's easier to paint the back beforehand.
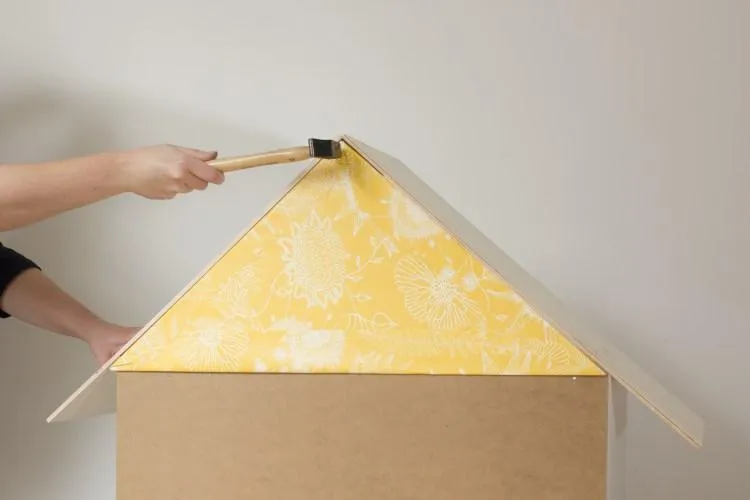
Step 4: add the attic wall
First, use a pencil to draw the shape of the roof on your wood board or rigid cardboard. Cut it out.
Cover with wallpaper or paint before nailing it to the strip at the top of the roof.
Step 5: decorate your wooden dollhouse!
This step is definitely the most fun. First, lay the floors. Use 3 mm balsa boards for parquet, patterned adhesive for vinyl floors or even mosaic for a tiled effect.
For walls, opt for paint or stick on some wallpaper or patterned paper.
If you are champion when it comes to finishes, you can also cut strips of balsa to make baseboards.
Now that everything is ready, you only need to furnish your wooden dollhouse!
You may be also interested in these guides
Guide written by:
ManoMano Team,
ManoMano is the largest marketplace for products and services in the DIY, gardening and home improvement sector in Europe. Together, we are free to invent a sustainable future and committed to build it today. We are hands-on to improve our homes for tomorrow. Bold, from idea to action. Ingenious always & together. Responsible for people & our planet.
'/%3E%3C/svg%3E)