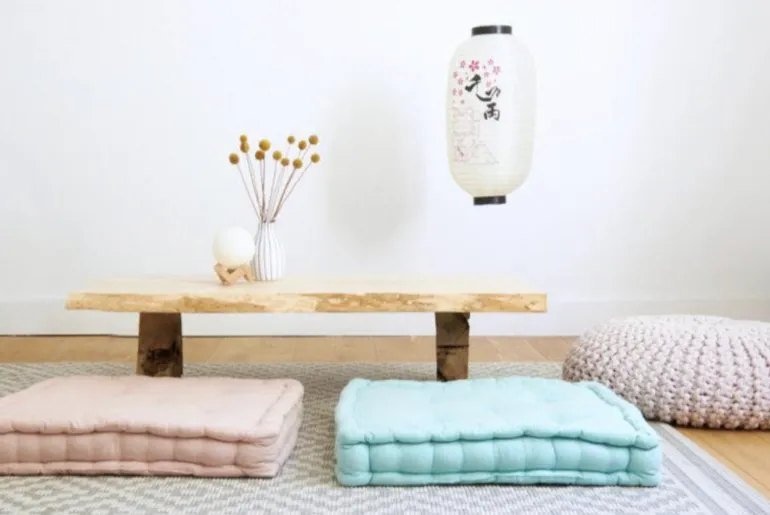
DIY Japandi coffee table: step-by-step tutorial
'/%3E%3C/svg%3E)
Guide written on 6 February 2024 by:
ManoMano
What you’ll need to make DIY Japandi coffee table
To make this Japandi inspired coffee table, you’ll need the following materials:
3 planks of unfinished wood (we’ve used one measuring 110 cm x 30 cm, not planed on one side)
2 cam bolts and fixing dowels
wood glue
3 large clamps (we’ve used 70 cm)
screwdriver
circular saw
sander
drill driver with bits for the cam lock fittings and dowels
Step 1: Glue the tabletop
If you’d like your table to have asymmetrical edges—as pictured here, not planed on one side, but smooth on the other—use the circular saw to cut the entire length of one of the two planks you will be joining together for your tabletop.
Assemble the two planks together before gluing them to check the joint is flush. If this is not the case, you will have to plane the meeting edges before gluing them.
Next, put the glue on the edges of the planks, join them together and fit three clamps on them tightly. Allow your tabletop assembly to dry completely, waiting a minimum of 24 hours.
Step 2: Sand away
Using your circular saw, cut the edges of the table at right angles. Here, we’ve cut our table to measure approximately 110 cm x 60 cm.Next, sand the planks smooth, making sure you remove any traces of glue at the joint.Finally, set your sander at 45° and use it to sand all right angles. This will produce a slightly rounded bevel, known as a chamfer, on the edges of your table for comfort and practicality.
Step 3: Put some legs into it
To make the legs for your coffee table, take the last plank and cut two pieces measuring 30 cm wide. Sand them until smooth.
To join the legs to the tabletop, prepare four cam locks and fix the dowel combinations.This is a common technique for assembling flat-pack furniture with T-joints. It can be done without glue and makes it easier to dismantle and reassemble the legs in the future.
Cam lock and fixing dowel combinations look a lot like nuts and bolts.
On one side of the coffee table leg, mark the location of the cam lock/nut (we’ve placed them 7 cm from the sides). First, drill a blind hole—a hole that does not go through to the other side—to the correct diameter with a milling cutter style drill to insert the cam lock. Next, use a conventional drill bit to drill a hole into this cavity (as pictured). The dimensions for the depth and diameter of the drill bits you must use are determined by the fittings’ manufacturer.
On the tabletop, mark the four assembly points and pre-drill the holes where you will fit the dowels.
Screw the fitting dowels into the tabletop.
The last step involves assembling the legs by inserting the dowels into the holes you’ve created. They should fit easily and you should see the head of the dowel protruding through the blind hole (the larger holes you first drilled). Just like with flat pack furniture assembly, turn the cam lock/nut gently using a screwdriver so that it grips the fitting dowel/bolt.
You may be also interested in these guides
Guide written by:
ManoMano
ManoMano is the largest marketplace for products and services in the DIY, gardening and home improvement sector in Europe. Together, we are free to invent a sustainable future and committed to build it today. We are hands-on to improve our homes for tomorrow. Bold, from idea to action. Ingenious always & together. Responsible for people & our planet.