DIY pallet garden table
'/%3E%3C/svg%3E)
Guide written on 18 September 2026 by:
Mariluz, Blog writer for Bricoydeco
Tools and Materials
To make this DIY pallet garden table we used the following tools and materials:
Reciprocating saw
Mitre saw
Orbital sander and/ or electric planer
Drill and/or manual screwdriver
Pocket hole jig
Screw clamps
Pallets
Fixing brackets
Wood screws
Varnish
Brush
Masking tape
Cost, time and difficulty
The difficulty rating on this DIY project is easy as it can be completed using either manual or power tools. If you decide to complete it using manual tools, then it will of course take longer to finish. In our case, it took us a full day's work using power tools. You should also keep in mind that both the condition the pallets are in, as well as any decoration on the surface, will impact the completion time.
The approximate price of materials is around £20, however this may increase depending on how many different layers of varnish you decide to use.
Step 1: Dismantle the pallet
The first step is to dismantle the pallet using a reciprocating saw or a crowbar. In our case we used a European pallet measuring 120cm long and 80cm wide.
If you use a reciprocating saw, it is important to remember that the blade must be suitable for cutting both wood and metal. Meanwhile, with the crowbar, you should take care when levering to avoid damaging the wood.
Step 2: Sand or plane the pallet boards
The next step is to sand the boards, because pallet wood usually has plenty of imperfections, dampness, splinters, etc. To sand the surface, use an orbital sander.
If the boards are in particularly bad condition then we recommend planing down the surface first before sanding them. By doing so, you’ll save a lot of time when it comes to sanding.
Step 3: Cut the parts
Next, cut the boards using a mitre saw or a handsaw. The parts you need to cut are:
10 planks measuring 45cm long for the table top
2 crossbeams measuring 65cm long and another 2 measuring 43cm, to make the rectangular frame
8 planks measuring 13cm, with one corner cut to a 50º angle, for the legs.
Step 4: Assemble your DIY Pallet Garden Table
Once you have cut the parts, you can assemble your DIY pallet garden table following this order:
Join the crossbeams that form the rectangular structure
Screw on the legs
Attach the planks that make up the table top
4.1.- Rectangular frame
Screw a pair of angle brackets to the 65cm and 43cm long crossbeams, as demonstrated in the following image.
4.2.- Screw on the legs
The legs are formed by two planks joined at a right angle. Each one should have the side partially cut to a 50º angle using the mitre saw. To screw them to the structure, the following steps should be followed:
Use the pocket hole jig to help you drill holes in the planks, making two diagonal holes in each.
Screw one side to the bottom of the table frame.
Screw on the other side to form a right angle, as can be seen in the picture below:
4.3.- Table top
The table top is made up of 45cm long planks which you should screw horizontally onto the table structure.
Step 5: Treat the wood and decorate the table
The next step is to protect and colour the wood with varnish. This type of finish is ideal for deck or outdoor furniture, as it allows the wood to breathe and helps regulate its internal moisture.
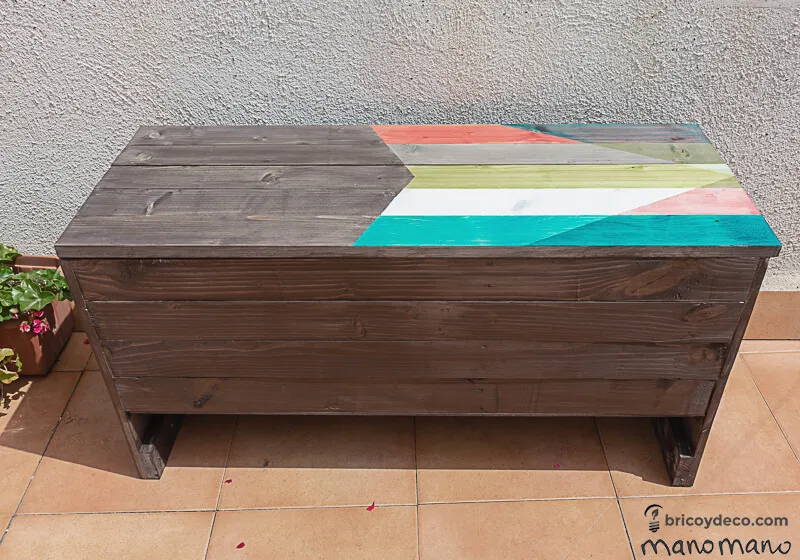
In this example, we have combined dark and bright colours by using masking tape to create a geometric design with triangles in white, turquoise, red, green and grey.
When finished, your DIY Pallet Garden Table made from pallets should look similar to this.
You may be also interested in these guides
Guide written by:
Mariluz, Blog writer for Bricoydeco
This article was written by: Bricoydeco and translated. Mari Luz authors the blog ‘Bricoydeco’, she is a DIY fanatic, lover of recycling and customising furniture. Her passion is giving a second chance to turn once forgotten things into unique pieces!
'/%3E%3C/svg%3E)