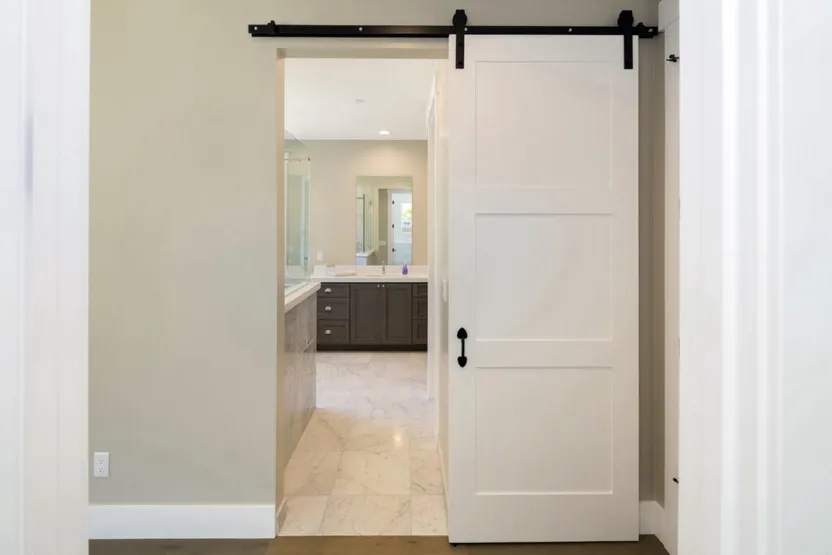
DIY sliding door project
'/%3E%3C/svg%3E)
Guide written on 18 September 2026 by:
Mariluz
DIY sliding door: Tools and materials
Tools you'll need for the door project:
Sabre saw or handsaw
Mitre saw or mitre box
Drill and cordless screwdriver
Clamps
Hammer
Dowelling jig
Adjustable wrench
Pinewood boards measuring 200 x 7 x 2.2 cm, wooden slats measuring 220 x 3.4 x. 3.4 cm and skirting board measuring 200 x 10 x 1 cm
Grab adhesive
Wood screws
Wood preserver
Paintbrush
Cost, duration and difficulty
If you already have most of the necessary tools, the total cost of the materials is approximately £90.
The level of difficulty is medium, as you will need to have some experience using power tools and assembling furniture. If you would prefer an easier option, you can always purchase indoor and sliding doors, ready for installation, on ManoMano.co.uk.
This project will take about 8 or 10 hours from beginning to end, so you will need a full day for your DIY sliding door project.
DIY sliding door from a hinged door tutorial
When turning a door into a DIY sliding door, we have to bear in mind that a hinged door fits right inside the door frame, while a sliding door rests outside the frame. It is for this reason that the sliding door needs to be at least 2 cm wider than the hinged door.
In this particular case, the door opening was bigger than the hinged door that we were recycling (15 cm wider). In addition, the door had glass panels that we wanted to remove. The following are the steps that we followed to make the door wider and give it the look of a barn door.
Step 1 - Remove the door's glass panels
First, we removed the door's mouldings around the glass panels. We cut it with a sabre saw and used a chisel and hammer to remove the mouldings.
You can also use a handsaw rather than the sabre saw, but it will require more strength and time.
Step 2 - Make the door wider
In the next step we made the hinged door wider and covered the central opening with wood.
We cut a few wooden boards measuring 50 x 7 x 2.2 cm with the mitre saw, and then we fixed them with screws onto the inner side of the frame. For this we used a dowelling jig as it allows you to drill oblique holes.In order to widen the door, we screwed a few slats measuring 220 x 3.4 x 3.4 cm to one of its sides, until we reached the desired width. It had to be wide enough to fit the door opening and to prevent the light from coming through. Bear in mind that the screw heads must be flush with the slats to avoid gaps in between them.
Step 3 - Finish the door with wood panelling
Next, we covered the door with wood panelling. This was a good way to hide the different materials that had been used and give it a more uniform look. Plus, we wanted the door to have a distinct and decorative style, that of an old barn door. We applied grab adhesive over the entire surface and then fixed the wood planks to it one by one.
Step 4 - Protect and decorate the wood
In the following step we stained the wood. We used lasur in different tones in order to give it a vintage look. Lasur is not only decorative, it also waterproofs the wood and protects it from UV rays.
For the exterior frame, we used a black water-based enamel matching the sliding door guide that we were going to install.
Step 5 - Install the sliding guide
The last step was to install the sliding guide. These guides are usually made up of the following pieces:
A bar or rail
Nuts, stoppers and bolts
Sliding rollers
Side stoppers
Lower guiding rail
Follow the below installation steps for your DIY sliding door:
Level the sliding guide and mark the spots where the holes are to be drilled on the wall.
Drill the holes and insert the plugs with the help of a hammer.
Screw in the rear stoppers of the guide. This will ensure that it is not flush to the wall. Next, tighten the front nuts with a hex socket or a wrench.
Mark, drill and screw the sliding rollers to the door. Bear in mind that the rollers then have to be inserted into the rail, so you might need a helping hand at this stage to lift the door if it is too heavy.
Insert the side stoppers and tighten them to prevent the door from sliding out of the rail.
Screw the upper stoppers and the lower guiding rail to the floor to keep the door from swaying when you open or close it.
If you follow all the steps above, your new sliding door will be done and ready. It is a far cry from the hinged door that we started with. We have managed to recycle the door and transform it into a great looking sliding door that is both practical and decorative.
You may be also interested in these guides
Guide written by:
Mariluz
This article was written by: Bricoydeco and translated. Mari Luz authors the blog ‘Bricoydeco’, she is a DIY fanatic, lover of recycling and customising furniture. Her passion is giving a second chance to turn once forgotten things into unique pieces!
'/%3E%3C/svg%3E)