How to paint a door
'/%3E%3C/svg%3E)
Guide written on 25 September 2026 by:
Tess, Painting & decorating consultant, Brighton
Important features
- Taking the door off the hinges
- Prepping the door
- Applying paint to the door
- Finishing up and cleaning your space
Best sellers in this category
Repainting a stained or discoloured door
Brilliant white doors will always make a good impression in the home, but you might find yourself needing to topping up your paint job for any number of reasons. For example:
your doors are stained from cigarette smoke, cooking fumes or have simply worn over time.
your children have mistaken your doors for canvases and have drawn all over them;
you have opened and closed your doors with dirty hands over the years and they've gotten stained around the door handle;
your dog or cat claws at your doors or marks them as they try to open them;
you are in full renovation mode and want to make the most of the opportunity to freshen up your doors.
No matter the reason behind your decision, the process of repainting a door is always the same, right down to the paint and tools you use.
Required skills
Painting a door doesn't require any particular skills. You simply need to be able to handle a roller, take the door off the hinges (not always required), protect any surrounding surfaces, choose the right kind of paint and remove the door handle or lock. In short, there's nothing all that complicated about it!
Time required
1 hour minus drying time / 1 full day including drying time.
Number of people required
1 person
Steps
Taking the door off the hinges
Prepping the door
Applying paint to the door
Finishing up and cleaning your space
Tools and equipment
Sandpaper
Edging brush
Roller (120 mm max.)
Painting sheets;
Masking tape
Pair of trestles (optional)
Gloves
1. Taking the door off the hinges
Removing the door from the hinges
To remove the door from the hinges, simply set it at a right angle to the door frame and lift it gently off the hinges. You might need to use a crowbar to apply a bit of leverage as some doors are trickier than others to remove. Wherever possible, get somebody to help you to avoid back ache! Once the door has been removed, set it down on your trestles, making sure to cover the surface with cloth or cardboard to protect the back of the door.
Painting a mounted door
Open the door at a 45° to 90° angle and place painting sheets or newspaper under the door. Place a door stop beneath the door to stop it moving as you work.
Crowbars
Best sellers in this category
2. Prepping the door
It is essential to prepare your door to ensure that your paint adheres properly to the surface. The type of prep required will depend on the state of the door. Remove the handles for a neater finish. Be sure to protect your handles once removed. Protect your walls with masking tape.
Preparing a raw wood door
Lightly sand the door to remove any raised wood fibres. This will also help to clean the door of any dirty marks or stains.
Brush down and dust the door thoroughly.
Next, apply a wood or universal primer to penetrate deep into the wood and help your paint to adhere properly to the surface.
Preparing a varnished or stained door
If the current paintwork is very chipped, you will need to strip the surface as it's no good painting over a surface that's falling off! If the paint is still in fairly good condition, you'll only have to sand and clean the door. From there, you can either apply a universal primer, a renovation paint (a specially formulated water-based paint with added resin or teflon) or an oil-based paint.
Prepping a painted door
More likely than not, your door has already been painted. Doors are painted in to both insulate the home and to make the door appear less imposing. In this case, all you need to do is to clean the door and apply the paint directly to the surface.
Wood primer
3. Applying paint to the door
Once you've protected the surrounding wall with masking tape, paint the door frame using a 18 to 25 mm edging paint brush.
You can use a flat paint brush as long as it's not too wide; otherwise, it will fan out if you press down on it too hard and you'll run the risk of marking areas you don't want to paint.
Start at the top and work your way to the ground using back-and-forth strokes. Don't try to stretch your paint too far; the more you try to drag it around, the more visible the brush strokes will be.
Let the paint dry before applying a second coat.
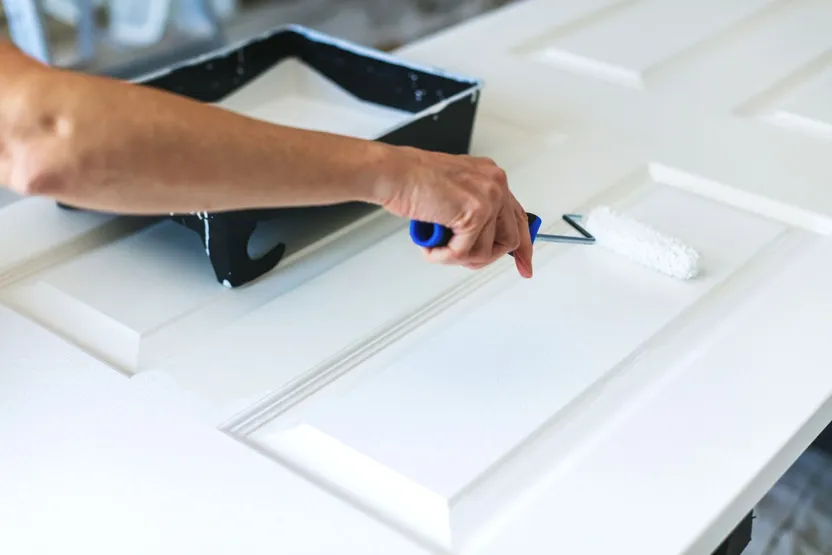
It's best to use a roller to paint the door.
If your door features moulding, start by painting this with an edging brush.
Paint the edges before you move onto the main surface.
Next, use the roller to paint the door from top to bottom. Once again, don't try to use too little paint. Trying to minimise the amount of paint you apply to the roller is sure to be a mistake; you need to find a balance between applying too little and too much paint to avoid paint dripping.
Leave the door to dry.
Before applying the second layer, check the finish of the first layer: if it is neat and tidy, you can proceed. If you can see a lot of brush or roller strokes, sand the surface down lightly to even out your paintwork before you proceed to a second coat.
Shop our paint brushes
4. Finishing up and cleaning your space
Remove the masking tape before the paint dries.
Leave the paint to dry entirely.
Replace the door handles.
Clean your tools and store your paint and equipment.
Clean up your workspace and throw away any rubbish.
And finally, if you're really looking to elevate your décor, why not switch up your door handles while you're at it?
Lever door handles
You may be also interested in these guides
Guide written by:
Tess, Painting & decorating consultant, Brighton
'/%3E%3C/svg%3E)