How to install a trampoline
'/%3E%3C/svg%3E)
Guide written on 6 February 2024 by:
Jérôme, Construction site supervisor, Cardiff
Important features
- Checking your equipment
- Preparing the ground
- Assembling the frame
- Fitting the accessories
Best sellers in this category
Trampolines: take the leap!
It's no secret that kids love jumping around! So why not indulge them with a trampoline? Quick and easy to set up, trampolines come in a range of sizes and models to suit a variety of budgets.
There is nothing terribly complicated about the installation process. Give yourself an hour and a little bit of space, and your little rascals will be jumping for joy all summer long!
Installation steps
Check your equipment and prepare the ground
Assemble the frame
Fit the feet
Fit the jump mat
Attach the frame pad
Install the safety net and poles
Assemble the ladder and shoe net
1. Check your equipment and prepare the ground
Start by unpacking your trampoline kit. Check that all your equipment is present. Next, organise everything you need for assembly. Put the legs to one side and the frame to another. Arrange the jump mat, net and fittings and empty the bags of tools and fixings into a box to avoid losing any parts.
Prepare the ground
It is very important to choose the right location for your trampoline. Firstly, this assures the stability of the structure. Secondly, the right position will secure your installation while guaranteeing a level jumping surface.
Use a spirit level to check that the ground surface is perfectly flat. Fill any irregularities with sand to create a level surface. Some manufacturers recommend digging a trench of around 30 cm in depth to bed down the trampoline legs. This can provide added stability but will require more effort on your part. If you plan on leaving your trampoline in the same place, this can be a good option. Whatever your decision, the most important consideration is making sure the surface beneath your trampoline is flat and stable.
Spirit levels
Best sellers in this category
2. Assemble the frame
The top rail usually consists of several separate tubes which fit together via screws to form a circle. Refer to the installation manual to make sure the parts are assembled correctly. The screws should be well tightened. You should end up with a perfectly circular tube. This is an important step as it will determine the stability of the whole structure.
3. Fit the feet
Trampoline feet usually come in a U shape. They are made up of one or several parts that connect just like the top rail. Once you have assembled all the feet, simply insert them into the right slots by following the manufacturer's instructions. Screw them tightly and make sure they are securely in place.
4. Fit the jump mat
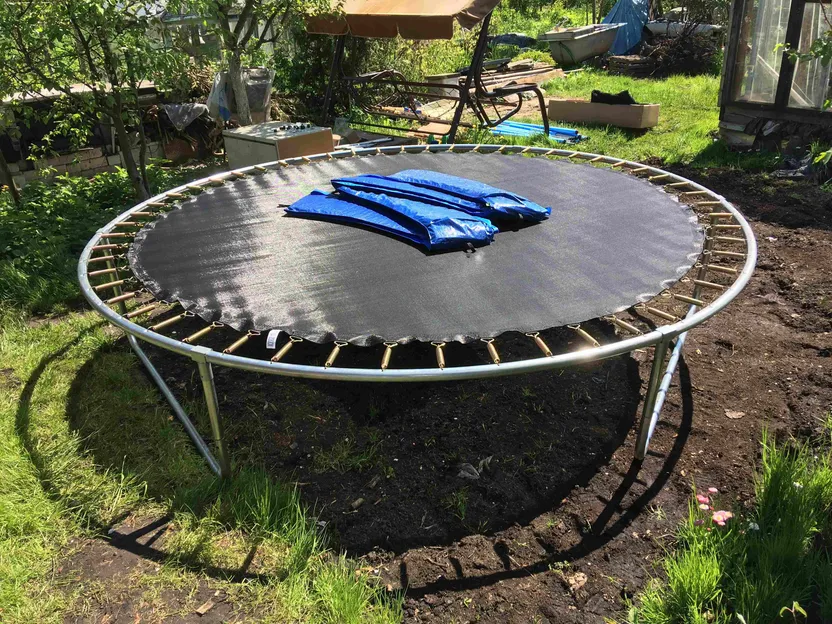
By this point, the frame should be fully assembled. The top rail features pre-drilled holes that are evenly spaced out. These holes are designed to incorporate the springs which hold the jump mat in place. Start by attaching the springs all the way round the top rail making sure they are the right way round (check in the manual if necessary). Once all the springs are in place, attach the jump mat to opposite ends of the top rail. Proceed to attach the mat on one side, then the other. This will ensure that the canvas is both well-centred on the frame and sufficiently taut.
5. Attach the frame pad
You will notice at this point in the installation process that there is a potentially dangerous gap between the top rail and the jump mat around the edge of the trampoline. For user safety, it is recommended to install padding all around the mat to fill in this space and to cover up the springs. This pad simply unfolds around the mat and attaches underneath (check the user manual to see the attaching method).
Trampoline safety pads
6. Install the safety net and poles
User safety on the trampoline is ensured by a safety net enclosure. The net is wrapped around a set of poles that are connected to the trampoline frame. These poles generally come in two parts: top and bottom poles. Start by attaching the bottom parts to the frame (they usually they screw into the legs). Next, insert the top parts into the net (via the sleeves provided). Then connect the top poles to the corresponding bottom poles, and roll the net down to the jump mat.
High-end trampolines often come with a second top rail to be fitted to the top of the poles. If this is the case for your trampoline, assemble this just like the top rail and connect it to the poles before rolling down the net.
Trampoline safety pads
7. Assemble the ladder and shoe net
Assembling a ladder
Assemble the ladder following the instructions in the user manual. This will be positioned in front of the gap in the safety net. The ladder is an important part as it allows easy access to the trampoline when in position and prevents use when it is removed.
Installing the shoe net
Some models come with a built-in shoe net. However, it goes without saying that you have to take your shoes off before you get on the trampoline! This handy net attaches to the frame behind the ladder and gives you somewhere to place your shoes without having to keep them on the ground.
Shop our trampoline accessories
What you need to install a trampoline
Required skills
Know how to assemble parts by following an instruction manual.
Know how to use hand tools, such as screwdrivers, spanners, shovel etc.
Time required
2 hours
Number of people required
1 person
Tools and equipment
Hammer
Screwdriver
Spanner
Pliers
Shovel
Straight edge
Wheelbarrow
Sand
Safety and workwear
Protective clothing
Please note: this is a non-exhaustive list; be sure to match your personal protective equipment to the job at hand.
Shop our safety shoes
More information
For more information on trampolines, trampoline accessories and outdoor games, check out our other guides:
For more information on outdoor games and play equipment, check out our other guides:
Pool toys buying guide
Swimming inflatables and armbands buying guide
Outdoor play equipment buying guide
You may be also interested in these guides
Guide written by:
Jérôme, Construction site supervisor, Cardiff
Electrician by trade, I first worked in industrial estates where I installed, wired and fixed a large number of electrical installations. After this, I managed a team of electricians for this type of work. 10 years or so ago, I turned to building and construction. From the modest family home, to gyms and theatres, I have been able to coordinate, audit and organise all sorts of construction sites. For 4 years now, I am restoring and building an extension to a bungalow in the heart of the Welsh countryside. My experience in manual work and my knowledge means I am proud to be of service. Terraces, interior design, roofing, plumbing, electrics, anything goes! My wife, daughter and I, built almost everything we have from scratch! So to answer all of your questions and advise you on choosing your tools? Easy!
'/%3E%3C/svg%3E)