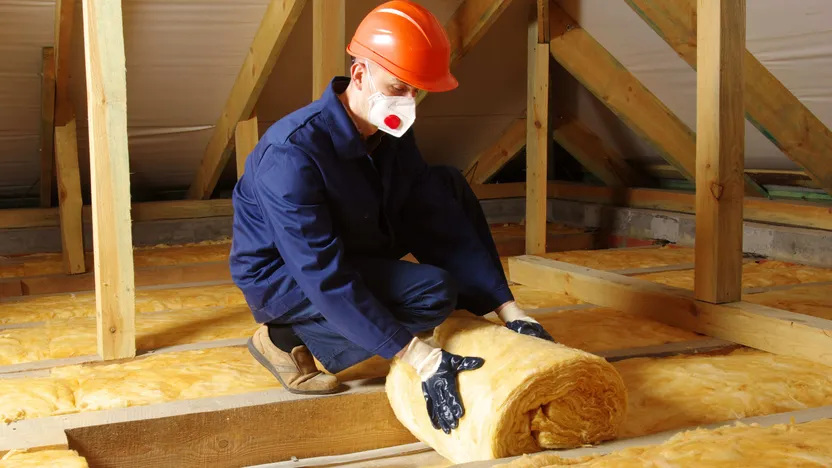
How to insulate a loft
'/%3E%3C/svg%3E)
Guide written on 25 September 2026 by:
Jérôme, Construction site supervisor, Cardiff
Important features
- Prepare the loft for insulation
- Lay the vapour membrane
- Laying mineral wool insulation over a floor
- Laying mineral wool insulation between joists
Best sellers in this category
Insulating a cold loft for comfort and savings
If you want to protect your home from excessive heat in summer and make savings on your heating in winter, you need to ensure that your loft space is well insulated. A 'cold' roof or loft refers to an unused loft space where the insulation is fitted below the roof structure itself. Good insulation should help to limit any resonating noise and provide excellent acoustic insulation.
Ideally, you should fit a cold loft with thermal acoustic insulation. In this guide, we will set out all the steps to follow on the basis that your loft is accessible and that it is able to support your weight as you work.
If this is the case, then fitting high-quality insulation should be straightforward since you simply need to lay out the mineral wool panels or roll. Otherwise, you may have to call in specialists who will usually open up part of your ceiling to pump in blown-in insulation.
Steps
Prepare the loft for insulation
Lay the vapour membrane
Laying mineral wool insulation over a floor
Laying mineral wool insulation between joists
Shop our insulation
1. Prepare the loft for insulation
The first step involves cleaning up and preparing all the different elements and materials you'll need to lay the insulation. Use a broom or industrial vacuum cleaner to remove all traces of dust. The area surrounding the surface you want to insulate must be clean and dry up to a height of at least 15cm from the ground.
The surrounding walls must be in good condition as sealant or sealant-adhesive won't adhere well to crumbling or brittle surfaces like old mortar. Use a wire brush to scrape the walls to create a rough surface for the product to adhere to. Finish off by cleaning up any debris.
If you've created a lot of dust, spray down your surfaces with water. Wait until the surfaces are fully dry before moving on to the next step.
Shop our all-purpose glues
Best sellers in this category
2. Lay the vapour membrane
Now that your surface is clean, dry and the surrounding areas have been cleaned, you can set about fitting the vapour barrier.
A vapour barrier is a damp-proof membrane used to create a perfect seal between the surface you want to insulate and the rest of the loft. This should prevent condensation from the home rising into the roof which would end up degrading the insulating materials.
Fitting a vapour barrier over a floor
Start by unrolling one strip of vapour barrier on the ground ensuring it overlaps the walls or surrounding surfaces by about 15cm on each side. Take care to fold the membrane neatly in the corners.
Lay out the rest of your strips ensuring that they overlap by about 10cm.
Once the whole surface is covered by the vapour barrier, you'll have to seal the strips together. To ensure the strips do not become unstuck over time or through exposure to moisture, be sure to use a special sealing tape.
Smooth it down well with your hand as you apply it to ensure there are no folds or bubbles in the tape.
Once the vapour barrier is sealed properly, you will have to adhere it to the surrounding surfaces. To do so, apply a thick bead (around 8 to 10mm) of mastic or adhesive sealant to the walls at a maximum height of 5cm from the ground. Make sure you use plenty of product in the corners.
Then, simply put the vapour barrier back in place and press it gently against the mastic or adhesive, taking care not to squeeze down too hard. There mustn't be any folds or air bubbles between the vapour barrier and the adhesive.
Fitting a vapour barrier over joists
If you do not have a floor in place over your joists, the vapour barrier will be fitted slightly differently. In this case, the strips of vapour barrier must be fitted parallel to the joists.
Lay the first strip between the wall and the first joist ensuring that it overlaps the wall by 15cm.
Ensure the material is folded around the joist neatly and cover the first joist.
You can then proceed to laying the rest of the strips, ensuring they overlap by about 10cm. Ensure that your joins occur between the joists and not on top of the joists themselves. If necessary, make the overlaps wider – this will only help to improve the seal.
Ensure that the material is folded tightly at the base and around each joint so that the vapour barrier is pressed as neatly as possible against the joists. If the vapour barrier isn't flattening against the joists, you can staple it into place. To ensure that the vapour barrier doesn't tear around the staples, cover each staple with a bead of glue to seal.
Connect the strips of vapour barrier using sealing tape. There mustn't be any folds of air bubbles beneath the tape.
Now that your vapour barrier is sealed correctly, you can adhere it to the surrounding surfaces using mastic or adhesive sealant following the process outlined above.
Waterproofing tape
3. Laying mineral wool insulation over a floor
Generally speaking, 300mm mineral wool will provide high-quality insulation for any type of building. However, you can double up on this thickness with two layers of insulation provided the floor of the loft can cope with the weight.
If possible, choose mineral wool with Kraft paper facing. Used alongside the vapour barrier, this will make it harder for moisture to penetrate the insulation. Sold in rolls or panels, mineral wool requires a bit of time to reinflate once removed from the packaging. You can shake it out gently to help it regain its thickness.
The insulation should be fitted with the Kraft paper side down over the vapour barrier. Unroll or lay the panels to form a strip of insulation widthways along the loft. If you have to make any cuts, measure then add about 2cm to your measurements before cutting using a handsaw or a special mineral wool knife.
Be sure to protect the floor when cutting the insulation to avoid damaging the vapour barrier. Do not leave any gap between the mineral wool and the surrounding surfaces. Continue laying strips of insulation until the entire loft is covered. For even better performance, you can add a second layer of insulation over the first making sure the strips are properly lined up.
4. Laying mineral wool insulation between joists
If you are fitting insulation over joists, the process will be a bit different. It is best to lay two layers of mineral wool in this case: the first will lie between the joists and the second will cover the entire surface.
For the first layer, try to use insulation panels that match the width and height of the gaps between the joists as closely as possible. This will make the process much quicker as you won't have to make as many cuts.
Place your panels between each joist ensuring there is no space between the insulation and the surrounding walls nor between the insulation and the joists.
Fill all the gaps between the joists. Next, lay a second layer of mineral wool perpendicular to the joists.
Cover the entire surface with this layer.
Blown-in insulation
Blown-in insulation is an increasingly common option for lofts. More cost-effective and quicker to install, this type of insulation is blown into place using a blower and can be formed of a variety of materials including mineral glass, rock wool or cellulose. The performance of the insulation (usually provided as a U value) depends on the thickness and type of the material used. It is possible to rent a blower to insulate the loft yourself. The tubes required can stretch up to 100 feet and the insulation itself is sold in bags of about 15 to 20 kg.
How to insulate a loft
Required skills
Lofts are often tricky spaces to navigate so you will need to be in fairly good shape in order to access the roof space. You will also need to be able to work on your knees or crouching down for several hours. You'll also need to be able to handle the mineral wool which comes in rolls or panels. It is light but can be awkward to carry.
Time required
3 to 4 hours per 10 m2
Number of people required
1 person
Tools and equipment
Tape measure, pencil, scissors
Mastic or adhesive sealant
Vapour barrier and mineral wool (in rolls or panels)
Personal protective equipment (PPE)
Face mask
Work clothes
Please note: this is a non-exhaustive list; Be sure to match your personal protective equipment to the job at hand.
Shop our insulation
More information
Like water heating systems, ventilation and other heating systems, loft insulation is part of a wider process to make your home more energy effficient and reduce energy consumption and greenhouse gas emissions from buildings.
You may be also interested in these guides
Guide written by:
Jérôme, Construction site supervisor, Cardiff
Electrician by trade, I first worked in industrial estates where I installed, wired and fixed a large number of electrical installations. After this, I managed a team of electricians for this type of work. 10 years or so ago, I turned to building and construction. From the modest family home, to gyms and theatres, I have been able to coordinate, audit and organise all sorts of construction sites. For 4 years now, I am restoring and building an extension to a bungalow in the heart of the Welsh countryside. My experience in manual work and my knowledge means I am proud to be of service. Terraces, interior design, roofing, plumbing, electrics, anything goes! My wife, daughter and I, built almost everything we have from scratch! So to answer all of your questions and advise you on choosing your tools? Easy!
'/%3E%3C/svg%3E)