How to paint plastic
'/%3E%3C/svg%3E)
Guide written on 6 February 2024 by:
Anne, Painter, Cambridge
Important features
- Preparing your surface: cleaning and sanding
- Applying a plastic primer
- Applying a plastic paint
- Cleaning your equipment and removing tape
Different types of paint for painting plastic
Want to paint your plastic furniture but not sure if it'll work? It goes without saying that if you don't choose the right paint and fail to prepare your surface properly, your paint is sure to peel over time.
In fact, PVC and other types of plastic are some of the hardest materials to paint and this is due to their composition; plastic surfaces are smooth and non-porous which makes them particularly non-adherent. However, there are a few different solutions. Firstly, you'll have to prepare your surface carefully using a special primer for plastic and, secondly, you must choose a special type of paint designed to stick to plastic surfaces. Here are a few examples of the options available.
Spray paints
Almost all spray paints are able to adhere to plastic and this option is handy for small objects or irregular shapes which may be hard to tackle with a roller. Spray paints will also help you achieve a perfectly even result as long as you know how to use them. The only downside of spray paint is that it'll only cover about 1 to 2 m² per can so you'll have to set aside a fairly hefty budget.
Primers for painting plastic
Using a primer is the safest solution and this type of product can be used on a range of different surfaces. What's more, if you start with a primer, you can usually paint over your surface with any type of top coat. A plastic primer can also often be used on other hard-to-paint surfaces such as glass, laminate or melamine.
Special plastic paints
Applying a special plastic paint is the quickest solution as it allows you to skip the priming stage. These paints are only improving over time and those found today usually offer an impressive level of adherence, excellent coverage and are very straightforward to clean.
Steps
Preparing your surface: cleaning and sanding
Applying a plastic primer
Applying a plastic paint
Cleaning your equipment and removing tape
Required skills
You don't need to be a skilled painter and decorator to paint plastic. A good read of the primer and paint instructions is usually all you need. If you want to use a spray can, simply take your time and go over your surface a few times without overloading it with paint to avoid drips.
However, this tutorial tackles the most durable technique: a plastic primer followed by paint. We'll take you through the steps to painting a PVC window frame, but bear in mind that our advice can be applied to most plastic objects.
Time required
30 minutes to an hour, minus drying time.
Number of people required
1 person
Tools and equipment
Fine grit sandpaper (120 to 240)
Sponge and brush
Pre-paint cleaner
Acetone and cloth
Paint brush and roller
Painting sheets, masking tape and newspaper
Personal protective equipment (PPE)
Respiratory protection
Painting overalls
Please note: this is a non-exhaustive list; be sure to match your personal protective equipment to the job at hand.
Masking tape
1. Preparing your surface: sanding and cleaning
Your surface should be lightly sanded to remove any dirt or impurities. Use a fine grit sandpaper to prevent scratches showing through your paint. If you're battling stubborn dirt, you can start with a coarser sandpaper but be sure to finish with a finer grit.
Once you've finished sanding, it's time to clean! This step is important for removing any remaining dirt, but also any greasy spots. You mustn't forget this step as it is imperative if you want your paint to adhere properly. Grab a basin or bucket, some water, a mild cleaner, a sponge and brush, and get scrubbing!
Make sure you rinse your surface thoroughly so you don't leave behind any streaky marks. Leave the surface to dry out fully. You might want to carry out this step the night before you plan to paint to ensure that your surface is completely dry.
Optional step: to make sure you've removed all traces of grease or oil, you can rub your surface with a cloth soaked in acetone before you proceed to painting. Acetone is able to degrease and dry out a surface all at once so you can apply your paint immediately afterwards. Be sure to wear a mask when handling this chemical. Next, you can move onto protecting any surrounding surfaces that you don't want to paint using masking tape and newspaper.
Buckets
2. Applying a plastic primer
Your surface should now be ready for your primer or undercoat. It is essential to use a primer designed specifically for use on PVC or other plastics. If you've chosen a universal primer, be careful: not all of these products adhere to PVC.
No matter where you're working, cover up the floor to save you the hassle of cleaning later on and protect yourself with gloves, a mask, goggles and paint overalls. Pour a little primer into your paint tray and use a brush to tackle the edges or any spot the roller can't reach. Finish by covering the whole surface with the roller. Leave the primer to dry before applying your paint.
Masks
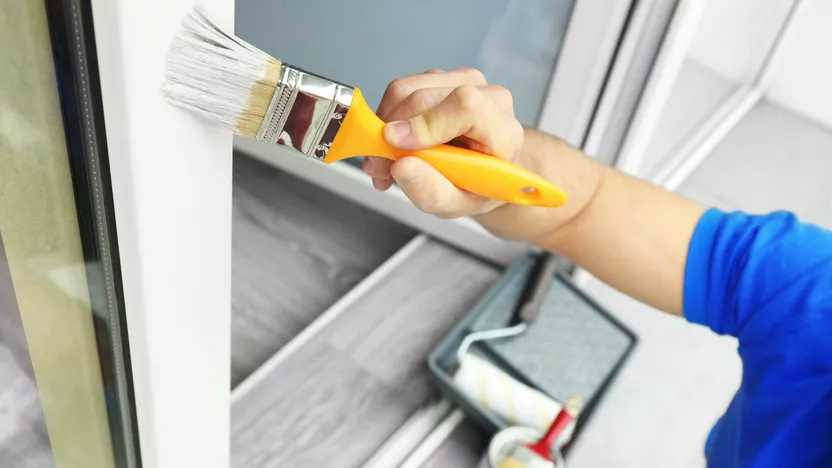
3. Applying a plastic paint
You choice of paint will depend on your own needs and preferences; for example you might need a paint that is suitable for outdoor use and able to stand up to weathering. You'll also have to pick a finish (glossy, satin, etc.). In terms of application, the same rules apply here: start with a brush and finish off using a roller. Pay close attention to drying times and wait before applying a second coat.
Paint brushes
4. Cleaning your equipment and removing tape
Once you're done painting, all that's left to do is ensure your paint can is firmly closed before you move onto removing your newspaper and masking tape. If you have accidentally gotten paint on the window itself, clean it off carefully. Clean your brushes thoroughly and store your equipment.
You may be also interested in these guides
Guide written by:
Anne, Painter, Cambridge
After 8 years of trade, I turned professional: I trained myself to be a painter and carpet fitter, either on my own or with 16 year old comrades. 9 months later, following vocational training, I created my company. I’m a self-taught DIYer and decoration enthusiast, I love to find and restore furniture and to create unique decoration pieces. I completed the renovation of my sister’s house with my niece: electrics, tiling, plasterboard...we did it all. And today, if I can share my experience I'm happy to do it. Good Luck.