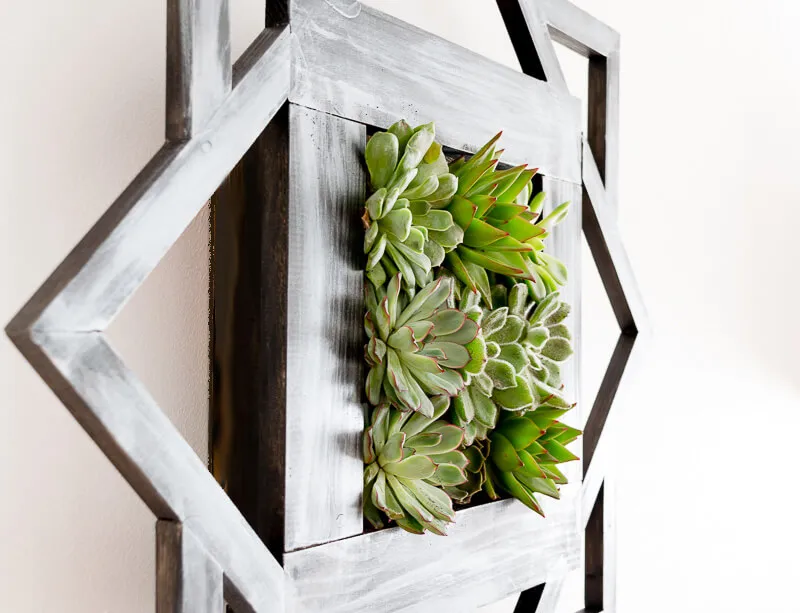
DIY vertical garden
'/%3E%3C/svg%3E)
Guide written on 6 February 2024 by:
ManoMano
What you'll need
To do this DIY project you will need the following tools:
Mitre box
Saw
Hammer
Staple gun
Scissors
Painter's tape
Wood Glue
In addition, these materials will be needed:
2 x Wooden slats of 69 x 18 x 230 mm
2 x Wooden slats of 69 x 18 x 365 mm
8 x Wooden strips of 27 x 18 x 225 mm
8 x Wooden strips of 27 x 18 x 165 mm
Wooden back piece
Fixing brackets
Screws
Paint
Net
Tray and seedbed
Plants!
We've put together a basket of the things you'll need to make this project.
Cost, time and difficulty
The cost for materials for this project, excluding tools, should come to under £50. In terms of time, the gluing aspect of construction means you'll have to take some breaks for drying time. Check your packet for specifics, but we'd recommend at least 12 hours.
In terms of difficulty, we'd put this as totally doable for beginners... we believe in you! Give it a shot! And whether you turn your with a planter like this one or a pile of wood and soil, remember you'll learn something from each attempt, and we are here to console you at any setback!
Step 1
Firstly, cut your wood to size, using the saw and miter block. You should have four pieces, sized 69 × 18 mm. These four pieces now need to be attached together, using wood glue and flat square brackets.
Tip: to make your work neat, remove the excess glue with a babywipe upon application. You can then secure painter's tape around the area to act as a clamp.
Step 2
Next, cut the ends of your 8 smaller strips at a 45° angle. Start with the slightly larger, 225mm pieces, and glue them together in pairs. Leave for a little time to set, and then attach these pairs to your main frame. After this, complete the same process for your slightly smaller strips, using them to 'bridge' the gaps between the ones you first glued.
Step 3
Now we need to create a structure to hold our soil and plants. Attach boards around the inside three sides of your frame, using angled brackets. This will create a box, which you can then staple mesh around. The mesh will be the front of your planter, and will keep your plants in place. Place your final piece of wood about an inch away from the other three. This is so it can collect surplus water. Once this is done, nail the back of your board in place.
Step 4
Paint or varnish your piece, and get creative! The technique used here shows a combination of black and silver chalk paint.
Step 5
When everything is dry and set, take a tray and fit this inside your planter. You can fill your tray with soil either before or after insertion. Use scissors to cut away parts of the netting, only cutting as much as you need to to fit the root of the plant into the planter.
Now all that's left is to hang your planter up! Leave the open part at the top, to facilitate irrigation while also allowing space for you to water the plants.
Succulents require minimal attention, but they do need watering every once in a while! Place your planter somewhere sunny, and consider adding some fine gravel to the bottom of the tray to help drainage of your vertical garden.
You may be also interested in these guides
Guide written by:
ManoMano
ManoMano is the largest marketplace for products and services in the DIY, gardening and home improvement sector in Europe. Together, we are free to invent a sustainable future and committed to build it today. We are hands-on to improve our homes for tomorrow. Bold, from idea to action. Ingenious always & together. Responsible for people & our planet.