How to install electric fencing
'/%3E%3C/svg%3E)
Guide written on 6 February 2024 by:
John, Passionate gardener, Cambridge
Important features
- Electric fence length
- Driving posts
- Insulators and wires
- Type of animal
- Voltage and power
- Earthing
Best sellers in this category
Electric fencing: protect your outdoor space
As outlined above, electric fences are recommended for anyone who wants to protect their animals from predators like cats or foxes or for those hoping to create an effective pen for their animals on a budget without having to carry out any major building work. Electric fences provide a great alternative to regular fencing for protecting chicken coops, penning in horses, containing cows in a field and so on.
Steps
Mapping out a fence
Install the electric fence posts
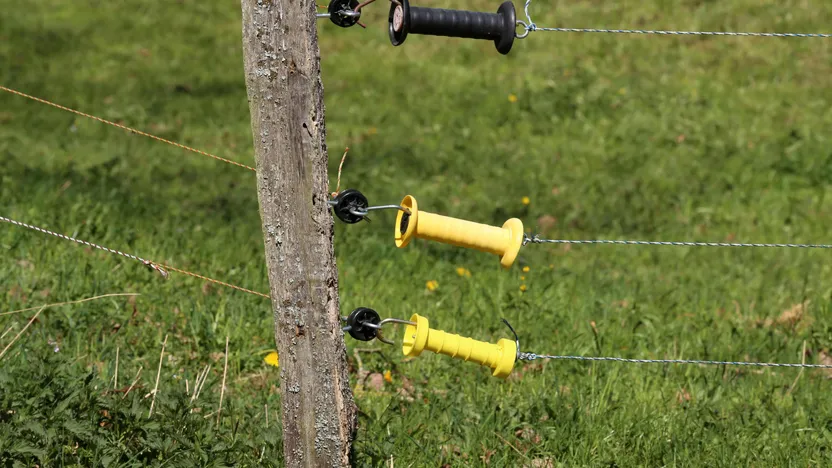
Fit the isolators to the posts
Feed the conductor wire or tape to the isolators
Install the energiser
Test the electric fence
Install warning signs
Garden augers
1. Map out the fence
Map out the perimeter of the fence on paper or directly on the ground.
Determine the number of wire or tape strands that will make up the fence depending on the types of animals you have.
Use this information to calculate the overall length of conductor required. If you are using electric fence netting, you will only need to determine the overall length required.
Calculate the number of fence posts required.
Electric fence posts, netting and rope
Best sellers in this category
2. Install the electric fence posts
If you feel it necessary, use a chalk line to mark out straight lines on the ground. Start by installing the corner posts. For large enclosures, you will need to reinforce each corner post, as well as the gate posts, by using braces or post anchors, or by cementing the posts.
You can then install posts between your corner posts. The distance between the posts varies depending on the types of conductor and post used, and the environment. Generally speaking, you should space the posts out as follows:
3 metres for 40mm tape;
5 metres for 20mm tape;
6 to 8 metres for wire;
10 to 40 metres if you are using a special alloy wire such as high tensile wire (in this case, follow the manufacturer's guidance).
Drive the posts down into the ground to at least a third of their overall length. Corner posts, in particular, must be very well anchored.
Please note: a post hole digger or digging bar can be used to pre-dig the holes to simplify the task.
Cementing the posts
3. Fit the isolators to the posts
Fit the insulators at the correct height indicated for the type of animal you want to contain.
Animal | Number of wires | Wire height |
Dairy cows | 2 | 60 cm - 90 cm |
Other cattle | 3 | 40 cm - 70 cm - 100 cm |
Ponies and small horses | 2 | 50 cm and 110 cm |
Horses | 2 or 3 | 80 cm and 140 cm |
Donkeys | 2 | 70 – 120 cm |
Sheet | 4 | 20 - 40 - 60 - 90 cm |
Goats | 5 | 25 - 45 - 60 - 80 - 100 cm |
Chickens | 4 | 20 - 30 - 50 - 80 cm |
Rabbits | 4 | 10 – 20 - 35 - 50 cm |
Large dogs | 3 | 25 - 50 - 85 cm |
Small dogs and cats | 3 or 4 | 10 - 20 - 40 - 60 cm |
Pigs | 2 or 3 | 20 - 45 - 70 cm |
Deer | 5 | 20 – 70 – 100 – 125 - 150 cm |
Energisers, conductors and insulators
4. Feed the conductor wire or tape to the insulators
Insulators can be used to block tape from one post to another for better tension.
If you have to link two lengths of tape use connectors designed for this purpose.
Be sure to plan out an entry point for the enclosure. An insulated handle fitted with a hook can be used to create a simple entrance point to enter and exit the enclosure.
When the entrance is open, the electric current flow is cut off and the fence is no longer electrified. If you want to keep the fence electrified when the gate is open, you can bury insulated wire between the two gate posts.
5. Install the energiser
Pick a sheltered spot to install your energiser near an power outlet or in a sunny spot if you have a solar-powered fence.
Earthing the fence
Earthing the fence is essential and this step must be carried out with care. The fence must have its own earthing system and should be at least 20 metres away from any other earth installations. Wherever possible, choose a moist spot for better conductivity. Drive the earth rod into the ground leaving 5 to 10 cm above ground level. Adjust the grounding rod to the energiser. Ideally, the length in metres of the earth rod should match the number of joules of output indicated on the energiser.
For example, a 3 joule (J) energiser requires 3 metres of earth rod. This can be achieved by connecting several grounding rods together using a high voltage insulated cable buried to a depth of around 10 cm. It is recommended to space out the earth rods at a distance of 3 metres.
Please note: the installation of a surge protector is recommended to make the system safer.
Connecting the energiser
Connect the earth rod to the 'earth' terminal (the - terminal) using ordinary 2.5mm insulated wire. Connect the + terminal to the fencing wire.
Energisers, conductors and insulators
6. Test the electric fence
It's important to check that the electric fence functions properly. To do so, proceed as follows:
Turn on the energiser.
Test that the fence is earthed properly. The easiest way to to so – if you want to avoid the unpleasant experience of actually touching the earth wires – is to use an electric fence tester.
A voltmeter can be used to test the conductors to check that the electricity current is flowing properly. Ensure you have at least 3000 volts over the entire length of the fence. For more resistant animals, like sheep, a minimum voltage of 4000 V is recommended.
Please note: excessive moisture or vegetation can lead to current losses which will mean lower voltage.
7. Install warning signs
If part of your fence runs along a public path, it is obligatory to hang warning signs every 50 metres to alert passers-by to the presence of the fence.
Road signs
How to install an electric fence
Required skills
Installing an electric fence isn't all that dissimilar to installing an ordinary fence – except you will also have to assemble the energiser, insulators and one or several insulated handles. No particular skills are required. However, you do need to be in good shape to drive the posts into the ground or use a garden auger to do so. Being able to check your posts are square and to follow instructions are the only other skills required to complete this outdoor task. Depending on the layout of the fence and the types of posts used, you may also have to mix cement.
Time required
Depends on length of fence
Number of people required
1 person (or 2 people to simplify the task)
Tools and equipment
an energiser;
tape or wire;
insulators;
clamps;
insulated handle;
earthing rod;
power cable;
fence posts;
warning sign(s).
Electric fence kit containing:
Digging bar
Post hole digger (to match the posts)
If cementing is required:
Building kit with builder's bucket or concrete mixer (depending on volume required), trowel and shovel
Wheelbarrow
Cement, sand, water
Farming equipment
You may be also interested in these guides
Guide written by:
John, Passionate gardener, Cambridge
When I was young, I was already working in the family garden. Perhaps that is where my interest in plants and gardening came from. So, it was logical for me to study plant biology. At the request of various publishers I have, over twenty-five years, written many books on the subject of plants and mushrooms (a subject that is close to my heart). They were mostly identification guides at first, but shortly after they were about gardening, thus renewing the first passion of my childhood. I have also regularly collaborated with several magazines specialising in the field of gardening or more generally in nature. There is no gardener without a garden, I have cultivated mine in a small corner of Cambridge for the last thirty years and this is where I put into practice the methods of cultivation that will I advise you in as well.
'/%3E%3C/svg%3E)