How to put up a fence
'/%3E%3C/svg%3E)
Guide written on 6 February 2024 by:
Rob, Copywriter and Digital Content Creator. Towcester
Important features
- Planning
- Marking out
- Putting up fence posts
- Cutting fence panels
- Putting up fence panels
Putting up a garden fence
This guide concentrates on installing a wooden panel fence, presuming that you will be digging out soil for post holes.
Wooden fence panels with wooden posts
Fence posts secured into the ground using concrete
Includes gravel boards
If you don’t want to use concrete to fix the posts, you can use metal post supports instead. Post supports are particularly good if your fence runs across a solid surface such as a patio or decking. They can be fixed directly onto the surface. Post supports can also be used in softer ground by digging out post holes first.
Steps
Planning your garden fence
Marking out where the fence will go
Putting up the fence posts
Cutting the fence panels
Putting up the fence panels
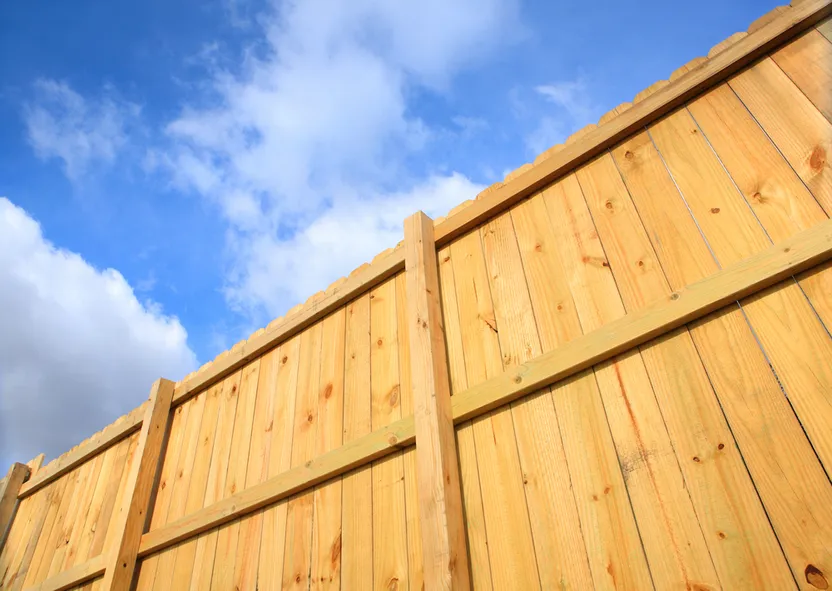
Wooden fencing
1. Planning your garden fence
You need to plan exactly where your fence will go and where the post holes will be. Some of the main points to consider are:
If your fence marks a property boundary, it’s best to discuss your plans with your neighbours. Check your property deeds if an existing fence needs to be removed first.
You don’t need planning permission to erect a fence less than 2m high.
You may need planning permission if your fence borders a public footpath or bridleway. Check with your local planning authority.
Installing a garden fence is a two-person job. Always wear the right safety gear, such as steel toe-capped boots, and protective gloves and goggles.
The best time of year to install a garden fence is in early spring or late autumn, when soil health is best, and any plants you disturb have the best chance to recover. In winter, the ground will be too wet or cold.
Always use treated wood and exterior grade screws to prevent premature rotting and rusting. Even if you are installing a pressure-treated fence panel it should be raised a minimum of 50mm above the ground to help prevent rotting. You can attach gravel boards to fill the gap underneath the panel. Treat the base of each fence post with wood preservative before you use them.
Wood preservative
2. Marking out where the fence will go
Use a CAT (Cable Avoidance Tool) detector to scan for underground pipes and cables before you start. If you find any cables, you may need to change your plans and relocate your fence. Remove any rocks and debris from the area, and carefully dig out any shrubs or plants so they can be replanted afterwards.
Use string to mark out where your fence line will be. Most fence panels are sold in a standard 183cm wide size, but other sizes are available. Carefully measure and mark where each post will sit and mark the spot with a peg or bamboo cane.
Make sure to mark the centre of each post hole. For example, if you are using 1.83m wide fence panels and your posts are 100mm wide, the centres of the posts will be 1.93m apart.
When choosing and cutting your fence posts, make sure they are long enough to accommodate the height of a fence panel, the gap for the gravel board, and the depth they need to be underground.
Dig out all your post holes. A hole depth of 450mm and width of 300mm is usually enough. If the ground is a bit soft though, you might need to dig deeper to accommodate a longer post.
Fence posts
3. Putting up the fence posts
Now you’ve completed the preparation, it’s time to put the fence posts up.
Add a small amount of pea gravel or shingle to the bottom of the first hole. This helps secure the post and improves drainage.
Place the first post into the hole. Screw two timber battens into the post to provide temporary support so the post stays secure in its position.
Use a spirit level to make sure the post is vertically level.
You can mix concrete fresh but it’s easier to use pre-mixed concrete. Following the manufacturer’s instructions, add the pre-mixed concrete into the post hole. Make sure the fence post stays level as you add the concrete.
The concrete should end up just above ground level. Use a trowel to smooth its surface. Try to create a little slope going away from the post on all sides. This ensures water run-off.
Once the concrete has set, remove the timber supports.
Repeat this process to erect the last post in the line. Then run a piece of string or builder’s line between the first and last posts. This string acts as a guide for your fence line.
Repeat this process for the other fence posts. As you go along, check each post is vertical and the same height. Lay a piece of timber across the top of two consecutive posts and use a spirit level to check the posts are level. If necessary, trim the tops of the posts down so they are all the same height.
4. Cutting the fence panels
At some point you will probably need to cut a fence panel to fit a required space. Fencing is rarely exactly the same length as a complete set of panels.
Measure out the section you need and mark the panel with a saw line.
Remove the framing battens (the vertical struts on the panel) from one end of the panel. Re-attach one along the saw line to form the new panel edge. Re-position the other battens as required.
Saw the panel flush with the outer edge of the re-positioned edge batten.
Wooden fencing
5. Putting up the fence panels
Before erecting the fence panels, you can install gravel boards first to help prevent the fence panels from becoming damp and decayed over time.
To fit gravel boards, leave a 150mm gap underneath the panels.
Measure this gap and mark the posts accordingly.
Measure and cut a 25mm thick piece of treated timber as your first gravel board.
Fix the board to the posts using an L-bracket at the base of each fence post. Use 20mm screws to secure the board.
You can fix the fence panels to the fence posts by using galvanised nails hammered in at an angle, but this guide concentrates on using fence clips.
To fit the first panel, mark out on the posts where you want to position the fence brackets. The best positions for the brackets are 150mm from the top and bottom of where the fence panel will sit.
Secure the brackets to the post with 35mm external grade screws.
Carefully slide the fence panel into position. You will need someone else to help you do this.
Once you’re happy with the fit, secure the panel to the fence bracket with 35mm external grade screws.
Finish off the fence posts by fitting them with caps. Post caps not only look neat, but they also help prevent the posts from water damage.
Apply a silicone-based sealant to the underside of the cap.
Nail or screw the post cap into place.
If you’re fencing a sloping site, you still need to keep the fence panels horizontal and level. Fill the angled gap underneath each panel by cutting a gravel board to size and fixing to the posts with L-brackets.
Fence brackets
How to put up a fence
Required skills
Putting up a garden fence requires moderate DIY experience:
Planning and visualising your project effectively
Measuring and cutting accurately
Digging ground to accurate measurements and a level finish
Comfortable with mixing and pouring concrete
Time required
1-3 days depending on the size of your fence
Number of people required
2 people
Tools and equipment
Wooden posts and post caps
Timber for gravel boards and temporary post supports
Pea shingle or gravel
Builder’s line or string
Pegs or bamboo canes
Exterior grade screws
CAT detector
Power drill and/or screwdriver
Trowel
Claw hammer
Nails
L-brackets
Fence clips or U-brackets
Silicone sealant
Personal protective equipment (PPE)
Please note: this is a non-exhaustive list; Be sure to match your personal protective equipment to the job at hand.
Saws
You may be also interested in these guides
Guide written by:
Rob, Copywriter and Digital Content Creator. Towcester