How to install a walk in shower tray
'/%3E%3C/svg%3E)
Guide written on 6 February 2024 by:
Jeremy, Construction site supervisor, Cardiff
Important features
- Preparing the surface
- Installing the shower tray
- Glueing the shower tray
- Finishing touches
Installing a walk in shower tray
The trickiest part of setting up a walk in shower tray is strpping the surface of where it will be installed. This involves cutting out a space in the floor to accommodate the shower tray, as well as the shower waste and drain pipe, before using mortar to create a perfectly level surface. Once this has dried, you'll then need to set up the drainage system and install the tray itself; these final steps should be fairly straightforward.
Steps
Preparing the surface
Positioning the shower tray
Fitting the shower tray
Finishing touches to your shower tray
Shower wastes
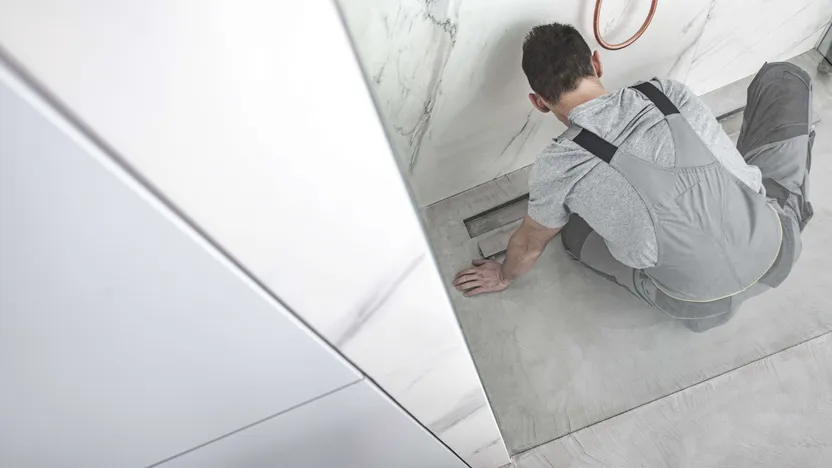
1. Prepare the surface
Strip the surface
You should take out enough flooring to accommodate the size of the shower tray and the necessary supporting elements.
You should go deep enough to allow a slope of about 5% for the shower waste kit, allowing enough space for the mortar and the depth of the shower tray itself.
Install the shower waste kit
Take precise measurements of the position of the plughole or outlet of your shower tray.
Factor this in when stripping out the flooring.
Put the drainage components in place and connect to the outflow pipe. Generally all the components will be made of PVC and assembled by glue.
Once the glue has dried on your drainage assembly, test the seal by letting some water flow into the shower waste.
The waste system needs to be held in a cavity underneath the tray, with enough space to work around the shower waste for any potential future repairs. There are two options:
Dig deeper than would be necessary for the shower tray alone in order to create an open space for the shower waste kit. You can then build a special support frame for the pipes and waste kit.
Cut a special channel in the floor material to accommodate the shower waste.
Lay the shower tray base
Once you've created the cavity for your shower waste, lay the base for your shower tray (typically either a resin-based mortar, or a specialist waterproof mixture). The surface should be perfectly flat and level.
You must also check the height between the base and the original floor level. The gap should correspond precisely to the depth of your shower tray.
Allow the base to dry.
2. Position the shower tray
Once the mortar is dry, you can position the tray.
Check that it's perfectly level and is in contact with the layer of grout across its entire surface. Check that the plughole is well lined up with the drainage system below it and connect it to the waste.
Test the seal again with the tray in place. Once this is done, disconnect and remove the tray in preparation for the final assembly.
3. Fit the tray
Stick the tray down using a specialised silicone glue applied with a sealant gun.
Apply the glue evenly across the surface of the tray (in parallel lines around 40 mm apart and ending 15 mm from the edge).
Since this is where you will permanently secure the shower tray, make sure you connect the plughole and shower waste correctly.
Apply even pressure across the tray when glueing and check that it's level using your spirit level.
Spirit levels
4. Finishing touches to your shower tray
Wet room shower trays
The assembly should be allowed to dry completely before you start tiling. The important thing here is to create a watertight seal at every joint.
Since tile grouting becomes porous over time, this seal tends to lose its watertightness. For best results, you can always use a waterproof resin base (which will increase the hold of your tiles).
Create a silicone seal around the walk in shower tray
Once the assembly is completely dry, create a final silicone seal all the way around the shower tray using a sealant gun.
Smooth the joint with your fingers and soapy water for a smoother finish.
Protect the walls around the shower tray
Whether you're renovating or building from scratch, you've got a choice of wall tiles, panels, walk in shower wall cladding, mosaic, waxed concrete...
Whatever you choose, the material needs to be made watertight, either through preparing the surface or installing cladding.
Silicone sealants
What you need to install a walk in shower tray
Required skills
Installing a shower tray requires a few basic building and plumbing skills:
cutting;
mixing and applying mortar;
application;
measuring the gradient and surface level;
connecting PVC drain pipes;
installing a waste system;
assembling parts, etc.
Time required
6 hours
Number of people required
1 person
Tools and equipment
Circular saw with a diamond blade (for cutting through concrete) or angle grinder (with the right blade for the material you're cutting)
Mortar, resin, mastic
Trowels
Mixing paddle or mixer attachment for a drill
PVC adhesive
Pilers and screwdriver
Rubber or wooden mallet, or hammer
Silicone adhesive in gun cartridge
Bricks or wooden planks
PPE
Face mask
Ear defenders
Work clothes or overalls
Please note: this is a non-exhaustive list; be sure to match your personal protective equipment to the job at hand.
You may be also interested in these guides
Guide written by:
Jeremy, Construction site supervisor, Cardiff
Electrician by trade, I first worked in industrial estates where I installed, wired and fixed a large number of electrical installations. After this, I managed a team of electricians for this type of work. 10 years or so ago, I turned to building and construction. From the modest family home, to gyms and theatres, I have been able to coordinate, audit and organise all sorts of construction sites. For 4 years now, I am restoring and building an extension to a bungalow in the heart of the Welsh countryside. My experience in manual work and my knowledge means I am proud to be of service. Terraces, interior design, roofing, plumbing, electrics, anything goes! My wife, daughter and I, built almost everything we have from scratch! So to answer all of your questions and advise you on choosing your tools? Easy!