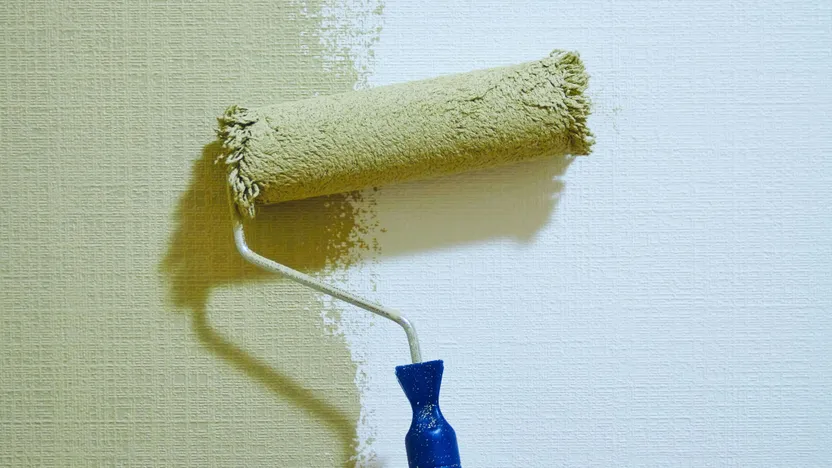
How to paint over wallpaper
'/%3E%3C/svg%3E)
Guide written on 6 February 2024 by:
Anne, Painter
Important features
- Choose a suitable paint for wallpaper
- Evaluate the condition of the wallpaper
- Dust and wash the wallpaper
- Apply masking tape
- Apply the paint
Best sellers in this category
Painting over wallpaper – it is possible!
Painting over existing wallpaper is a really quick way to make over a room. Not only will the process save you time, you'll also save money! It might surprise you to hear that the majority of modern paints are designed to paint over most surfaces provided that the surface is in good condition.
Stuck with an outdated wallpaper from the '70s? A lick of paint can be a low-cost and quick way to deal with the problem. In fact, you will save about two days on average compared to repapering the walls. While it is always preferable to start with a clean and fresh surface, if your wallpaper is up to the task, we say why not!
If you're looking to avoid re-wallpapering, it is essential to choose the right type of paint as well as the right tools. Removing old wallpaper can uncover all sorts of unpleasant surprises from badly plastered walls to glue marks that are impossible to remove. You can avoid a lot of work by simply applying a fresh coat of paint!
Steps
Choose a suitable paint for wallpaper
Evaluate the condition of the wallpaper
Dust and clean the walls
Apply masking tape
Apply the paint
Roller extension poles
Painting over wallpaper
Best sellers in this category
1. Choose a suitable paint for wallpaper
You can't cover wallpaper with just any kind of paint. To prevent spoiling the wallpaper, it is strongly recommended to apply water-based paint except when dealing with vinyl wallpaper. Vinyl wallpapers are coated with plastic and have a slippier surface than traditional paper. If you have a vinyl wallpaper, it is best to use an oil-based paint for better adherence.
Water-based paint boasts the added advantages of being better for the environment and relatively odourless. Please note that dark or patterned wallpapers will require more than one coat of paint for good coverage.
2. Evaluate the condition of the wallpaper
Before you get stuck into painting, take care to check the condition of the wallpaper you hope to repaint. If the wallpaper is in good condition – meaning there are no tears or areas of peeling – you can go right ahead to the next step.
If the wallpaper is coming away in spots, it is highly recommended to re-glue these parts. There are special touch-up pastes designed to be applied directly behind wallpaper if you have large areas of unstuck paper.
If the area is too small to apply the adhesive using a paint brush, it is possible to purchase small syringes of adhesive to inject wallpaper paste directly through the paper. If the strip is completely torn, it is highly recommended to change it before painting.
Shop our paint brushes
3. Dust and clean the walls
Start by vacuuming the walls to remove any traces of dust. If your wallpaper is not washable, you should probably stop there in terms of cleaning though you can try to clean gently using a damp sponge or cloth.
If your wallpaper is washable, clean using a mild cleaner such as soapy water or a water-vinegar solution. Be careful not to wet the wallpaper too much and to rinse the soap properly. For more effective cleaning, be sure to clean from top to bottom to prevent water dripping on any spots you have already cleaned.
4. Apply masking tape
To ensure your paint doesn't bleed over to the next wall or onto a bright white ceiling, it may be necessary to apply masking tape on the wall and ceiling as well as around any doors or windows.
You may also want to remove socket or switch covers or cover them up using masking tape. It's best to use a special wallpaper tape or a tape designed for delicate surfaces to avoid damaging the paper. Remove any furniture or cover it up and place it in a corner of the room where it won't get in the way. Use dust sheets to protect the furniture. Lay dust sheets or tarp on the ground to prevent marking the floor with paint splashes.
Tarpaulin sheets
5. Apply the paint
Once your walls are clean and any areas or items you don't want to paint are protected, you can start applying your paint or undercoat. It's a good idea to apply a universal undercoat first to saturate the wallpaper so it will absorb less of your top coat. As undercoats are less expensive than regular paint, you will save the equivalent of a coat of paint. Additionally, if your wallpaper is textured, the undercoat will help to cover up the pattern a little better. Then, proceed as follows:
Once your undercoat is dry, start by tackling edges and corners. Use a round brush to apply paint to the corners of the room and cut in the paint where the walls meet the ceiling. Do not attempt to paint all of these surfaces first – simply start in these areas as you work your way along the wall.
Use a roller to paint the rest of the wall working from left to right (if you are right-handed) and top to bottom in areas of around 1 m².
You should overlap your roller strokes to ensure the nap gets into the whole surface. This is especially important when painting over wallpaper since most feature some texture.
You may have to use a step ladder or a roller extension pole to reach the top of the walls.
Apply a second coat if necessary.
Once your second coat has been applied:
Remove the masking tape before the paint has the chance to dry fully.
Next, clean your tools and work space.
Leave the walls to dry and air out the room.
How to paint over wallpaper
Required skills
There's nothing very complicated about getting stuck into this job! Being able to apply masking tape, choose the right paint, cut in paint and use a roller are the only skills required. You should also take steps to cover electric sockets and switches.
Time required
Approx. 3 hours for a 12 m² room per coat of paint.
Number of people required
1 person
Tools and equipment
Special wallpaper masking tape (designed to prevent damage to wallpaper when removed)
Dust sheets
Paint roller (with medium to long nap depending on the wallpaper texture)
Step ladder or roller extension pole
Safety and workwear
Be sure to match your protective equipment to the job at hand.
Wallpaper and wallpaper borders
More information on decorating
You may be also interested in these guides
Guide written by:
Anne, Painter
After 8 years of trade, I turned professional: I trained myself to be a painter and carpet fitter, either on my own or with 16 year old comrades. 9 months later, following vocational training, I created my company. I’m a self-taught DIYer and decoration enthusiast, I love to find and restore furniture and to create unique decoration pieces. I completed the renovation of my sister’s house with my niece: electrics, tiling, plasterboard...we did it all. And today, if I can share my experience I'm happy to do it. Good Luck.
'/%3E%3C/svg%3E)