How to waterproof a wetroom
'/%3E%3C/svg%3E)
Guide written on 6 February 2024 by:
Kate, Flooring Expert, Swansea
Important features
- Apply the tanking primer
- Apply the tanking tape
- Apply the tanking compound
Tanking a wet area: a mandatory step
Tiling is often the ideal solution for kitchens and bathrooms, and can be used to cover both floors and walls. However, contrary to what you might think, tiles are not entirely waterproof.
In order to protect your substrate from water infiltration, you must waterproof the surface before you start. This process is known as tanking. If you fail to waterproof beneath the tiles, water can damage the surface causing the tile adhesive to deteriorate over time. This may even cause your tiles to come away from the surface.
Any area that is subjected to frequent water contact must be tanked, according to the standard BS 5385-1:2018. This includes wet rooms, the walls in shower cubicles and the walls surrounding a shower over bath.
To do so, you should use a tanking system and follow the manufacturer's instructions to the letter. This guide deals with a paint-on tanking solution but it is also possible to use tile backer boards. Be sure to follow each step carefully.
Steps
Apply a water tanking primer
Apply the tanking tank
Apply the tanking compound
Floor primer
1. Apply the tanking primer
Before starting, you must prepare the surface properly. The surface must be clean, smooth, dry and free from all grease and other contaminants.
Next, apply the tanking primer. All manufacturers call for the application of a primer designed to prepare the substrate and allow the tanking solution to adhere properly.
Please note: tanking primer is usually blue in colour. This allows you to see where you are applying the primer but the colour should fade as the primer dries.
Tanking primer comes as a ready-mixed solution and should be applied undiluted. Apply the primer to the entire surface that will be exposed to water from ceiling to floor. Use a roller to apply the primer to both the wet area and any surrounding area that will have to withstand splashing. If the manufacturer advises applying two coats, apply the first one vertically and the second coat horizontally. Otherwise, apply one coat and overlap your roller strokes. Follow the manufacturer's instructions regarding drying times.
Surface preparation
2. Apply the tanking tape
It is now time to apply tanking tape to any corners, edges or any other area where water tends to infiltrate more easily. It is important to provide these areas with extra protection to ensure the surface is perfectly watertight. This includes any corners, skirting boards, the waste outlet or the area surrounding pipes.
Use a wide paintbrush to apply a tanking compound to these areas. Just like when painting, it is important to apply the compound to the corners first. Cut your tanking tape to the correct size by measuring it against these surfaces.
Please note: if you buy a tanking kit, the tape should be supplied. Otherwise, you will have to buy the tape separately. This tape is usually made of fibreglass and is designed to be cut to size using scissors or a utility blade. It is also possible to find pre-made corner tape or special mats to use around drains or pipes for easier application.
Be sure to work out the areas you need to apply the tape in advance to ensure you have enough. Place the tape directly over the compound and smooth down the tape to remove all air bubbles. Apply a second layer of compound to cover up the tape.
3. Apply the tanking compound
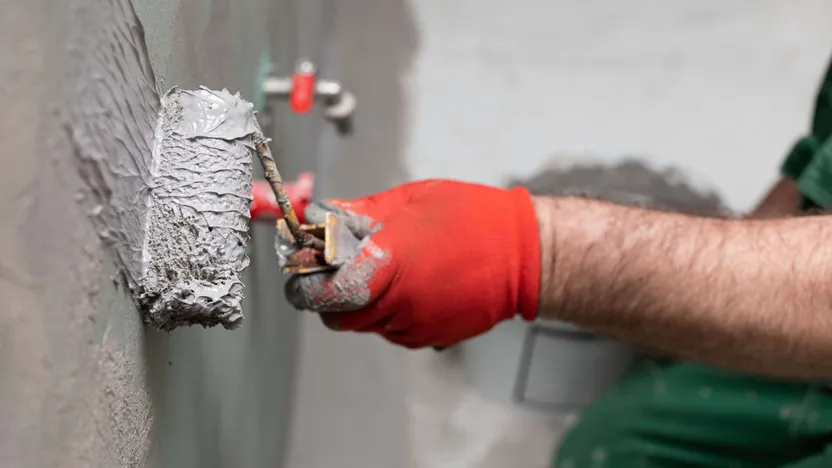
You can now move on to applying the tanking compound to the rest of your surface.
Apply your first coat of compound evenly using a paint roller.
Leave to dry for several hours (according to the manufacturer's instructions) before applying a second coat.
Please note: you will need around 1kg of product per square metre for two coats.
Tiling a bathroom after tanking
You should be able to tile your wet area around 12 hours after applying a tanking compound. Tile the surface as you would usually by applying tile adhesive first, grouting and cleaning up afterwards.
Please note: for maximum protection, use a water-resistant grout.
How to tank a wet area
Required skills
You will have to be able to use a paint brush and roller, and be prepared to follow application instructions. If you are tiling the wall yourself, you will need to use tiling tools (such as a tile cutter, mallet, etc.) and be able to take accurate measurements.
Time required
Around half a day for two coats of tanking compound in a bathroom.
Number of people required
1 person
Tools and equipment
Wide paint brush
Tanking primer, tape and compound
Decorating knife to smooth down tape
Safety and workwear
Please note: this is a non-exhaustive list; be sure to match your personal protective equipment to the job at hand.
Floor primer
More information
Tile spacers
You may be also interested in these guides
Guide written by:
Kate, Flooring Expert, Swansea
Flooring is my life. I love what I do, and I've been doing it for as long as I can remember. So, I'm not bragging when I tell you I know all there is to know about every flooring product. From laminate, parquet and linoleum to PVC, carpeting and tiling, my workdays are spent learning about manufacturing processes, composition, performance, laying techniques and maintenance methods. I've certainly seen my share of mistakes made on construction sites because of what was essentially a lack of information or understanding of the product. Flooring elements are constantly evolving and being improved upon - even us pros can find it hard to keep up! Some of us in the industry use language that is overly technical or loaded with jargon you'd have to be an expert to understand. What's more, flooring salespeople are often so focused on closing the sale that they don't take the time to explain the products in any detail. That's why I want to pass on my knowledge in a way that's clear and accessible, and maybe a bit fun too. Because flooring shouldn't be a chore!
'/%3E%3C/svg%3E)